This article was co-authored by wikiHow staff writer, Rain Kengly. Rain Kengly is a wikiHow Technology Writer. As a storytelling enthusiast with a penchant for technology, they hope to create long-lasting connections with readers from all around the globe. Rain graduated from San Francisco State University with a BA in Cinema.
The wikiHow Tech Team also followed the article's instructions and verified that they work.
This article has been viewed 265,256 times.
Learn more...
Do you want to turn off auto updates on your Windows 10 computer? While there is no way to permanently disable automatic updates, you can delay them indefinitely by using the Services program or by setting your Wi-Fi as a metered connection. You can also disable automatic updates for the apps and drivers on your computer. Be advised that stopping Windows updates will make your system more vulnerable to viruses and malware. This wikiHow will show you how to turn off automatic updates on your Windows 10 computer.
Things You Should Know
- Open "Start" and enter "Services". Click "Services" → "Windows Services" → "Manual" → select "Disabled" → "Apply" → "OK".
- Open "Settings" → "Network & Internet" → "Wi-Fi" → click your network → toggle on "Set as metered connection".
- Disabling Windows 10 updates will increase your risk for viruses and malware.
Steps
Disabling the Update Service
-
1Press the Windows key on your keyboard. This opens the Start menu and activates the search bar.
- Understand the limitations of this method. While disabling the automatic update service will temporarily halt any Windows 10 cumulative updates, the service will re-enable itself after a certain amount of time.[1]
-
2Type services, and click Services in the search results. Doing so will open the Services window.
- You can also press the Windows key + R to open the Run window. Type services.msc and press Enter.
Advertisement -
3Scroll down and double-click Windows Update. Doing so opens the Windows Update Properties window.
-
4Click the "Startup type" menu and select Disabled. It's in the middle of the window. Selecting Disabled will prevent the Windows Update service from automatically starting itself for the time being.
- If you don't see this option, first make sure that you're on the right tab by clicking General at the top of the Properties window.
-
5Click the Stop button. You'll find this option near the bottom of the window. Clicking it prompts the Windows Update service to stop running.
-
6Click Apply, then click OK. Both options are at the bottom of the window. Doing so will apply your settings and close the Properties window. The Windows Update service should now be disabled.
-
7Check the update service periodically. Any time you restart your computer or go more than two days without shutting down, open Services and check the "Windows Update" status to ensure that it's still disabled. While the Windows Update service shouldn't turn itself back on often, it will occasionally do so.
- If you see "Disabled" to the right of the "Windows Update" heading, Windows Update is still disabled.
- If you see anything other than "Disabled" to the right of the "Windows Update" heading, disable the Windows Update again.


Using a Metered Connection
-
1Open your Windows Settings . You'll find this gear icon in the Start menu, which is typically at the bottom-left corner of the screen. Click the gear in the lower-left side of the Start menu opens your Settings.
- This method won't work for Ethernet connections. You can only disable automatic updates by using this method on a Wi-Fi connection.
-
2
-
3Click the Wi-Fi tab. You'll find this option in the upper-left side of the window.
-
4Click your current connection's name. It's near the top of the page. Doing so will open the Wi-Fi connection's settings page.
-
5Scroll down to "Set as metered connection" and turn the feature On . This sets your connection to metered, which will prevent Windows from downloading updates over your currently connected network.
- If this switch is colored and has "On" next to it, your Wi-Fi is already set up as a metered connection.


Using Group Policy Editor
-
1Make sure that you're using the right version of Windows. You'll need a pre-Anniversary edition of Windows 10 Pro or an equivalent. You can't use this method if you're using Windows 10 Home edition.
- The Windows 10 Education and Enterprise editions also include the Group Policy Editor.
- You can check your version of Windows by typing system into Start, clicking System Information near the top of the menu, and looking for "Microsoft Windows 10 Professional" to the right of the "OS Name" heading.
- The Windows Anniversary update removed the option to turn off automatic updates from the Group Policy Editor, so this method will not work if you've been keeping Windows 10 up to date.
-
2Press ⊞ Win+R. Pressing these two keys at the same time opens the Run dialog window. You can also get here by typing run into the Search bar.
-
3Type gpedit.msc into the Run window and click OK. The Group Policy Editor window will open.
-
4
-
5Click Configure Automatic Updates. It's an item in the main Group Policy Editor window. Doing so selects this item.
-
6Open the "Configure Automatic Updates" properties window. Right-click the selected Configure Automatic Updates item, then click Edit in the resulting drop-down menu.
-
7Check the "Enabled" box. It's in the upper-left side of the window.
-
8Click the "Configure automatic updating" drop-down menu. This option is on the left side of the window.
-
9Click 2 - Notify for download and notify for install. It's in the drop-down menu. This option ensures that you'll be asked before updates are installed, allowing you to decline the updates.
-
10Click Apply, then click OK. Doing so saves your changes.
-
11Apply your changes. To do so:
- Open Start
- Open Settings
- Click Update & Security
- Click Windows Update
- Click Check for updates
- Wait for Windows to identify available updates (Windows will not install these updates).
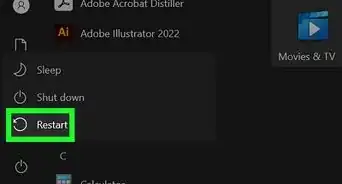
- When finished, restart your computer. Once your computer finishes restarting, your update preferences will be saved.
- You'll still be able to manually allow updates as they become available.


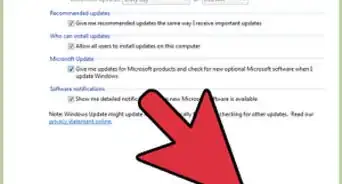
Disabling App Updates


Community Q&A
-
QuestionWhat do I do if the Windows Update Service keeps turning itself back on when I disable it?
 Community AnswerWhen you are disabling the Microsoft Update Service, on tabs you'll see "recovery" is set to "one" in "one minute" and "at restart." change that to "9999," "day" and no restart. This will prevent it from restarting the service automatically, unless you restart it manually.
 -
QuestionIf updates are disabled, will my PC still boot?
 Community AnswerYes. Updates simply keep the system more up-to-date and secure.
 -
QuestionWhy does Windows need updates?
 Bat 🦇Top AnswererThere are different types of updates. Security updates help fix any vulnerabilities in Windows so that malware cannot infect your system. Feature updates add new features and interface changes, and are usually delivered a few times a year. Bug fixes fix any software errors and glitches that make it work improperly. These updates can either be delivered alone or bundled with each other in a Windows update.
Warnings
- Disabling Windows Updates makes your system vulnerable to malware. It is strongly recommended that you do not disable updates in Windows.⧼thumbs_response⧽


-Step-17.webp)

References
About This Article

1. Type "services" into the Windows search bar.
2. Click Services.
3. Double-click Windows Update.
4. Select Disabled from the "Startup type" menu.
5. Click Stop.
6. Click Ok.
7. Click Ok.