This article was co-authored by Ryaan Tuttle. Ryaan Tuttle is a Home Improvement Specialist and the CEO of Best Handyman, Inc. in Boston, Massachusetts. With over 17 years of experience, he specializes in building home service businesses, focusing on creating scalable and efficient brands. With the help of his global team, the companies have achieved over 10+ million in sales and received recognition through magazine features, and enjoy partnerships with wikiHow and Jobber field service software. Boston Magazine and LocalBest.com have named Best Handyman Boston the Best Handyman in Boston. Ryaan holds Construction Supervisor and Home Improvement Contractor Licenses.
There are 11 references cited in this article, which can be found at the bottom of the page.
This article has been viewed 42,252 times.
An unused basement is a huge wasted space! If you have unfinished basement walls but want to use the room for a living area, you can improve the aesthetic by finishing the walls. To finish basement walls, you'll need to prepare the walls first, install insulation, apply a wall frame, and install drywall before you can decorate them. Luckily, it's a lot easier than it sounds as long as you follow the right steps and use the right tools.
Things You Should Know
- Take care of any moisture issues and fill in gaps with hydraulic cement before you close up the walls to avoid future problems.
- Apply sealant to your walls before purchasing and installing your insulation.
- Build out the frame of your wall using wood boards and then hang your drywall before patching and painting or hanging wallpaper.
Steps
Preparing Your Walls
-
1Fix moisture problems in your basement before finishing your walls. Moisture can be created by leaky pipes, faulty windows, rainwater, or built-up condensation. Check your basement for moisture after it rains. Feel the walls and make sure they aren't wet. If you notice water pooling on the floor or trickling out of the walls, you have moisture problems. Call a contractor to fix the moisture issues before finishing the walls.[1]
- A contractor may have to do some exterior drain tiling, exterior waterproofing, or pipe repairs if water is leaking into your basement.
- It will be harder to fix problems if you finish your walls before repairing the source of the moisture problems.
- Keep an eye out for any pooling water around your home and see that your gutters are functioning properly and not draining near the basement. Finding a way to allow water to drain away from your home will help you keep your basement dry.
- If your basement has window wells, cover them and caulk the windows with clear silicone.
-
2Purchase hydraulic cement if you have holes in your walls. Some unfinished basements may have holes or divots in the walls. Hydraulic cement is a fine grain material that can effectively fill in the holes in your walls. Buy a 50-pound (23 kg) bag of cement. If there are no holes or divots in your walls, you can skip the next couple of steps and go straight to applying an interior sealer.[2]Advertisement
-
3Mix the powder cement with water according to the instructions. Read the instructions on the back of the cement so that you know what ratio of water to cement you need. Pour the cement into a bucket, add the appropriate amount of water and mix it together with a wooden stick or trowel. Continue mixing until the cement is a slushy consistency.[3]
-
4Spray the wall with water. Use a spray bottle to apply a mist of water over the holes in the wall. This will prepare the holes for the cement.
-
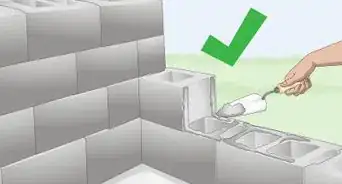
5Spread the cement over the holes in the walls. Use a trowel to scoop up some of the cement and spread it into the holes in your walls. Fill the holes, then use the trowel to scrape the cement and flatten it out so that it runs flush with the wall. Repeat this process on all the holes in your walls.[4]
-
6Let the cement dry overnight. Feel the surface of the cement the next day to make sure that it's dry. Once the cement has hardened, you can move onto the next step.
-
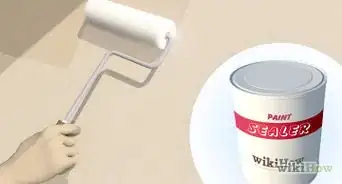
7Apply an interior masonry sealer to the walls. Purchase an interior waterproof sealer online or at a hardware store. This will come in a paint can and can be applied to the walls with a paint roller. Saturate the roller with the sealer and go in an up and down motion over the walls until they are completely coated in the sealer.[5]
- Open the windows and wear a facemask or respirator so that you don't inhale the fumes from the sealer.
-
8Let the sealer dry for 2-4 hours. Come back to it and feel over the surface of the walls with your hands. If the wall feels moist or tacky, let it dry longer.
-
9Before adding walls, make sure the basement is dry. If you notice any problems with humidity or a musty smell, take the time to let the basement dry before adding walls. You may need to buy or rent a dehumidifier and let it run for a few days to completely dry it out.


Installing Basement Wall Insulation
-
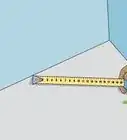
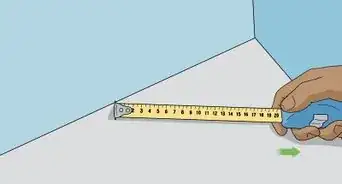
1Measure your walls. Use a tape measure to measure the length and height of your walls. Write these measurements down on a piece of paper.[6]
-
2Purchase enough extruded polystyrene insulation to cover your walls. Buy 3⁄4-inch (1.9 cm) thick extruded polystyrene insulation online or at a hardware or home improvement store. This insulation will usually come in pink or yellow panels and is made to insulate basements. Use the measurements you took for your basement walls and get enough material to cover them all.[7]
- It's a good idea to get 2-3 extra panels of the material in case you make a mistake.
-
3Measure and cut your insulation to fit around obstructions. Place the insulation next to obstructions in your wall and make a mark next to the areas that you'll need to cut out. Obstructions could include the space around windows, pipes, or power outlets. Cut holes in the insulation with a razor blade or knife so that the insulation fits around the obstructions.[8]
- If your insulation is longer than the height of your basement, you'll have to cut the top of the insulation so that it fits.
- If your insulation isn't long enough, you may need to cut out extra pieces of insulation to fill in the holes.
-
4Apply a foam adhesive to the back of your insulation. Read the instructions and packaging to make sure that the adhesive you buy sticks to foam insulation. Apply the adhesive in a back and forth motion to the entire back of your insulation.[9]
-
5Press the sheets of insulation onto the walls. Start on one end of your wall and carefully line the insulation up to the wall. Press the insulation onto the wall and hold it in place for 2 minutes or until it sticks to the wall. Work your way down the wall and continue to glue the insulation sheets side-by-side, until all of your walls are covered in insulation.[10]
-
6Use insulation tape to cover the cracks in between the insulation. Use a thick insulation tape and run it down the seams where your insulation panels meet. This will help better insulate your basement and will help keep the insulation sheets together as you frame the wall.[11]
- Caulking the perimeter of the basement where the wall meets the floor can be helpful.


Building a Wall Frame
-
1Measure and mark 3 inches (7.6 cm) from the top and bottom of the wall. Use a tape measure and draw 2 marks on the left and right ends of the drywall. You should have a total of 4 marks on each wall. These lines will dictate where you will place your wooden planks for the frame.
- A completed wall frame looks like a grid made of wooden boards.
-
2Draw a straight line in between the marks. Hold a level against your insulation and draw a straight line across the entire length of the wall, horizontally. Slide the level along the side of the wall and draw the line gradually until you've connected the 2 marks on the top of your wall. Repeat this process on the bottom of your walls so that you have a total of 2 horizontal lines running across your drywall.[12]
-
3Make another line in the center of the top and bottom marks. Measure the distance in between the top and bottom lines that you drew. Divide that number by 2 to get the exact center of the lines. Measure down from the top line and draw a straight horizontal line in between the bottom and top lines on your wall.[13]
- For instance, if your bottom and top mark are 8 feet (2.4 m) away from each other, you'd measure 4 feet (1.2 m) down from the top mark and draw a line across your wall.
-
4Draw 2 more lines in between the remaining lines. Measure the distance in between the center line and top line. Divide this number by 2 and draw a line in the exact middle of the lines. Repeat the process between the middle line and bottom line. Your wall should now have a total of 5 horizontal lines running across the insulation.[14]
-
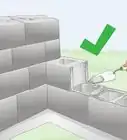
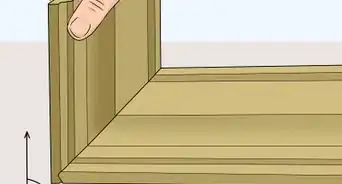
5Hold a 1x3-inch (2.5 cm × 7.6 cm) board on top of the bottom line. Line the bottom edge of a 1x3-inch (2.5 cm × 7.6 cm) board with the top of the bottom-most line you drew and have someone hold it in place.[15]
- If you are using boards that are shorter than the width of your walls, you'll have to line up multiple boards so that they span across the entire width of the wall.
-
6Drill 5-inch (13 cm) deep pilot holes into the boards. The first pilot hole should go into the end of the board. Use a 3⁄16-inch (0.48 cm) masonry bit and a hammer drill to create a hole through the center of the board, insulation, and concrete wall. Then, drill an additional pilot hole every 16–20 inches (41–51 cm) apart down the length of the board. This will set up your board so that you can secure it to the wall.[16]
-
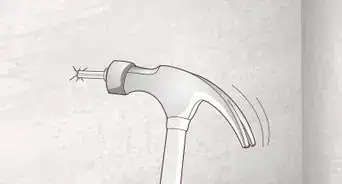
7Hammer 4-inch (10 cm) long spring spikes into the pilot holes. Spring spikes don't have a sharp tip but do have a bent end which anchors them into concrete pilot holes. Tap on the end of the spikes so they go into the holes. Continue to hammer the spring spikes into the board until it's completely secured to the wall.
- You might also consider using tapcons (blue concrete screws often used to attach wood to concrete). Tapcons will also need a pilot hole.
-
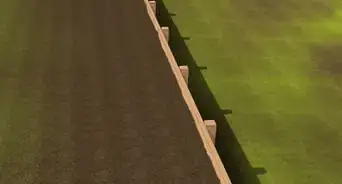
8Attach boards to the rest of your lines. Repeat the process that you used for the bottom frame board with the rest of the lines that you drew. Once you're done attaching the boards, you should have five vertical boards running across your wall.
- There should be empty spaces in between each of the boards.
- If there are obstructions, you may have to break your vertical framing boards up to accommodate them.
- Use a saw to cut your boards so that they fit around obstructions on your wall.
-
9Draw a line in the center of your wall, vertically. Now it's time to set your vertical framing boards. Measure the length of the wall and divide it by 2. Now measure from one end of the wall to the exact center of the wall and draw a vertical line. This is where your first vertical framing board will go.
-
10Screw a vertical board in the center of the wall. Use 1x3-inch (2.5 cm × 7.6 cm) boards to construct the vertical section of your wall frame. Use 1.625-inch (4.13 cm) drywall screws to screw the vertical board perpendicularly over your horizontal framing boards.[17]
-
11Screw boards 16 inches (41 cm) apart from the centerboard. Repeat the process and finish framing the vertical portion of your wall frame. Once you're done, you'll have boards running across the length and height of your walls.[18]
-
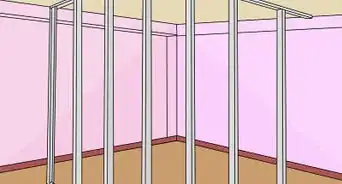
12Frame all the walls in your basement. Frame the rest of the walls by repeating the process that you used earlier. Once you're done framing all of the walls, you can apply drywall to your basement walls.
- If you are adding partition walls in the basement, standard 2x4 walls are fine.


Applying Drywall
-
1Measure and mark your drywall to fit on the wall. Purchase enough drywall online or at a hardware store so that you can cover all of your walls. Once you get the drywall, cut it out so that it matches the height of your walls. You'll also have to measure and mark the drywall to cut out holes to fit around obstructions on the walls.[19]
- Drywall is available in varying types and thicknesses. Choose a moisture-resistant drywall for your basement.[20] For most basements, 1/2 inch greenboard is a good choice and should not be hard to find.
-
2Cut out the drywall so it fits around obstructions. Since drywall is more solid than insulation, you'll want to make your cuts straight lines and draw boxes around obstructions. Measure the area to compensate for obstructions and mark it with a pencil. Once the drywall is marked, use a razor blade or knife to cut along the marks.[21]
-
3Apply glue to your wall studs. Apply drywall adhesive to the vertical studs on your frame. Make sure to get good coverage from the top to the bottom of the wood board.[22]
-
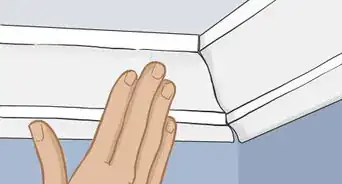
4Press the drywall to the wall frame. Line the drywall up to the wall and press it onto the wall frame. Then, hold it in place for a minute or 2 and let it set.
-
5Screw the drywall into the wall frame. Look at the wood studs next to the drywall. Line the screwdriver up to the wall frame studs and use drywall screws to secure the drywall to the wood. Put screws on the left and right side of the drywall. Then, put screws spaced 16 inches (41 cm) apart on the top and bottom wall frame studs.[23]
- Check that your screws are the right length. They will need to go through the drywall and into the wood below. If they are too long, they may hit concrete behind the wood frame and not go in all the way.
-
6Apply drywall to the rest of the walls. Repeat the process and cover all of the wall frames with drywall. This will act as the finished walls of your basement.[24]
-
7Apply wallpaper to the walls. Purchase wallpaper and adhesive and apply sheets of it over the drywall to give your basement a finished look. Select designs and colors that match the aesthetic you want to achieve.
-
8Paint the walls if you don't want to wallpaper. Select a color you like and use a brush or roller to apply the paint over the surface of your walls. You'll probably want to spackle over the screw holes before you start painting or they may be visible on your walls after you're done painting.


Expert Q&A
-
QuestionHow can I cover my concrete basement walls?
 Ryaan TuttleRyaan Tuttle is a Home Improvement Specialist and the CEO of Best Handyman, Inc. in Boston, Massachusetts. With over 17 years of experience, he specializes in building home service businesses, focusing on creating scalable and efficient brands. With the help of his global team, the companies have achieved over 10+ million in sales and received recognition through magazine features, and enjoy partnerships with wikiHow and Jobber field service software. Boston Magazine and LocalBest.com have named Best Handyman Boston the Best Handyman in Boston. Ryaan holds Construction Supervisor and Home Improvement Contractor Licenses.
Home Improvement SpecialistTry picking out some moisture-resistant drywall to cover your basement walls.
Things You'll Need
Preparing Your Walls
- 50-pound (23 kg) bag of hydraulic cement
- Trowel
- Spray bottle
- Can of masonry waterproof sealer
- Paint roller
Basement Wall Insulation
- Tape measure
- 3⁄4-inch (1.9 cm) thick extruded polystyrene insulation
- Razor blade or knife
- Foam adhesive
- Insulation tape
Building a Wall Frame
- Pencil or pen
- Level
- Tape measure
- 1x3-inch (2.5 cm × 7.6 cm) by 8-feet (2.4 m) boards
- 4-inch (10 cm) long spring spikes
- Electric screwdriver
- Glue or adhesive
- 4-inch (10 cm) drywall screws
Drywall
- Drywall sheets
- Razor blade or knife
- Adhesive
- Screwdriver
- 1.625-inch (4.13 cm) drywall screws
- Paint (optional)
- Wallpaper (optional)


References
- ↑ https://www.extension.umn.edu/environment/housing-technology/moisture-management/moisture-in-basements-causes-and-solutions/
- ↑ https://www.familyhandyman.com/basement/how-to-finish-a-foundation-wall/view-all/
- ↑ https://www.familyhandyman.com/basement/how-to-finish-a-foundation-wall/view-all/
- ↑ https://www.thisoldhouse.com/how-to/how-to-frame-out-basement-walls
- ↑ https://www.familyhandyman.com/basement/how-to-finish-a-foundation-wall/view-all/
- ↑ https://www.familyhandyman.com/basement/how-to-finish-a-basement-framing-and-insulating/view-all/
- ↑ https://www.familyhandyman.com/basement/how-to-finish-a-basement-framing-and-insulating/view-all/
- ↑ https://www.youtube.com/watch?v=BoXGHtOCBDw&feature=youtu.be&t=10s
- ↑ https://www.familyhandyman.com/basement/how-to-finish-a-basement-framing-and-insulating/view-all/
- ↑ https://www.familyhandyman.com/basement/how-to-finish-a-basement-framing-and-insulating/view-all/
- ↑ https://www.youtube.com/watch?v=BoXGHtOCBDw&feature=youtu.be&t=1m34s
- ↑ https://www.thisoldhouse.com/how-to/how-to-frame-out-basement-walls
- ↑ https://www.thisoldhouse.com/how-to/how-to-frame-out-basement-walls
- ↑ https://www.thisoldhouse.com/how-to/how-to-frame-out-basement-walls
- ↑ https://www.thisoldhouse.com/how-to/how-to-frame-out-basement-walls
- ↑ https://www.thisoldhouse.com/how-to/how-to-frame-out-basement-walls
- ↑ https://www.thisoldhouse.com/how-to/how-to-frame-out-basement-walls
- ↑ https://www.thisoldhouse.com/how-to/how-to-frame-out-basement-walls
- ↑ https://extremehowto.com/drywall-tips-from-the-pros/
- ↑ Ryaan Tuttle. Home Improvement Specialist. Expert Interview. 18 June 2021.
- ↑ https://extremehowto.com/drywall-tips-from-the-pros/
- ↑ https://youtu.be/Dn25J1jW3k0?t=56s
- ↑ https://youtu.be/Dn25J1jW3k0?t=3m1s
- ↑ https://www.youtube.com/watch?v=Dn25J1jW3k0&feature=youtu.be&t=5m4s
About This Article