This article was co-authored by Deanna Ranlett. Deanna Ranlett is a Pottery and Ceramics Professional and the Owner of Mudfire Inc. in Decatur, Georgia. With more than 22 years of experience in the ceramics industry and eight years of experience owning a studio, they specialize in glaze formulation, firing ceramic and pottery pieces, general clay projects, and screen printing for ceramics. Deanna holds a BFA in Ceramic Arts and Ceramics from Georgia State University.
This article has been viewed 78,985 times.
True Japanese Raku refers to pottery made by a specific family in Japan for pottery that is specifically made for the Japanese Tea Ceremony. This article will discuss Western-style Raku, developed by Paul Soldner in the 1960s.
Steps
-
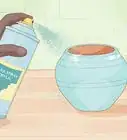
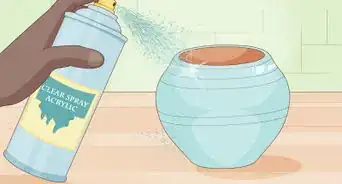
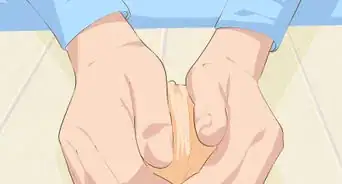
1First you need to glaze your bisque ware using RAKU Glaze. These glazes have a low melting point so they will mature at cone 06 in about an hour. check out http://members.chello.nl/~c.sleddens/index_bestanden/dewitt-raku-glazuren.htm for a huge list of glaze recipes. ***note: many of these glazes work better of applied in a thin layer***
- It is better to wax the bottom if you dip and glaze the objects to prevent the glaze from getting onto the part that touches the kiln shelf.
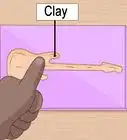
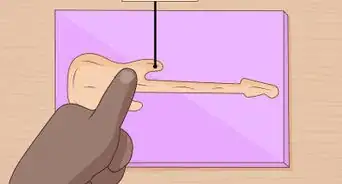
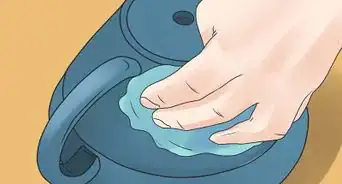
- If you brush and glaze, you need not wax it because you can control where exactly you are putting the glaze.
- You can use a soft bristle brush and follow the manufacturer's directions for the product you are using. Let one coat dry before applying the next one.
-
2Next, load the kiln and bring the temperature up to 1850 degrees. This should take about an hour. If you don't know how to fire a kiln, you should have an experienced potter help you.[1]
- If you are using pyrometric cones or a pyrometer, skip this step.~~ Check on the ware every 15 minutes or so after you've been firing for about 45 minutes. You're looking for bubbling in the glaze. Once it starts bubbling, you're about 15 minutes away from "Raku Time!"
Advertisement -
3You know your ware is ready to pull when it is glowing red and the glaze surface appears shiny and liquid. Matt glazes are more difficult to read, so fall back on your cones/pyrometer reading if you need to.
-
4While you're waiting for the glaze to mature, you need to prepare your reduction chambers.
-
5Shred newspaper and fill some small metal cans. The cans should only be a little bigger than the pieces you want to put in them, the smaller the better to create a good reduction and lots of pretty color!
-
6Once the pieces are ready, you're going to need 3 people to do the Raku. (1)One to open the door, (2)one to pull the pieces out with tongs and place them in the cans, and (3)one to close the can lids. Each person should have a set of Raku gloves and appropriate eye protection. You may also want to wear dust masks as it's gonna get smoky!
-
7Person 1 opens the door while Person 2 takes the pieces out one at a time. The door should be closed between pulls to retain heat. Place the pieces as quickly as possible into the waiting cans. Person 3 should wait for the newspaper to catch fire, then fit the lids on securely to smother the fire and smoke the pieces. **Note, always try to turn bowls upside down so the inside gets better color**
-
8Wait a few minutes for the fires to smother and smoke the pieces. Good cans shouldn't release too much smoke when covered, so be careful when you open them up. Keep your face away from the openings as you take off the lids. Also watch out for back drafts.
-
9THESE PIECES ARE STILL VERY VERY HOT! Any remaining newspaper will begin to burn again once air is introduced back into the can. You can pour some water into the cans to put them out and cool the ware.
-
10Take the pieces out with tongs and douse them in the bucket of water. **DO NOT DO THIS TO BOTTLES*** Bottles will explode if you douse them, allow bottles to cool naturally.
-
11Done.


Community Q&A
-
QuestionCan sawdust be used?
 Community AnswerYes, but shredded paper can give you a cleaner surface. Sawdust can stick in the glaze, but gives nice effects as well.
 -
QuestionShould this be done indoors?Community AnswerFor safety, you should do it outside, wear a mask, gloves and perhaps safety goggles.
Warnings
- People sensitive to smoke should probably not Raku.⧼thumbs_response⧽
- Only use real ceramics gloves. These gloves are rated to 1700 degrees. Your lobster oven mitt is not gonna cut it.⧼thumbs_response⧽
- This is very dangerous, please only Raku under the supervision of an experienced Potter.⧼thumbs_response⧽
- Pieces come out of the cans at well over 1000 degrees, even though they look cool. Always use gloves and tongs to take pieces out of the cans.[2]⧼thumbs_response⧽
Things You'll Need
- A kiln
- Bisqueware
- Raku Tongs and Gloves
- Raku Glaze
- Dust Masks
- Small metal cans, with lids (for reduction chamber)
- Newspaper
- Bucket of water (for safety and to cool ware)
- Plenty of space free from anything flammable, including overhead tree branches


References
About This Article