This article was co-authored by Stephen Cardone. Stephen Cardone is the COO of NY Headshots, a New York City-based studio that specializes in shooting and producing headshots for individuals and businesses. Stephen has over four years of professional photography experience and over six years of documentary filmmaking experience. Stephen also works extensively as a photographer at NY Headshots. His work includes events, environmental photography, as well as headshots for actors, models, and corporate. He holds a BA in Non-fiction Writing from The New School.
There are 15 references cited in this article, which can be found at the bottom of the page.
This article has been viewed 57,706 times.
This wikiHow will teach you how to focus your camera whether you're using a DSLR or a smartphone. Getting the focus right in a photograph can make or break the shot, and the good news is it's actually really simple to do once you know how the different features and settings work. Below we've covered everything you need to know so that you can get out there and capture the perfect shot.
Steps
Using Manual Focus on a DSLR
-
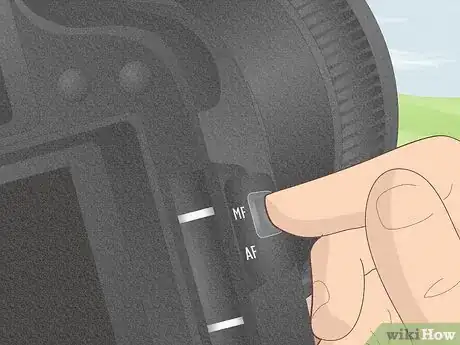
1Flip the switch on your lens to “MF.” Check the side of your DSLR (digital single-lens reflex) or SLR lens for a small switch labeled “AF - MF” or “A - M.” If the switch is set to “AF,” or automatic focus,” flip it to “MF,” or manual focus.[1]
- While you're getting used to shooting in manual, try photographing still subjects, like flowers or other objects. It will be a lot harder to focus manually if you're shooting moving objects or people.[2]
- When set to automatic focus, depressing the shutter button halfway automatically adjusts the focus. In manual mode, you’ll rotate the focus ring on the lens.
- Be sure to switch your camera to manual focus before twisting the focus ring. Adjusting the focusing ring while the camera is in automatic focus may damage the lens.
-
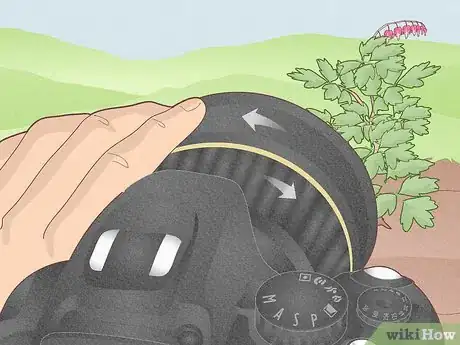
2Twist the focus ring until your subject is sharp. You’ll find 2 rings around a DSLR zoom lens. The one closest to the camera’s body controls zoom, and the one toward the end of the lens controls focus. Peer into the viewfinder, twist the focus ring, and watch different parts of the shot come into focus.[3]
- Play with the focus function as you observe how the shot changes to get a feel for manual adjustment.
- Look for 2 scales of numbers labeled “ft” and “m” around the focus ring. The number displayed through the viewing window or aligned with a mark tells you where the lens is focusing. If you see 1.25 on the viewer or aligned with an arrow, objects 1.25 ft (0.38 m) away from the lens are in focus.
- When you're focusing on your subject, try to make sure the focus is on their eyes, so their eyes appear nice and clear. Then, you can create different looks by adjusting the aperture.[4]
- If you use a wide aperture, you can create a soft focus in the background. That way, the subject will still be in focus, but the background behind them will be blurred.[5]
Advertisement -
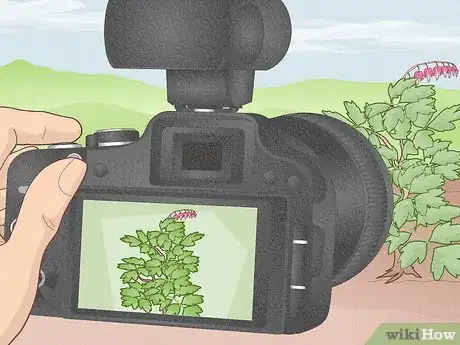
3Use live view mode to fine tune the focus. The viewfinder, or the small window that you look through while taking a photograph, doesn’t always offer the best representation of focus. If your camera has an LCD screen, switch to live view mode to do a final focus check. Watch your shot on the LCD screen, and twist the focus ring until your subject becomes sharp.[6]
- Most photographers prefer to look through the viewfinder when they take photographs. Holding the camera to your face braces it and minimizes movement. You can still take the photograph using the viewfinder, but use the LCD screen to adjust your focus.
- Note that once you’ve set the focus, you must keep the camera that distance away from the subject. The subject will become unfocused if it moves outside the range noted on the focus ring. For this reason, autofocus is best for moving objects.
-
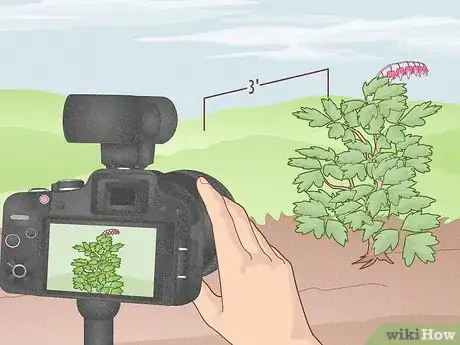
4Measure the distance from a still subject to the lens for perfect focus. Recall that the numbers on the focus ring tell you where the lens is focusing. For perfect focus, set your focus distance, then position your subject exactly that distance from the lens.[7]
- For instance, if you’re taking a portrait, place the camera on a tripod, set your focus to 3 ft (0.91 m), and position the sitter exactly that distance from the camera lens.
- Measuring works well in a studio setting with still objects, but it probably won’t be an option if you’re shooting in the field. When you can’t make an exact measurement, estimate the distance and adjust the focus using the LCD screen.
Adjusting the Depth of Field
-
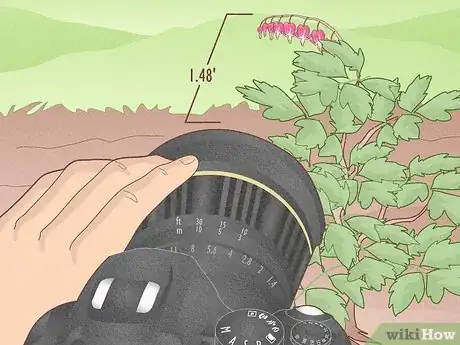
1Check your camera’s minimum focus distance. The minimum focus distance is how far the lens must be from a subject at full zoom. If you want the subject to be in sharp focus with a blurred background, you’ll need to get as close to the object as possible in full zoom. Search online for your camera or lens model number along with the keywords “minimum focus distance.”[8]
- Your DSLR probably came with a basic kit lens, such as an 18-105 mm with a minimum focus distance of 1.48 ft (0.45 m). This means it can’t focus on objects closer than 1.48 ft (0.45 m) at full zoom.
- A good macro lens, which is intended for highly detailed close-ups, can focus on objects 8 in (20 cm) or less from the lens at full zoom.
- Point-and-shoot cameras with optical zoom also have minimum focus distances. If you don’t have a DSLR, you can still manipulate the depth of field to achieve a sharply focused subject with a blurred background.[9]
-
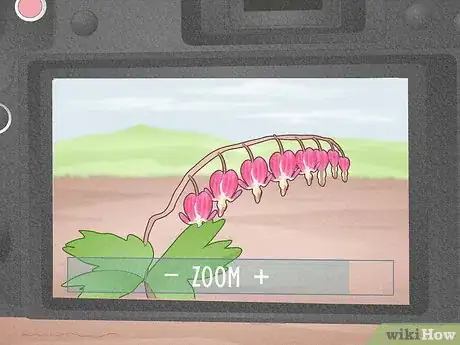
2Zoom in on your subject for a shallow depth of field. With your lens at full zoom, position your subject at the minimum focus distance from the tip of the lens. If your minimum focus distance is 1.48 ft (0.45 m), the subject should be that far away from the lens.[10]
- Depth of field is the amount of the photograph that appears sharp from the foreground to background. When a photograph is taken at a shallow depth of field, an object closer to the lens appears in sharp focus, and the background is blurred.
-
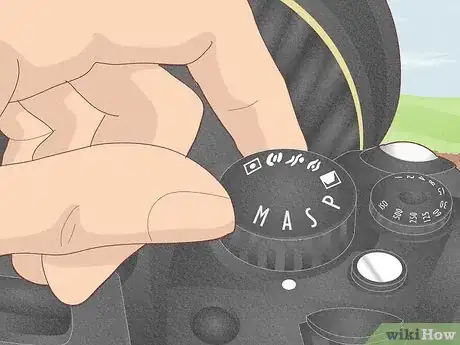
3Use the largest aperture setting to blur the background. The aperture setting, or the f-stop number, controls the amount of light that enters the lens. A smaller f-stop number, such as f2, corresponds with a larger aperture. A larger aperture results in a shallow depth of field, which yields a sharply focused subject and blurred background.[11]
- Look for a dial on the top of your camera. Set it to “A” or “Av,” which denotes aperture priority mode. In this mode, you set the aperture, and the camera automatically sets shutter speed. In “M,” or manual mode, you select both the aperture and shutter speed.
- If you have a point-and-shoot camera, you might be able to manually control the aperture, but not all models offer this feature. If you can’t, you should still be able to achieve a shallow depth of field by zooming all the way in at the minimum focus distance.[12]
-
4Put distance between your subject and the background. The more space there is between the subject and background, the blurrier the background will be. Keep as much distance as possible between the subject you’re focusing on and any objects in the background.[13]
- For instance, photographing a flower at least 10 to 15 ft (3.0 to 4.6 m) in front of background objects will give you more blur than if there are objects 1 ft (0.30 m) behind it.
- This principle also applies to smartphone cameras. To a degree, you can achieve the effects of a shallow depth of field, even though phone cameras don’t have optical zoom.[14]
-
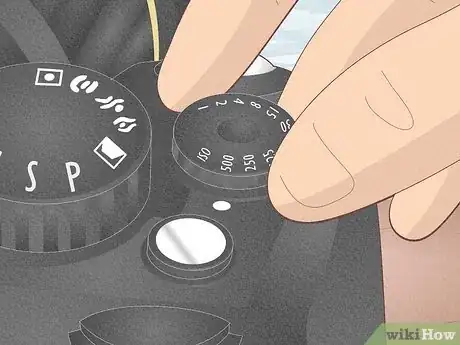
5Adjust the shutter speed and ISO, if necessary. A larger aperture means more light enters the lens. This could produce bright, noisy photographs in outdoor settings or other well-lit locations. To decrease brightness while retaining a large aperture, you’ll need to adjust the shutter speed and ISO settings.[15]
- Go with a faster shutter speed to decrease brightness. If the current setting is 200, this means the shutter speed is 1/200 of a second. Try incrementally faster shutter speeds, such as 1/500 or 1/1000, until you achieve your desired brightness.[16]
- Make sure your ISO is set to 100 or 200. In well-lit conditions, higher ISO settings will produce grainy, noisy photographs.[17]
- The exact methods for setting shutter speed and ISO vary by camera model, so look through your menu options or check your user manual for specific instructions.
Focusing a Smartphone Camera
-
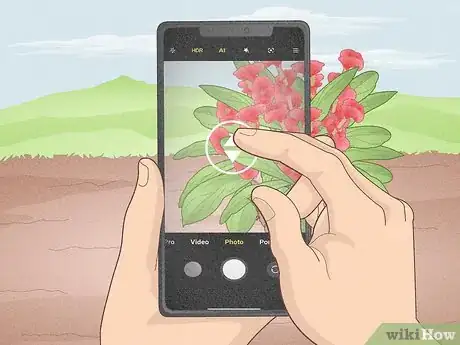
1Tap the screen where you want the camera to focus. To manually focus a smartphone, simply tap on the object as it appears on the screen. You’ll then see a square or rectangle on the object.[18]
- Press and hold the screen to lock the focus on your subject. This means if other objects in the frame change position, your phone will stay focused where you’ve selected.
- Note that the subject you’ve locked focus on needs to stay put, or it’ll become unfocused. Additionally, keep your phone the same distance from the subject after setting the focus. Don’t bring it closer to or farther away from the subject, or you’ll lose focus.
-
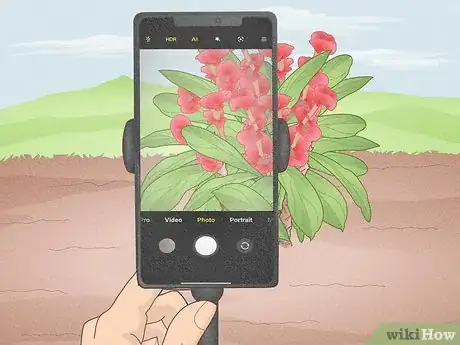
2Keep your phone as still as possible. Unsteady hands are the number 1 reason for blurry cell phone photographs. To guarantee your phone remains still, invest in a tripod designed for smartphones.[19]
- If you don’t have a tripod handy, try bracing the phone on a surface. If you have to hold it in the air, try to keep your arms as close to your body as possible. Hold your breath while taking the photograph, or do your best to slow your breathing.
- Good lighting can also reduce blur due to shaking. In lower light, the shutter speed is slower, which leaves more time for shaking to blur the image.
-
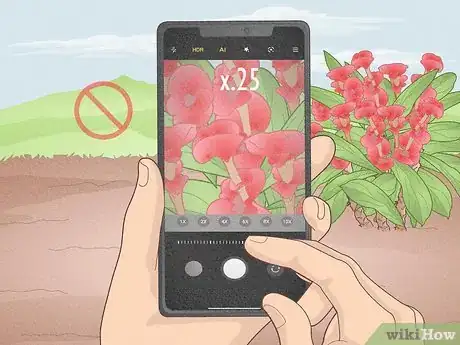
3Avoid using digital zoom. For DSLR and point-and-shoot cameras, optical zoom is when the lens physically moves to enlarge the subject. Cell phone cameras don’t currently have this feature. A smartphone's zoom function simply crops and digitally enlarges the shot, which lowers image quality.[20]
- Instead of using digital zoom, bring the camera’s lens as close to the subject as possible. Keep in mind most smartphone cameras can’t focus on objects less than 3 in (7.6 cm) from the lens.[21]
-
4Use distance to blur the background. As with DSLR and point-and-shoot cameras, you can manipulate a smartphone camera’s depth of field to blur backgrounds. Tap the screen to manually focus on your subject, and put as much space as possible between it and any objects in the background.[22]
- Check your smartphone camera settings for macro or portrait modes. In these modes, you’ll have an easier time achieving a sharply focused subject with a blurred background.
Expert Q&A
-
QuestionHow can I improve my photography skills?
 Victoria SprungVictoria Sprung is a Professional Photographer and the Founder of Sprung Photo, a wedding photography studio based in Chicago, Illinois. She has over 13 years of professional photography experience and has photographed over 550 weddings. She has been chosen for Wedding Wire's "Couple’s Choice" Award eight years in a row and The Knot's "Best of Weddings" award five years in a row. Her work has been featured in People Magazine, Time Out Chicago, Chicago Magazine, the Chicago Reader, Rangefinder, The Chicago Sun-Times, and Pop Sugar.
Professional Photographer Start by photographing still subjects, like flowers. Since they don't move, you can work on your technique. Live subjects can move, so they're harder to photograph.
 -
QuestionWhere should I focus in portrait photography?
 Stephen CardoneStephen Cardone is the COO of NY Headshots, a New York City-based studio that specializes in shooting and producing headshots for individuals and businesses. Stephen has over four years of professional photography experience and over six years of documentary filmmaking experience. Stephen also works extensively as a photographer at NY Headshots. His work includes events, environmental photography, as well as headshots for actors, models, and corporate. He holds a BA in Non-fiction Writing from The New School.
Professional Photographer When taking portraits, focus your camera lens on the person's eyes so they are clear.
 -
QuestionWhat are some effects I can do with the camera focus for headshots?
 Stephen CardoneStephen Cardone is the COO of NY Headshots, a New York City-based studio that specializes in shooting and producing headshots for individuals and businesses. Stephen has over four years of professional photography experience and over six years of documentary filmmaking experience. Stephen also works extensively as a photographer at NY Headshots. His work includes events, environmental photography, as well as headshots for actors, models, and corporate. He holds a BA in Non-fiction Writing from The New School.
Professional Photographer Open the aperture as much as you can or to around 2.8 and focus on the person's eyes. You can also create a more artistic effect by opening the aperture wider—that will blur the background while still leaving the subject in focus.
References
- ↑ https://www.cnet.com/how-to/how-to-use-manual-focus-on-your-dslr-lens/
- ↑ Victoria Sprung. Professional Photographer. Expert Interview. 14 April 2020.
- ↑ https://www.cnet.com/how-to/how-to-use-manual-focus-on-your-dslr-lens/
- ↑ Stephen Cardone. Professional Photographer. Expert Interview. 5 May 2020.
- ↑ Stephen Cardone. Professional Photographer. Expert Interview. 5 May 2020.
- ↑ https://www.photographytalk.com/photography-articles/6974-how-using-live-view-can-improve-your-photos
- ↑ https://www.diyphotography.net/six-tips-to-take-great-manual-focus-pictures/
- ↑ https://www.cnet.com/how-to/how-to-get-blurred-backgrounds-with-a-dslr-kit-lens/
- ↑ https://www.cnet.com/how-to/how-to-get-blurry-backgrounds-with-a-point-and-shoot/
- ↑ https://www.cnet.com/how-to/how-to-get-blurred-backgrounds-with-a-dslr-kit-lens/
- ↑ https://photographylife.com/what-is-aperture-in-photography
- ↑ https://www.cnet.com/how-to/how-to-get-blurry-backgrounds-with-a-point-and-shoot/
- ↑ https://www.cnet.com/how-to/how-to-get-blurred-backgrounds-with-a-dslr-kit-lens/
- ↑ https://www.businessinsider.com/portrait-mode-photos-tips-tricks-google-2017-11#3-dont-stand-too-close-to-the-background-3
- ↑ https://photographylife.com/what-is-aperture-in-photography
- ↑ https://photographylife.com/what-is-shutter-speed-in-photography
- ↑ https://photographylife.com/what-is-iso-in-photography
- ↑ https://www.popsci.com/take-better-smartphone-photos#page-2
- ↑ https://www.popsci.com/take-better-smartphone-photos#page-5
- ↑ https://www.pcmag.com/article2/0,2817,2383739,00.asp
- ↑ https://iphonephotographyschool.com/focus-tips/
- ↑ https://www.businessinsider.com/portrait-mode-photos-tips-tricks-google-2017-11#3-dont-stand-too-close-to-the-background-3
- ↑ https://www.pcmag.com/article2/0,2817,2383739,00.asp
