This article was co-authored by Garrison Hullinger and by wikiHow staff writer, Kyle Hall. Garrison Hullinger is an Interior Designer and the President of Garrison Hullinger Interior Design (GHID). With more than 15 years of experience, he specializes in client-centered design that balances beauty and warmth with comfort and functionality. Garrison and GHID’s work has been featured in numerous publications such as The New York Times, The Wall Street Journal, and Interior Design Magazine. Garrison attended Oklahoma Christian University.
This article has been viewed 13,730 times.
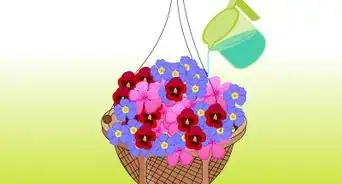
Hanging plants can bring life and color to both indoor and outdoor spaces. Before you hang plants in or around your home, it’s important that you choose the right plants and prepare a basket properly. By planting your plants in a good potting mix with fertilizer and watering them regularly, you can ensure your hanging baskets flourish.
Steps
Choosing the Right Plants
-
1Select sun-loving plants if you’ll be hanging them in direct sunlight. If you’re going to hang your plants outside in the open, or even inside near a sunny window, it’s important that you choose plants that thrive in direct sunlight. Otherwise, your plants might wilt and dry out. Some sun-loving plants you can use are:[1]
- Periwinkles
- Trailing petunias
- Sweet potato vines
- Signet marigolds
-
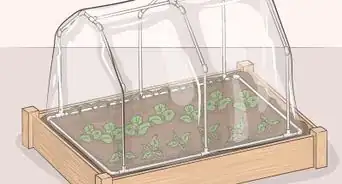
2Go with shade-loving plants if they’ll be sheltered or indoors. Shade-loving plants are the exact opposite of sun lovers—they thrive in shady spots with indirect sunlight. If you’re going to be hanging your plants underneath a shaded porch or inside your home, these plants are the way to go. Plants that do well in shaded areas include:[2]
- Ferns
- Silver bells
- English ivy
- Pansies
Advertisement -
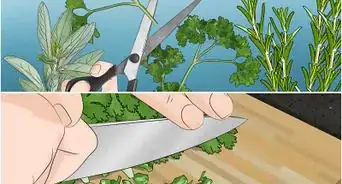
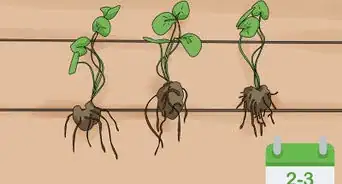
3Choose plants that will thrive in your climate. Some plants do better in warm weather, while others prefer the cold. Using plants that are suited to your climate will help prevent them from wilting and dying.[3]
- Some warm-weather plants you can try are fuschias, petunias, silver falls, and geraniums.
- If you live in a cold climate, try ivy, ornamental sedge, winter violas, and winter heathers.


Putting the Plants in a Basket
-
1Line a hanging basket with coir or moss. The lining of the basket is important—it’s what keeps the soil and plants in place. Without lining, your plants wouldn’t be able to absorb water. Look for premade coir or moss lining at your local gardening center, or you can make your own by piecing bits of moss together from your yard.[4]
- When you’re finished, the lining should cover the entire inside of the basket.
-
2Fill the basket up halfway with a well-draining potting mix. Using a well-draining potting mix will prevent your plants from sitting in water and developing root rot. Look for a potting mix that contains peat moss, vermiculite, and perlite.[5]
-
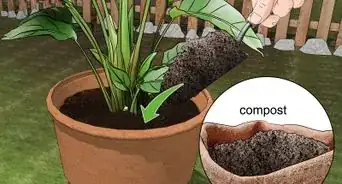
3Mix a slow-release fertilizer into the potting mixture. Fertilizing your plants will help them grow faster and healthier. A slow-release fertilizer will gradually release fertilizer into the soil over the course of weeks or months, depending on the brand you use.[6]
- Look for a 1:2:1 fertilizer that’s low in nitrogen.
- Read the directions that come with the fertilizer so you know how much to use and how frequently you need to reapply it.
-
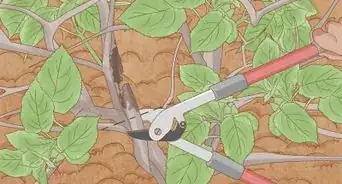
4Start by planting one of your plants in the center of the basket. Any one of your plants can go in the center, although you may want to save your favorites for the outside of the basket since they’ll be more visible. Also, save trailing plants for the outside of the basket so you can easily dangle their vines over the sides.[7]
- To secure the center plant in the basket, use your hands to dig a small hole in the potting mixture and then place the roots of the plant inside the hole.
-
5Position the rest of your plants around the center plant. Now that you have a central plant to work around, you can fill in the rest of the basket with your other plants. Evenly space the plants around the basket. Try to fill in any gaps so one part of the basket doesn’t look emptier than the rest.[8]
-
6Pack down the potting mix and water your plants. Once the potting mix is packed and your plants are secure in the basket, water them until the soil is moist but not soaked. When you're finished, your plants are ready for hanging.[9]


Hanging up the Basket
-
1Drill a pilot hole into the ceiling where you’ll be hanging the basket. A pilot hole is a pre-drilled hole that makes it easier to screw something into a surface. Make the pilot hole with a drill bit that’s slightly smaller than the screw-end of the hook. That way the screw-end of the hook will still have something to grip onto.[10]
- The right size hook to use depends on how heavy your basket is. Weigh your basket and then look for a hook that can support its weight. If the basket is particularly heavy, you may need to use an anchor along with the hook.
- If you do not wish to drill holes in the wall, you might consider using an extendable rod which comes with preinstalled hooks or other suitable hardware. Check the weight restrictions on the packaging and follow the manufacturer's recommendations for installation.
-
2Twist the hook for the hanging basket into the pilot hole. Position the screw-end of the hook inside the pilot hole and keep twisting the hook until the threads are all the way in the ceiling. The hook should feel secure when you pull down on it.[11]
-
3Hang your plant basket from the hook. Take the ring at the end of the chains or ropes on your basket and place it on the hook. Make sure the chains or ropes aren't twisted when you hang it up.[12]
-
4Use a wall mount or shepherd’s hook if there's no nearby ceiling. If you want to hang your plants outside in your garden, you can stake a shepherd’s hook in the ground and hang the basket from the hook at the end. To hang your plants along the outside of your home or inside on a wall, install a wall-mounted hook.
- To mount a wall hook, place the hook against the wall and mark the screw holes with a pencil. Then, drill a pilot hole through each mark. Position the hook on the wall and drill the screws through the holes until the hook is secure.


Things You’ll Need
- Plants
- Hanging basket
- Coir or moss lining
- Well-draining potting mix
- Slow-release fertilizer
- Drill
- Hook


-Oven-Step-15.webp)

References
- ↑ https://hortnews.extension.iastate.edu/2009/6-3/hangingbaskets.html
- ↑ https://hortnews.extension.iastate.edu/2009/6-3/hangingbaskets.html
- ↑ https://www.rhs.org.uk/advice/profile?PID=139
- ↑ https://www.rhs.org.uk/advice/profile?PID=139
- ↑ https://hortnews.extension.iastate.edu/2009/6-3/hangingbaskets.html
- ↑ https://hortnews.extension.iastate.edu/2009/6-3/hangingbaskets.html
- ↑ https://www.rhs.org.uk/advice/profile?PID=139
- ↑ https://www.youtube.com/watch?v=Tw8ix3Nh5jY&feature=youtu.be&t=235
- ↑ https://www.rhs.org.uk/advice/profile?PID=139
About This Article