X
wikiHow is a “wiki,” similar to Wikipedia, which means that many of our articles are co-written by multiple authors. To create this article, volunteer authors worked to edit and improve it over time.
This article has been viewed 81,840 times.
Learn more...
Windows Movie Maker is a simple pre-installed video editor. You can easily speed up or slow down video clips for effect, although the effect is limited to doubling the speed. You can even split and splice video clips, so that you can speed up certain parts of a video but leave others as they were filmed. Read on to learn how to increase the speed of videos on Windows Movie Maker!
Steps
Method 1
Method 1 of 2:
Windows Live Movie Maker
-
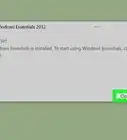
1Open your video in Windows Live Movie Maker. Import the video file into the program, then drag the clip into the timeline. If you only want to speed up a specific section of the video, make sure to Split the video at the beginning and end of the "sub-clip" to create a separately-adjustable clip.
-
2Click the "Video Tools Edit" tab. Find this tab at the far-right end of the navigation bar along the top of the window: to the right of Home, Animations, Visual Effects, Project, and View.Advertisement
-
3Open the "Speed:" drop-down menu. Find this in the central "Adjust" section of the Video Tools Edit bar: above Duration; to the right of Background Color; and to the left of Split.
-
4Choose the increment of speed increase. The values range down the drop-down menu relative to the original speed of the video: 1x. If you select 0.125x, you will slow the clip down to 1/8 of its current speed. If you choose 64x, you will increasing the speed by sixty-four times the current pace. If you aren't sure which speed to use, consider why you need to speed up the video.[1]
- Choose the highest values (64x, 32x, 16x) if you are speeding up a video of something incredibly slow: a sunset, or a snowman melting, or a plant growing.
- Use 8x or 4x if you want to fit something fairly slow into a much shorter span of video time: a snail crossing a driveway, or a group of people building something.
- Speed the video up 2x—double the original speed—if you want to speed along a regular scene without losing clarity, or if you want to minutely adjust a clip of something slow.
- If you decide that you want to slow down the video, use a small value: 0.125x, 0.25x, or 0.5x.
-
5Review the new speed. Watch the video through, and make sure that the new, faster speed works with your vision for the project. If not: adjust it. Don't be afraid to split the clip in question into a collection of even-smaller clips, each with its own unique speed. Be aware that when you speed up the video, you shorten its duration – so it will look shorter on the timeline.[2]


Advertisement
Method 2
Method 2 of 2:
Windows Movie Maker 2003
-
1Open your video in Windows Movie Maker. If you haven't done so already: Import your video clip into Windows Movie Maker, then Drag the file onto the timeline along the bottom of the window. If you want to speed up the entire video, just leave it as is. If you want to speed up a specific portion of the video, you'll need to split the video into several clips.
-
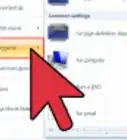
2Open the video effects. From the main storyboarding screen, click Tools, then Video Effects.
-
3Choose "Speed Up, Double." Scroll through the various video effect options until you find "Speed Up, Double." Left-click and drag this effect to the timeline version of the video clip that you want to speed up – then "drop" the effect onto the clip. This should double the speed of your video clip.[3]
- Windows Movie Maker does not have a more precise speed-increase effect than the doubling tool. If you want to do something more advanced, you'll need to find another video editor.
-
4Slow the video back down. If you make a mistake, you can simply press Ctrl+Z or click "Undo" to restore the clip to its original speed. You may also apply the "Slow down by half" effect. Navigate to the Video Effects tab again, then drag "Slow down by half" onto the video.
- Try right-clicking on the timelined clip, then selecting "Effects." You should be able to see the effects that are currently applied to this clip, and remove any effects that don't fit your purpose.


Advertisement
Community Q&A
-
QuestionHow do I change the quality of a video in Movie Maker?
 Community AnswerOpen the video project you are working on. Click on "File" > "Save Movie" > "Create custom setting..." (which is at the bottom of the list). Enter the resolution settings you want to use (width, height, etc.) under the "Video settings" category. Click "Save."
Advertisement
Things You'll Need
- Windows Movie Maker
- A video clip (windows .avi or .wmv)
-Step-13-Version-3.webp)
References
About This Article
Advertisement


-Step-13-Version-3.webp)


