X
wikiHow is a “wiki,” similar to Wikipedia, which means that many of our articles are co-written by multiple authors. To create this article, 35 people, some anonymous, worked to edit and improve it over time.
The wikiHow Tech Team also followed the article's instructions and verified that they work.
This article has been viewed 370,146 times.
Learn more...
How can you turn your home video folder into a movie that everyone wants to watch? The key to any good movie is the editing process. Windows Movie Maker can transform your collection of clips into a single masterpiece, complete with credits, a soundtrack, and snazzy transitions. Follow this guide to make a home video as it's meant to be seen.
Steps
Part 1
Part 1 of 3:
Getting Started
-
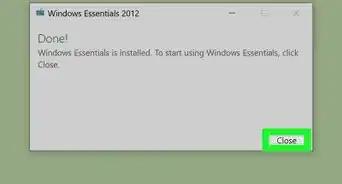
1Download Windows Essentials. This is a free software package from Microsoft that contains Windows Movie Maker as well as a few other Windows utilities. You can find the installation program from the Microsoft website.
- Windows Movie Maker is included in Windows Vista and XP, but needs to be downloaded for Windows 7 and 8.
-
2Open Windows Movie Maker. You can find it in your Start Menu under all programs, or you can search for “movie maker” and select it from the results.Advertisement
-
3Familiarize yourself with the interface. Windows Movie Maker 2012 is organized in a similar way to Microsoft Office. You can navigate through the various options by selecting the tabs at the top of the window.
- Home – This is the main tab for Movie Maker. You can use this tab to add videos, images, and audio to your project. You can also select premade themes for the movie, rotate the image, and upload the project to websites such as Facebook, YouTube, and Vimeo.
- Animations – This tab allows you to add transitions between clips.
- Visual Effects – This tab will allow you to change the color and tone of the image. You can turn it black and white or turn the color saturation way up.
- Project – You can make overall changes to your entire project by adjusting the audio mix and change the aspect ratio of the video.
- View – This tab lets you zoom in and out on the timeline, change the thumbnail sizes, and view the waveforms for your film’s audio.
- Edit – This menu appears after you add your first video clip. You can use this tab to trim the clip, set a new start point or end point, fade in and out, and stabilize the video.
- Options – This tab shows up after you add a music file to your project. You can set start and end times for the music, fade it in and out, and split the file.


Advertisement
Part 2
Part 2 of 3:
Creating a Movie
-
1Add your video clips. Click the Home tab and then click the “Add videos and photos” button. This will allow you to browser your computer to find a video file. You can also drag and drop files into the main window to add them to the project.
- If you want to make a slideshow, or add some still images into your project, you can add images in the same way you do videos.
- If you have a webcam connected to your computer, you can click the “Webcam video” button and record a clip directly into your project.
-
2Shuffle your clips. Once you’ve added a few clips, you can drag and drop them to rearrange them however you see fit. This can be especially useful if you need to add a clip later in the project but want to place it in the middle of the movie.
-
3Edit the clips you’ve added. Highlight one of your clips and click the Options tab. Move the cursor to the point that you want to trim the clip. You can then set that point as either the Start or End, or you can split the video at that point by clicking the appropriate button in the Options tab.
- If you are having a hard time getting the cursor to a specific part, you can enter in the exact time into the field.
-
4Add transitions between your clips. Select the first clip and then click the Animations tab. The Transitions section will show animations that will play at the start of your movie.[1]
- To add a transition between your first and second clip, select the second clip in your project. You can select from the available transitions. Use the arrow buttons at the end of the Transitions list to scroll through more options.
-
5Add a soundtrack. Click the Home tab. If you want to add narration to your video, click the “Record narration” button. This will allow you to record your voice if you have a microphone attached.
- To add a music file to your movie, click the “Add music” button. You can choose to download music from free online sources or add music files from your computer.
-
6Add titles. You can add a title to the beginning of each clip if you’d like. This can be especially useful for presentations. Click the Add Title button in the Home tab. This will create a title screen and open the Format tab, which will allow you to change the text properties and title card background color.
-
7Add credits. Clicking the “Add credits” button in the Home tab will add a Credits card to the end of your project. You can add multiple cards to have multiple credits screens, and you can use the Effects section of the Format tab to create scrolling credits just like a real movie.


Advertisement
Part 3
Part 3 of 3:
Finishing the Movie
-
1Preview your creation. Once you are finished putting it all together, use the “Preview full screen” button in the View tab to watch the movie from start to finish. Make note of anything that doesn’t work correctly or that needs tweaking.
-
2Share the video directly to a social network. You can use the Share section in the Home tab to upload your video directly to sites like YouTube and Facebook. Movie Maker will ask what resolution you would like to save the movie in, and then ask you to sign in with your Microsoft Account. Once you do, you will be able to upload the video, as long the video fits the guidelines for the site you are uploading to.
- You must have a verified YouTube account in order to upload videos longer than 15 minutes.
-
3Save the video to your computer. Click the arrow underneath the “Save movie” button in the Home tab to open a list of preset formats that you can save your video as. Choose the device that you plan on watching the video on, and Movie Maker will do the conversion automatically.
- The first option is recommended settings for your specific project.
- You can choose “Create custom settings” to specify exactly how you would like the video encoded.


Advertisement
Community Q&A
-
QuestionCan I improve the quality and resolution of a video using Windows Movie Maker?
 Community AnswerNo. A video's quality is determined by its resolution and bit rate. Find the source of the original video for the best quality. If it's your own, record in a higher resolution.
 -
QuestionWhat camera can I use to go to video?
 Community AnswerYou can use any camera. Anything portable, like a movie camera or even a flip-phone with a camera, will be fine.
 -
QuestionHow do we start our movie with a black page instead of the usual picture?
 Community AnswerAdd "Title" from the menu and select the duration. You can remove the text if you only want a black page.
Advertisement
Warnings
- Save often! Windows Movie Maker can suddenly freeze and you'll have to shut down the program. It usually happens if you've uploaded a large number of files, but sometimes it just freezes if the computer is moving slow.⧼thumbs_response⧽
Advertisement
About This Article
Advertisement


-Step-13-Version-3.webp)


