This article was co-authored by Sarah Fogle. Sarah Fogle is a DIY Home Improvement Specialist and the creator of Ugly Duckling House. With over a decade of experience, Sarah specializes in beginner-friendly home remodeling projects. Sarah holds an MBA from Georgia State University. She has been featured in multiple publications including Better Homes and Gardens and Make Magazine. She has also partnered with brands such as Lowe's, Home Depot, and Martha Stewart Crafts.
There are 19 references cited in this article, which can be found at the bottom of the page.
This article has been viewed 32,033 times.
Custom concrete countertops are a stunning sight in most homes. They are durable, customizable, and also pretty easy to install on your own. Even if you don’t have any experience pouring concrete, you can create and fit a new countertop in your home. Recruit a few friends or family members to join in the fun. You can get concrete countertops that look beautiful and last a long time, whether you’re putting them in a kitchen, a bathroom, or even outdoors.
Steps
Cutting Form Boards for the Countertop
-
1Purchase 3⁄4 in (1.9 cm)-thick melamine-coated particleboard. Choose a pair of 3⁄4 in (1.9 cm)-thick pieces of particleboard that are at least as big as the countertop will be. Most sheets will be bigger than you need, but that won’t be an issue as long as you have a saw handy at home. After getting the boards, take one of the pieces and set it on a flat surface. Put it on the floor, for instance, or use a workbench if you have one.[1]
- The particleboard is what you use to create a non-stick container called a form. It’s an important part of shaping and fitting the countertop. Make sure it has a melamine coating so the concrete doesn’t stick to it!
- Melamine-coated particleboard, along with everything else you might need for the installation, can be found online. It’s also available at most hardware stores.
-
2Measure the cabinet space the countertop will cover. If you have an existing countertop you’re replacing, try measuring that. Otherwise, use a tape measure to estimate the size you want the countertop to be. For example, use a tape measure to figure out the length and width of countertops you plan on fitting a countertop over. Since countertops usually hang over cabinets a little bit, add an extra 1 in (2.5 cm) on to any sides that aren’t connected to a wall.[2]
- If you’re not installing over cabinets, then find an alternative way to estimate the countertop size. For example, standalone and outdoor countertops sit on some sort of base. Measure the base to figure out the perfect countertop size for your home.
- Take separate measurements for each countertop you’re installing. For example, if you’re installing countertops in a corner, you will usually install 2 separate countertops instead of a single, big one.
Advertisement -
3Trace the measurements onto the particleboard with a pencil. This outline will help determine how the finished countertop looks, so take your time with it. Sketch the countertop’s shape directly onto the melamine board according to the measurements you took. Use a straightedge or ruler to keep the lines straight, then double-check them to make sure everything looks accurate.[3]
- To limit the amount of cutting you have to do, work along one edge of the board. You can repurpose it for one edge of the form. Take advantage of one of the longer edges!
- If you’re planning on scoring the melamine, trace the outline on both sides. Scoring the board first will ensure you can cut through it more cleanly than usual.
-
4Put on a dust mask, safety glasses, and earmuffs before cutting boards. Expect a lot of wood dust to be released when you start sawing into the particleboard. Whenever you have to cut something for the installation, reach for your safety gear first. Also, wear a short-sleeved shirt without gloves, jewelry, or anything else that could get in your way while you’re using a saw.[4]
- If you’re able to, work outdoors in order to limit the amount of sawdust that gets into your home. You can vacuum afterward to remove the leftovers.
- Remember to keep other people and pets out until you’re done working and have had a chance to clean up.
-
5Score the particleboard on both sides with a utility knife. Drag the knife along the outline you made, gently cutting through the melamine coating. Make sure you don’t cut through the particleboard underneath it. You may have to go back over it a few times to get a clean, consistent cut. To break all the way through the melamine, set a circular saw or table saw to cut at a depth of 1⁄4 in (0.64 cm) and then go back over the score marks again.[5]
- Always score both sides. If you only score one side, the other side can still chip. It may make the form weaker when you use it to create the countertop.
-
6Cut the particleboard to size with a circular saw. Set your saw to cut all the way through the particleboard. To start the cut, push the saw forward along the outline you made. Move it at a slow but steady pace. Hold the particleboard steady with your other hand, making sure it’s out of the blade’s way.[6]
- It’s best to leave the particleboard a little longer than you need it. That way, you can easily set the form on top of it to mold the countertop.
- You could also use a table saw if you have one available. If you’re using a table saw, carefully push the particleboard toward the blade.
- When you’re done cutting everything, you should have enough boards to build into a frame. When you set them on top of the board you cut for the base, you will have a container to pour the concrete into.
-
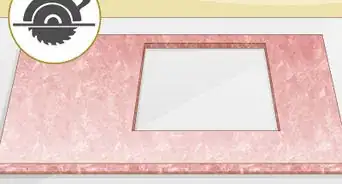
7Measure and trace cutouts if your countertop will have a sink. Some sinks and other appliances come with a template you can use to make the outline. If you have to make one, then try using a piece of cardboard. Set the sink on top of the cardboard, trace around it in pencil, then trim off the excess with a sharp knife. Place it on top of the particleboard to complete the outline.[7]
- Also, outline any other spots where you will have a hole in the countertop, such as for the faucet. Determine where the sink and other components will be before continuing.
- Another option is to get high-density foam. Set the sink or sink template on it, then trace around it with pencil. Cut it with a serrated knife, then place it in the cutout spot and pour concrete around it.
- Cutouts are used to leave holes in the countertop. Frame them with particleboard, then pour concrete around them.
-
8Cut the second particleboard into 3⁄4 in (1.9 cm)-tall strips. Lay the strips on your cutting surface and trim them to be 3⁄4 in (1.9 cm) wide. When you stand them up, they will be at the height you need. These strips will be used to line the edges of the first particleboard. Cut a pair of strips to match the first board’s length, then cut 2 more equal to its width. If you’re installing a sink, cut 4 more boards to fit along the outline you drew.[8]
- Make sure the strips are as tall as the finished countertop will be. If they are too short, they won’t be able to hold all of the concrete you need for the installation.
- Test the boards by placing them along the first board. They should fit cleanly together. Make sure they are the perfect size, since you will use them to shape the countertop.
- If you are going to install a faucet, try cutting a piece of PVC pipe. Make it the same size as the bottom edge of the faucet.


Building the Concrete Form
-
1Arrange the strips along the edges of the particleboard. Stand the strips on edge so they are 3⁄4 in (1.9 cm) tall. Position them around the edges of the base particleboard to form a frame. Now you have a great frame you can use to hold and shape the concrete. Press the frame boards together so the corners connect without any gaps, similar to a picture frame.[9]
- The easiest way to make the frame is by setting the smaller boards on top of the base board. If you don’t have enough room on top of the particleboard, place the strips around its edges in a frame.
-
2Position additional strips around cutouts you traced on the particleboard. Frame the cutouts like you did with the base board. Set the strips on top of the base, positioning them within the outlines you drew. Move them so they are even with the outlines. Make sure the boards are all pushed together without any gaps between them.[10]
- Make a separate frame for each cutout you want the countertop to have.
- If you place them outside the outline, the hole left in the concrete will be too big. Your sink, for example, might fall straight through when you try to install it.
-
3Mark spots along the strips in pencil to position the screws. Start at the corners of the side boards you’re using for your form. Measure about 1⁄2 in (1.3 cm) across the bottom edge of each of the longer boards and make a mark. Then, make additional marks every 12 in (30 cm) from there.[11]
- Another option is to make the marks on top of the strips. You can then screw down through them to ensure they are nice and snug against the base board.
-
4Create pilot holes using a 1⁄8 in (0.32 cm)-wide drill bit. Just drill through each of the marks you made earlier. Plan on making them all about 1 1⁄4 in (3.2 cm) deep. As long as they are consistent, the form you’re building will stay in one piece while you work on the concrete. Make sure the drill passes through each of the frame boards and into the base.[12]
- The pilot holes are a great way to prevent the boards from cracking when you screw them together. It is possible to screw them in place without pilot holes, but they may crack before you’re done with them.
- Try measuring about 1 1⁄4 in (3.2 cm) up from the tip of your drill bit and then wrapping a piece of masking tape over it. You can use the tape to determine when the pilot holes are deep enough.
- Always use a drill bit that is one size smaller than the screws you plan on using to secure the form boards together.
-
5Secure the strips in place with 9⁄64 in (0.36 cm) wood screws. Get ones that are about 1 1⁄4 in (3.2 cm)-long or otherwise fit the pilot holes you made. After placing them, drive them in with a cordless screwdriver. Check that all of the boards are stuck together before continuing. If they seem a little loose, take some time to fix them so you don’t end up with a concrete mess.[13]
- If you’re having a hard time fitting the strips together, you could spread hot glue underneath them and along their edges. Glue is particularly useful for interior strips, like the ones you might use to outline a sink cutout.
- To help keep the strips in place, you could also place some scrap blocks of wood next to them. Screw the wood to the side and base boards for additional stability.
-
6Spread caulk along the joints in the boards to seal them. Cut the tip off a bottle of caulk and load it into a caulk gun. Start with the corners, spreading a consistent bead of caulk from top to bottom. Squeeze some caulk around the edges of the base as well to seal the gaps. Then, wet your finger and run it along the caulk to smooth it out a little.[14]
- Silicone and polyurethane caulk are the best choices. They are waterproof and will stop the concrete from leaking out of the form.
- Apply the caulk along the inner edges of the form boards or else you won’t successfully seal off the gaps. The caulk helps ensure you end up with a smooth countertop that looks great wherever you place it.
-
7Wait 24 hours for the caulk to dry. Check the caulk over one last time to make sure it looks consistent and is about as smooth as you can make it. If the boards are well-sealed, leave the caulk to finish creating a concrete-proof seal. Once the caulk feels dry to the touch, you can begin pouring the new countertop![15]


Pouring the Concrete
-
1Mix concrete and water in a plastic paint bucket. To make a strong countertop, get a concrete mix specifically designed for countertops. Pour it into the bucket first so you don’t end up with a cloud of dust. The ratio for this type of concrete is usually around 12 cups (2.8 L) of water for every 80 lb (36 kg) of concrete you’re using. After pouring the water in, stir it with a hoe or a mixing paddle until it’s nice and uniform, like a bowl of oatmeal. Test it by scooping up a little to see if it holds its shape.[16]
- If you use concrete specifically designed for countertops, it will have filler and additives that help it last longer. Make sure it’s a high-strength, pre-mixed concrete so you aren’t stuck waiting forever for it to dry.
- To determine how much concrete you need, multiply the length, width, and depth measurements of your countertop together. Search for a concrete calculator online to take care of the math for you.
-
2Pour the concrete into the form until it’s about half-full. Just pour it straight from the bucket into a form. If you need to, scoop it out of the bucket with a shovel. The form doesn’t have to be exactly half-full, so err on the side of caution and add a little more of the concrete mix if it looks too empty. Push down on the poured concrete with a hoe afterward to pack it down.[17]
- You could also fill the wood form as much as ⅔ of the way full before smoothing out the concrete and laying mesh on top of it. It just needs to be at least halfway full to ensure it’s durable enough.
- If you’re making multiple countertops, pour them individually. Make sure they are separated by particleboard, or else they could end up fused together.
-
3Smooth the concrete out by moving a trowel across its surface. Start at one end and work across the length of the form. Spread the concrete out so it looks flat and pretty. Remember to use the edges of the trowel to push any excess concrete toward the edges, filling any gaps around the boards. Then, run the trowel across the concrete one last time.[18]
- It’s a good idea to push the concrete down a few times with a hoe. If it isn’t packed in very well, the countertop will have air holes that weaken it.
-
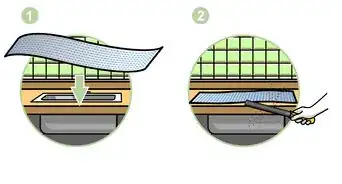
4Cut concrete wire mesh with tin snips to fit inside the wood form. To strengthen the countertop, use a steel concrete-reinforcing mesh. Set the mesh on top of the wood form to get an idea of how to trim it. Plan on cutting it so it barely fits inside the form. Trim off the excess with tin snips before placing it on top of the concrete.[19]
- The mesh is very easy to place. All you have to do is gently set it on top of the fresh concrete. It makes the finished countertop much less likely to crack.
- Cutting the mesh could leave sharp edges behind, so handle it with caution. Wear cut-proof work gloves for additional protection.
-
5Pour the rest of the concrete into the form. This time, fill the form all the way to the top. Make sure the wire mesh gets buried in the center. Press down on the concrete with a hoe to help compress it and force out any air bubbles.[20]
- You could also shake or hit the particleboard with a rubber mallet to compact the concrete. Be sure to pour more concrete afterward as needed to fill in any gaps.
-
6Smooth out the concrete with a wood board and trowel. Take a flat-edged wood board and lay it across the width of the form. Wiggle it back and forth like a saw while simultaneously moving it forward along the concrete. It will level out the countertop for you, so no need to worry about using too much concrete. To finish, smooth out the remaining concrete with a trowel.[21]
- Use the edge of the trowel to push concrete into any gaps you notice along the particleboard. Make sure the form is packed as fully as possible so that your countertop is solid and strong.
-
7Cover the concrete with plastic to prevent it from drying out too quickly. Find a way to drape the plastic without letting it touch the concrete. One way to do this is by setting sawhorses next to the concrete, then stretching the plastic out between them. Keep the concrete out in an area with plenty of air circulation.[22]
-
8Wait 2 to 3 days for the concrete to cure. Check the manufacturer’s instructions for the recommended drying time. If you’re using a quick-drying concrete, your countertop will be hard enough to install after a few days. To test it, press your thumb against it. If you’re only able to leave a small dimple on it, then it’s at the right consistency.[23]
- If you have the time, you can leave the concrete to dry for longer. It gets stronger as it finishes curing. Try leaving it alone for at least a week.
- Many types of concrete take up to 28 days to fully cure. You can wait that long if you have the time, but it isn’t really necessary. Besides, the particleboard becomes more difficult to remove as the concrete hardens.
-
9Unscrew the frame boards from the hardened countertop. Use a cordless screwdriver rotating counterclockwise to undo the screws. Gently pry the particleboard off of the concrete. Watch how the concrete reacts when you remove the supports. If it starts to lose its shape, put the boards back up right away. Let the concrete dry out a little more before trying again.[24]
- If some of the concrete falls off, put it back on with a trowel. Spray it with a little bit of water to make it easier to work with. Then, wait longer for it to dry.


Cleaning and Sealing the Countertop
-
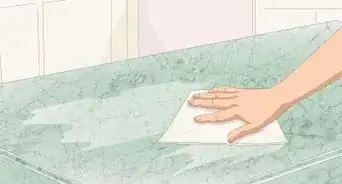
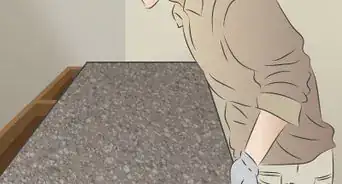
1Sand the countertop smooth with 400-grit diamond sandpaper. Go over the entire countertop, taking care to buff out any bubbles you see along its surface. It’s easiest if you work along the countertop’s length first. Smooth out the sides afterward. Be sure to use a light amount of pressure to avoid leaving scratches.[25]
- To make this part easier, use an orbital sander. You will be able to smooth out the countertop much quicker and even get a better finish than usual.
- If you have to sand off any bubbles, you can fill them in with a concrete patching compound. Let it dry for 4 to 6 hours before sanding it flat.
-
2Wipe the countertop clean with a sponge dampened in warm water. Squeeze out the excess moisture before washing off the entire countertop. The concrete dust left behind after sanding isn’t visible, but it’s still a big problem that can affect how your countertop turns out. Clean the sides as well.[26]
- If you have a HEPA vacuum, you can use it to suck up the dust. Regular vacuums likely won’t remove all of it, but a HEPA vacuum is designed to trap small particles like unseen dust.
- Washing and sealing concrete is a messy process. To keep your home clean, take the countertop outside and lay it on a plastic tarp, if possible.
-
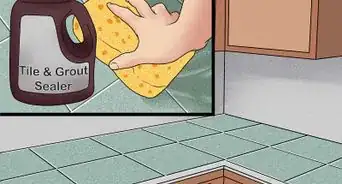
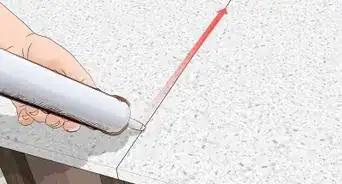
3Apply a layer of concrete sealant with a 3⁄4 in (1.9 cm)-nap paint roller. Pour the sealant in a tray to push the roller through it. Apply it along the top edge of the countertop first. Coat the sides afterward. Make sure they all have a thin but consistent coating of sealant.[27]
- Another way to apply sealant is by using a sprayer. You could also use a clean cloth to wipe the sealant on.
-
4Wait at least 10 minutes for the sealer to dry. Check the manufacturer’s recommendations for a more specific drying time. Some products can take as long as 3 hours to dry. Check that it feels dry to the touch before continuing.[28]
-
5Flip the countertop over to seal the opposite side. Even though the bottom part of the countertop isn’t as likely to get stained, it is still worth protecting from accidents. Place the sealed side face down, then apply the sealant with a roller. Give it time to dry afterward.[29]
- If you have time, you can apply another layer of sealant to both sides to ensure the countertop is completely protected from stains.
-
6Wait 2 to 4 hours for the sealant to dry. Leave the countertop out in the open in a spot with plenty of air circulation. Check back afterward and touch the countertop. If it feels dry to the touch, then it is ready to be finished. Otherwise, give it another hour to dry.[30]
- Keep in mind that the concrete may not dry out evenly. If you have it flat on a tarp, the bottom edge could still be damp. Wait a little longer or flip the concrete back over to finish drying it.
-
7Roll a second coating of sealant onto the concrete to waterproof it. Coat your roller, then use it again. Start with the top surface, then tackle the sides next. Flip over the countertop afterward to finish the bottom surface. Let the second coat dry as well before moving the countertop to where you plan on installing it.[31]
- If the new finish makes the countertop look a little dull, you could wax it to give it a shine. Wipe the wax onto it with a clean cloth. Some sealants give a high-gloss sheen like wax does, and you don’t have to shine your countertop if you don’t want to.
-
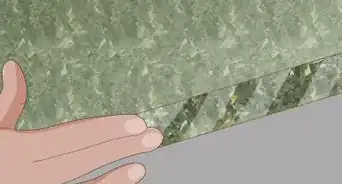
8Place the countertop to install it. The concrete slab will be heavy, so ask a friend for help. If you’re installing it over cabinets, lift it up and lay it flat over the cabinets. Place outdoor and standalone countertops on supports. Then, place the sink and any additional components on top, if you’re installing any. Then, step back and admire your cool, new countertops.[32]
- The countertops don’t actually attach to the cabinets at all. However, they are so heavy that they won’t move.
- Concrete countertops may need additional support because of their weight.[33]


Expert Q&A
-
QuestionHow often should you clean concrete countertops?
 Erik BakirovErik Bakirov is a Cleaning Specialist at Room413 Cleaning in Los Angeles, California. Erik specializes in deep, move-in, and move-out cleaning services. Room413 matches homeowners with reliable and trustworthy cleaning services. They also promote environmentally friendly cleaning products.
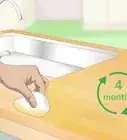
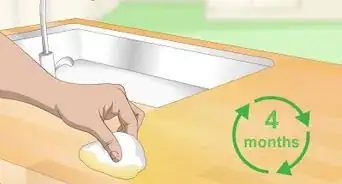
Cleaning SpecialistIt depends on how often the countertop is being used. Usually, once a week will be sufficient. Clean the countertop by wetting a rag, applying a little bit of soap, and wiping it down. Products like Dawn dish soap will work great.
Warnings
- Wear protective safety glasses, a dust mask, and other gear while cutting and sanding. Also, use damage-resistant work gloves while working with wire mesh and concrete.⧼thumbs_response⧽
Things You’ll Need
- Melamine particleboard
- Pencil
- Ruler or straightedge
- Circular saw or table saw
- Dust mask
- Safety glasses
- Damage-resistant gloves
- Tin snips
- Wire mesh
- Silicone or polyurethane caulk
- Caulk gun
- Trowel
- 9⁄64 in (0.36 cm)-wide wood screws
- 1⁄8 in (0.32 cm)-wide drill bit
- Drill
- Cordless screwdriver
- Concrete sealant
- 400-grit sandpaper
- Sponge or cloth
- 3⁄4 in (1.9 cm)-nap foam roller
- Paint roller tray
- Countertop-mix concrete
- Plastic mixing bucket


References
- ↑ https://www.bobvila.com/articles/how-to-make-diy-concrete-countertops/
- ↑ https://www.youtube.com/watch?v=v3jbCpY8RIQ&feature=youtu.be&t=92
- ↑ https://www.bobvila.com/articles/how-to-make-diy-concrete-countertops/
- ↑ https://www.bobvila.com/articles/concrete-countertops/
- ↑ https://www.bobvila.com/articles/how-to-cut-melamine-and-veneer/
- ↑ https://www.bobvila.com/articles/diy-concrete-countertops/
- ↑ https://www.bobvila.com/articles/how-to-make-diy-concrete-countertops/
- ↑ https://www.youtube.com/watch?v=eyouJ9Kx1OQ&feature=youtu.be&t=36
- ↑ https://www.bobvila.com/articles/diy-concrete-countertops/
- ↑ https://www.bobvila.com/articles/diy-concrete-countertops/
- ↑ https://www.thisoldhouse.com/kitchens/21017046/how-to-build-custom-concrete-countertops
- ↑ https://www.youtube.com/watch?v=0cnwwg6kBoY&feature=youtu.be&t=125
- ↑ https://www.youtube.com/watch?v=TUAPO8otVrY&feature=youtu.be&t=174
- ↑ https://www.thisoldhouse.com/kitchens/21017046/how-to-build-custom-concrete-countertops
- ↑ https://www.bobvila.com/articles/how-to-make-diy-concrete-countertops/
- ↑ https://todayshomeowner.com/diy-concrete-countertops-5-mistakes-to-avoid/
- ↑ https://www.youtube.com/watch?v=0cnwwg6kBoY&feature=youtu.be&t=278
- ↑ https://www.youtube.com/watch?v=eyouJ9Kx1OQ&feature=youtu.be&t=145
- ↑ https://www.popularmechanics.com/home/how-to-plans/how-to/a20407/how-to-build-concrete-countertops/
- ↑ https://todayshomeowner.com/diy-concrete-countertops-5-mistakes-to-avoid/
- ↑ https://www.bobvila.com/articles/diy-concrete-countertops/
- ↑ https://www.bobvila.com/articles/diy-concrete-countertops/
- ↑ https://www.thisoldhouse.com/kitchens/21017046/how-to-build-custom-concrete-countertops
- ↑ https://www.thisoldhouse.com/kitchens/21017046/how-to-build-custom-concrete-countertops
- ↑ https://www.youtube.com/watch?v=TUAPO8otVrY&feature=youtu.be&t=919
- ↑ https://www.bobvila.com/articles/how-to-make-diy-concrete-countertops/
- ↑ https://www.youtube.com/watch?v=eyouJ9Kx1OQ&feature=youtu.be&t=360
- ↑ https://www.thisoldhouse.com/kitchens/21017046/how-to-build-custom-concrete-countertops
- ↑ https://www.thisoldhouse.com/kitchens/21017046/how-to-build-custom-concrete-countertops
- ↑ https://www.bobvila.com/articles/how-to-make-diy-concrete-countertops/
- ↑ https://www.bobvila.com/articles/concrete-countertops/
- ↑ https://www.youtube.com/watch?v=TG0F7Qe4MzM&feature=youtu.be&t=770
- ↑ Sarah Fogle. DIY Specialist. Expert Interview. 10 August 2021.
- ↑ https://www.thisoldhouse.com/countertops/21018446/concrete-s-changing-colors
- ↑ https://www.youtube.com/watch?v=v3jbCpY8RIQ&feature=youtu.be&t=992
About This Article