This article was co-authored by Patrick Johns. Patrick Johns is a Home Improvement Specialist and the Owner of CatchAll Handyman Services. With more than 28 years of experience, he has worked on a variety of home improvement projects, such as carpentry, plumbing, and door and window installations in both commercial and residential properties.
This article has been viewed 206,277 times.
Tired of opening your garage door by hand? Try installing a garage door opener yourself instead of paying someone else to do it. Installation should only take you a few hours to complete and having a garage door opener will make opening and closing your garage door every day so much quicker and easier.
Steps
Preparing to Install a Garage Door Opener
-
1Assess whether you have the type of garage door that can have an opener attached. Most newer garage doors with multiple horizontal sections should be compatible with an opener. Older types, such as those that are one solid piece, may need to be replaced before you can install an opener.[1]
-
2Choose a garage door opener. There are two basic types of garage door openers, chain driven and belt driven. Both operate in roughly the same way but just use a slightly different part for operation.
- A belt driven garage door opener can be a bit quieter during operation. Consider this when making the choice of what opener to buy.
Advertisement -
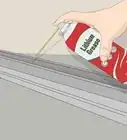
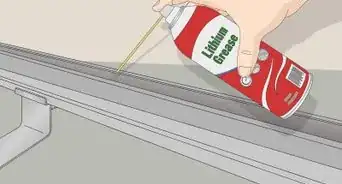
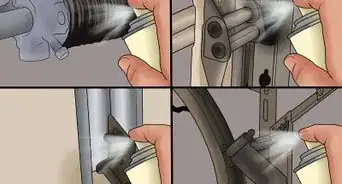
3Prepare your garage door for opener installation. Make sure your garage door is well lubricated and operating properly.
- The weight of a garage door is supported by the door springs, cables, and pulleys, not the opener. If you can't raise and lower the door normally by hand, do not install the opener until the door is repaired.
- Remove all ropes or cords attached to the garage door so you won't get tangled in them during installation.
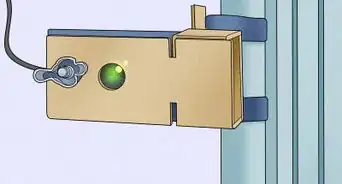
- Deactivate or remove all existing garage door locks, so they won't accidentally engage and either damage the opener or cause personal injury.
-
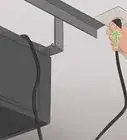
4Make sure there is an electrical plug in the immediate area of the opener motor. They are usually mounted in the ceiling, facing down. You will need to install one, or have one installed by a licensed electrician, if you do not have one already.
- If you need to install permanent electrical wiring, always disconnect the power at the main breaker box before attempting to wire connections. Always connect the power cord of the garage door opener to a properly grounded outlet to avoid electrical shock.


Installing the Garage Door Opener
-
1Lay out all of the parts your opener came with. Make sure that the parts list included with your opener matches the parts included in the package.
-
2Begin by putting together the main assembly. Your opener should have come with a list of detailed installation instructions, so follow those to begin assembly.
- First put the rail together. This should come in several pieces that fit easily together.[2] Attach them together as directed in your installation instructions.
- Then you will need to slide the carriage (also known as a trolley) over the rail. This is the piece of the opener that will move along the rail, pulling the door open.
- Attach the rail to the motor compartment. This is the largest piece of the opener and it will be positioned furthest from the garage door.
- Install the pulley at end of rail, opposite the motor compartment. Then feed the belt or chain through the end of the rail, around the pulley, then around the other end (at the motor). Finally you will attach the end of the belt or chain to the carriage. The end of the chain or belt should have a screw attached to it, so that you can easily attach it to the carriage. This screw will also allow you to adjust the tension of the chain or belt.[3]
-
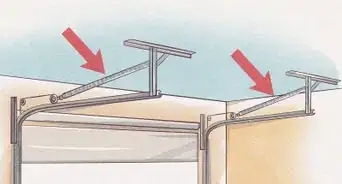
3Install blocking on the ceiling, if there is none there already. This is how you will attach the garage door opener to the ceiling. The instructions your garage door opener came with should have detailed specifications for the blocking.
- No matter what the size and spacing of the blocking is, be sure that you are attaching it to joists (solid wood) in the ceiling, not just to sheetrock.
-
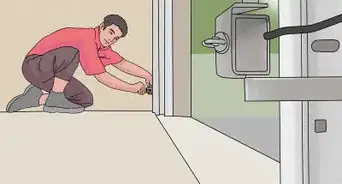
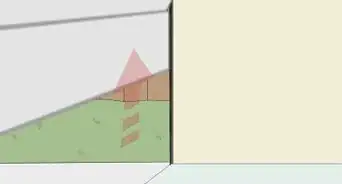
4Find the point of connection to the garage door and attach the bracket that came with your opener to the door itself. The distance from the top of the garage door should be specified in the opener's direction and in most cases you will want it centered on the door.
- If your garage door opener did not come with this bracket you will need to consult the instructions to determine what type of bracket you will need.[4]
-
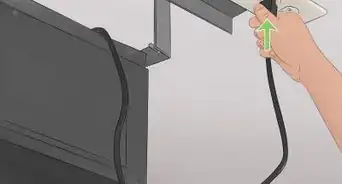
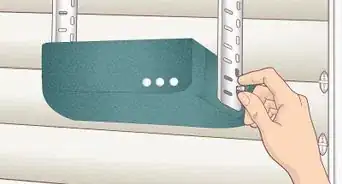
5Lean the end of the assembly (opposite the motor compartment) up above the garage door. Attach the bracket the opener came with to the wall above the door and then insert the end of the assembly into it. Connect the bracket and the end of the assembly as directed in the installation instructions.
-
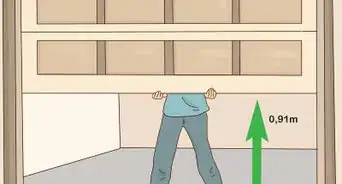
6Lift the other end of the assembly up and into place. Install the power unit high enough so that tall people won't run into it, at least 7' from the floor if possible.
-
7Attach to the bracket on the garage door. In many cases there will be two pieces used to attach the door to the opener, giving some flexibility in the connection, as the distance between the door and the opener assembly may vary.


Installing Additional Features
-
1Attach the safety rope to the emergency release on the carriage. Garage door openers must have a manual disconnect cord. It should be adjusted to approximately 6' from the floor so any adult can reach it.
-
2Insert a lightbulb into the socket in the garage door opener compartment, if it has one. The manual or the inside of the compartment should suggest an appropriate wattage for the lightbulb but it's a good idea to buy a lightbulb that is rated for "rough service" because of the vibrations it will need to withstand.[5] The light will turn on whenever the door is opened but may be able to be operated manually as well.
- Many garage door openers use the light to signal programming changes that are occurring. Be sure to install the lightbulb in your opener so that you can program your garage door successfully.
-
3Install the electric eye safety system that came with your garage door opener. This will require you to run two small wires down to the bottom of one side of your garage door. You will also need to mount an electric eye in that location, as well as a reflector on the opposite side of the door.
- Be sure to follow the instructions and wiring diagram included with your opener.
-
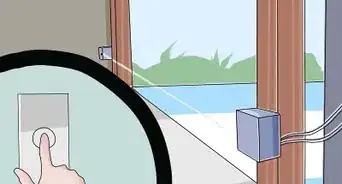
4Install the push button control 5' from the floor so small children cannot reach it. Put it in a location where anyone operating it can easily see the garage door.
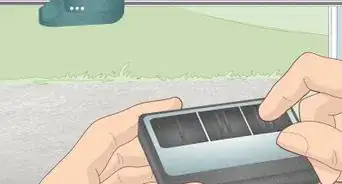
- Also install and program any other optional equipment, such as a keypad for opening the door on the exterior of your garage or remote openers.
-
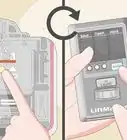
5Adjust the safety reverse system and the electric eye system properly. Refer to your opener manufacturer's instructions for details.
-
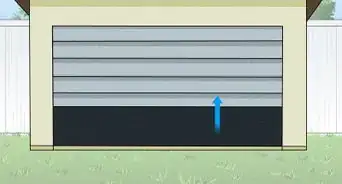
6Test your garage door to make sure the opener is working correctly. If the door and the opener are moving smoothly, if all parts are attached solidly, and there are no obstructions blocking the door or the opener's movement, then it should be fine.
- Some garage door openers can be quite loud under normal working conditions, so don't assume that just because it's a bit loud that it is not installed properly.


Community Q&A
-
QuestionHow can l stop the rail from bending upward when I close the door?
 Community AnswerIt sounds like the travel limits need to be reset. The operator is trying to push the door through the floor, and since it cannot, the rail is being pushed up.
 -
QuestionDoes a garage door opener need to be installed on a rail?
 Community AnswerYes. The rail that you can see in the pictures helps lift the door, because the opener will take the tension off of the cables. It also is used to guide the chain/belt.
 -
QuestionHow long does it take to install a garage door opener?Community AnswerAbout a half an hour.
Warnings
- If possible, use the manual disconnect only when the garage door is fully closed. The opener will not carry the weight of the door, and if the springs are weak or broken, disconnecting it could cause the door to fall.⧼thumbs_response⧽
- Never let children operate or play with the opener. Keep the radio transmitter in a location inaccessible to children.⧼thumbs_response⧽
- Do not wear rings, watches or loose clothing while installing or servicing a garage door or opener. They could get caught on a moving part and cause injury to you or your property.⧼thumbs_response⧽
- Always disconnect electrical power to the opener when servicing the unit or working close to the drive chain or other moving parts.⧼thumbs_response⧽
- Never alter or remove a garage door's springs, cables, or pulleys. Doors with torsion springs (a single coil above the door) should only be serviced by qualified service technicians.⧼thumbs_response⧽


References
- ↑ http://www.familyhandyman.com/doors/garage-door-repair/how-to-install-a-garage-door-opener/view-all
- ↑ https://www.youtube.com/watch?v=vDc-m0cB_7o
- ↑ http://www.familyhandyman.com/garage/troubleshooting-garage-door-openers/view-all
- ↑ https://www.youtube.com/watch?v=T4_qJh_FhRc
- ↑ http://www.familyhandyman.com/doors/garage-door-repair/how-to-install-a-garage-door-opener/view-all
About This Article

To install a garage door opener, first assemble the rail, carriage, pulley and motor compartment according to the instructions. Attach brackets to the ceiling and door, and position the end of the rail above the closed door. Lift the motor compartment into place on the ceiling, and attach the rail and carriage to the bracket on the door. For added safety, attach a rope to the emergency release on the carriage. For more tips, including how to install a keypad entry panel and sensors, scroll down!