This article was co-authored by wikiHow Staff. Our trained team of editors and researchers validate articles for accuracy and comprehensiveness. wikiHow's Content Management Team carefully monitors the work from our editorial staff to ensure that each article is backed by trusted research and meets our high quality standards.
This article has been viewed 37,852 times.
Learn more...
A new garage door is a DIY project any homeowner can do with a couple of strong friends. After removing the old door, installing the new door is done by stacking the door panels one at a time and fitting the roller tracks around the panels’ wheels. You’ll also need to secure the springs that allow the door to move, but once you do, your garage will open and shut smoothly and safely.
Steps
Removing the Old Door
-
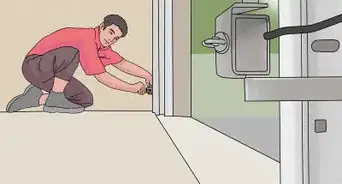
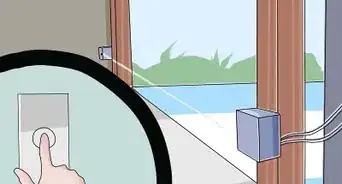
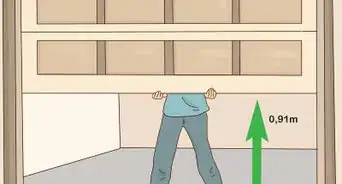
1Lift the garage door as far as it will go. Raise your old door. You’ll need to deal with the lifting mechanisms before you can remove the door.[1]
-
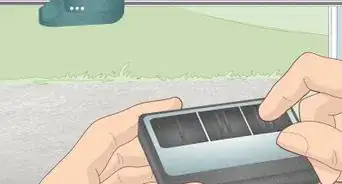
2Use locking pliers to lock the door in place. Locking pliers are small, handheld vice-grips. Pick up 2 of them from the home improvement store. Use their jaws to secure the bottom of the door to the roller track, then try to move the door. When it won’t move at all, you’ll know it’s in place.[2]Advertisement
-
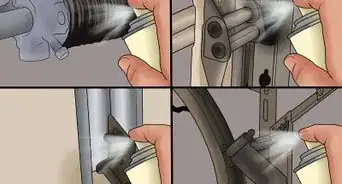
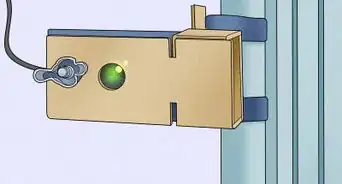
3Tie extension springs to the tracks with safety cables. Extension springs hang loosely on the sides of the door. Wrap a strong cord around the track and the spring to bind them together. Make sure the rope is securely knotted so that the springs won’t turn into dangerous whips if the cable they’re on breaks.[3]
- If you don’t see these springs, look above your door for a tightly-wound torsion spring. This spring is a safer lifting mechanism than extension springs as long as you don’t mess with the tension. Leave it alone and call a professional to release the spring.
-
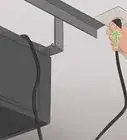
4Detach the lifting cable from the bottom bracket. Now that you’ve secured the door, locate the thick lifting cable on either side of the door. Use pliers to pull the cable free from the bracket on the lowest door panel. The door panel is still attached to the rest of the door, so don’t worry about it falling.[4]
-
5Lower the door. Stand off to the side of the door. Pull it all the way down, resting the bottom of the door on the floor. These doors are heavy, so you may need a few helpers to pull down a double door.
- It’s a good idea to place a block of wood or another sturdy substance to prevent the bottom of the door from crashing down on someone’s finger or toe.
-
6Take apart the door panels by removing the rollers and brackets. Start with the highest panel and have others hold the panel in place as you work. You’ll need to unscrew the hinges securing the panel to the one below it. Also undo the brackets holding the rollers in place on the side of that panel. When finished, move the panel away, then work on the next panel.
- If your door has windows, tape over the door to prevent shards from flying in case of shattering.


Placing the First Panel and Track
-
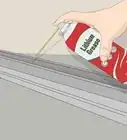
1Lay weather stripping over the door’s bottom panel. Weather stripping can be purchased at any home improvement store. It looks like a long rubber tube with a groove that fits over the door panel. Lay the panel flat on a workbench and fit the strip over its bottom.[5]
-
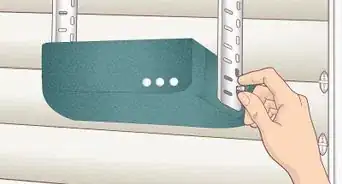
2Mount brackets over the weather stripping. You’ll need a bracket for both lower corners of the panel. Make sure the brackets are lined up evenly with the sides of the door and hang slightly over the stripping. Then, take your electric screwdriver and fasten the brackets in place with a pair of coarse-thread lag screws.[6]
-
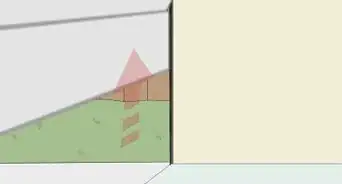
3Center the bottom panel in the door frame. Move the panel to the door and stand it upright. A tape measure can help you make sure it’s as centered as possible. Also make sure that the bottom of the door is as level with the ground as possible to achieve the perfect installation.[7]
- You can place shims on the floor to lift up an uneven side of the door.
- The rubber weather stripping will fill in the gaps on uneven floors as long as you keep the door panels straight during installation.
-
4Install hinges along the top of the door panel. You’ll need 3 hinges for every door panel besides the top one. Line up the first hinge in center of the top edge and screw it in place with a machine-thread lag screw. Place the other hinges on the panel’s top corners.[8]
-
5Place the rollers in the hinges and brackets. You’ll need 4 rollers for the first panel and 2 for every other panel. They come on metal rods that you slide into the holes on the side hinges and brackets. The rollers should face away from the door panels.
-
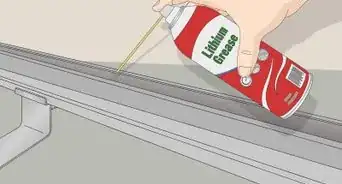
6Wrap the track around the wheels. The track has an indentation for the wheels to move up and down. It’s like laying the weather stripping. Hold the track piece against the floor next to the wheels, then fit the wheels into the track.[9]
-
7Screw the track to the door frame. Ensure that the track is flat against the wall. Leave a small margin of space between the track and the door frame. When the track is positioned, screw the track’s brackets directly to the frame with lag screws.[10]


Installing the Other Panels and Tracks
-
1Attach hinges on top of the second door panel. You’ll install the hinges the same way you did for the first panel. This time, leave off one of the hinges for now. Every time you install a new panel, leave the hinge on that same side off until you’ve set the panel in place.[11]
- Leaving off the third hinge makes getting the panel into the track a lot easier.
-
2Stack the second door panel on top of the first one. Have a friend help you carry the next door panel and hold it in place on top of the first one. Adjust the panels so their edges line up perfectly.
-
3Secure the hinges to the second panel. Hold the top part of the hinge up against the second panel to see where it’ll rest. It helps to drill a hole for the lag screw first. Once that’s done, fasten the hinge directly to the panel using the drilled hole and a screw.[12]
-
4Fit the remaining hinge and roller onto the panel. This will be the third hinge that you left off the far side of the door earlier. Place the roller into the hinge first. Fit the wheel into the track on that side, then screw the hinge in place.
-
5Fasten the second track on the other side of the door. Look over the track to make sure it’s parallel to the door, then screw the track’s brackets directly into the door frame. Slide the track out so that it isn’t touching the door frame, then tighten the bolts on both tracks to hold them in place.[13]
-
6Connect the horizontal track sections to the vertical tracks. You’ll need someone to climb up on a ladder to help lift the horizontal track. It’ll have a small curved section that fits on top of the vertical track. Line up the sections.[14]
-
7Bolt the track sections in place. Place the bolts into the curved track section and tighten them to fasten the track sections together. Make sure the bolt threads are to the inside of the track. You’ll need to then secure the loose end of the horizontal track section to a perforated angle iron hanging from the ceiling.[15]
- If your garage does not already have an angle iron, find one at the hardware store and bolt it to the ceiling.
-
8Set the other door panels in place. Attach them to the other panels and tracks the same way you did before. When you reach the last panel, which reaches the horizontal track, stop. Don’t place hinges or wheels on top of the panel.[16]
- You can’t install the last panel without installing the track first, since the panel will fall in on you.
-
9Align the top hinges and rollers with the curving rack. The last hinges should be placed partway down the door panel. Line them up with curved part of the track. Get the wheels on the track first before fastening the hinges with your electric screwdriver.[17]


Installing the Spring System
-
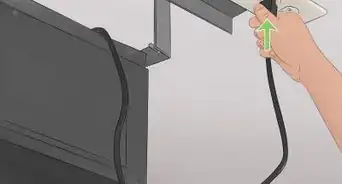
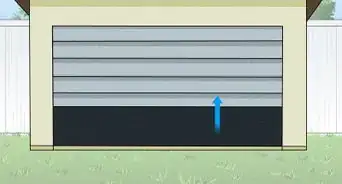
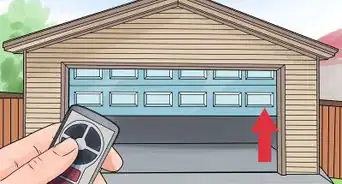
1Lift the door. The door should lift smoothly up. If it doesn’t, you’ll need to go back and redo your work. Have a friend help lift the door all the way up so you can install the springs.[18]
-
2Lock the door in place with locking pliers. Clamp the jaws of the vice-grips onto the track. Pull the door down a little to test it. It should rest atop the vice-grips but be unable to move down any further.[19]
-
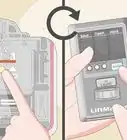
3Install a torsion spring and bar for a sturdier lifting system. The easiest way to get the garage door working is to purchase a DIY-friendly, easy tensioning system. Follow the included directions to install the system above the door.[20]
- You will need a drill to rotate the spring a few times to add tension.
-
4Run cables through extension springs for a cheaper system. When choosing this system instead of a torsion spring, hook the springs onto part of the angle iron above the track. Feed a steel cable through the pulleys, hooking the end to a bracket on the back of the curved part of the track.[21]
- You will need to loop the free end of the cable through a small bracket. Add an S-hook to the bracket, then place the S-hook on the track above the door.
- You will also need to run a safety cable through the extension springs and loop the cables through the holes in the track’s brackets.


Warnings
- Do not try to undo a torsion spring unless you are a professional or installed a torsion spring from a DIY kit.⧼thumbs_response⧽
- Stay away from damaged garage doors in case they may fall.⧼thumbs_response⧽
- Garage doors are heavy. Have a friend help move doors and door panels.⧼thumbs_response⧽
- Make sure run a cable through extension springs to they can’t turn into dangerous whips if they break.⧼thumbs_response⧽
Things You’ll Need
- Electric screwdriver
- Adjustable wrench
- Cordless drill
- Level
- Locking pliers or vice-grips
- Lag screws
- Bolts
- Ratchet
- Tape measure
- Stepladder
- Easy tensioning system or extension springs with cables
- Weathering strip
- New door or panels
- Shims


References
- ↑ https://homesteady.com/how-4431057-remove-existing-garage-door.html
- ↑ https://homesteady.com/how-4431057-remove-existing-garage-door.html
- ↑ https://www.familyhandyman.com/doors/garage-door-repair/how-to-install-a-garage-door/view-all/
- ↑ https://www.familyhandyman.com/doors/garage-door-repair/how-to-install-a-garage-door/view-all/
- ↑ https://www.familyhandyman.com/doors/garage-door-repair/fixing-garage-door-bottom-seal/view-all/
- ↑ https://www.thisoldhouse.com/how-to/how-to-install-garage-door
- ↑ https://www.familyhandyman.com/doors/garage-door-repair/how-to-install-a-garage-door/view-all/
- ↑ https://www.thisoldhouse.com/how-to/how-to-install-garage-door
- ↑ https://www.thisoldhouse.com/how-to/how-to-install-garage-door
- ↑ https://www.thisoldhouse.com/how-to/how-to-install-garage-door
- ↑ https://www.thisoldhouse.com/how-to/how-to-install-garage-door
- ↑ https://www.thisoldhouse.com/how-to/how-to-install-garage-door
- ↑ https://www.familyhandyman.com/doors/garage-door-repair/how-to-install-a-garage-door/view-all/
- ↑ https://www.thisoldhouse.com/how-to/how-to-install-garage-door
- ↑ https://www.familyhandyman.com/doors/garage-door-repair/how-to-install-a-garage-door/view-all/
- ↑ https://www.thisoldhouse.com/how-to/how-to-install-garage-door
- ↑ https://www.thisoldhouse.com/how-to/how-to-install-garage-door
- ↑ https://www.thisoldhouse.com/how-to/how-to-install-garage-door
- ↑ https://www.familyhandyman.com/doors/garage-door-repair/how-to-install-a-garage-door/view-all/
- ↑ https://www.familyhandyman.com/doors/garage-door-repair/how-to-install-a-garage-door/view-all/
- ↑ https://www.thisoldhouse.com/how-to/how-to-install-garage-door
About This Article