This article was co-authored by wikiHow staff writer, Hannah Madden. Hannah Madden is a writer, editor, and artist currently living in Portland, Oregon. In 2018, she graduated from Portland State University with a B.S. in Environmental Studies. Hannah enjoys writing articles about conservation, sustainability, and eco-friendly products. When she isn’t writing, you can find Hannah working on hand embroidery projects and listening to music.
There are 11 references cited in this article, which can be found at the bottom of the page.
wikiHow marks an article as reader-approved once it receives enough positive feedback. In this case, 100% of readers who voted found the article helpful, earning it our reader-approved status.
This article has been viewed 146,103 times.
Learn more...
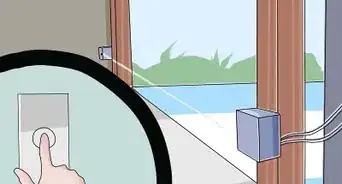
If your garage door has trouble closing on sunny days, it might be because the sensors are getting blinded by the light. Moving your sensors out of the sun can be a pain, especially since sunlight changes angles and directions throughout the day. Instead, you can use a few simple DIY hacks to block the sun from your sensors so your garage door closes automatically.
Steps
Cardboard Tube
-
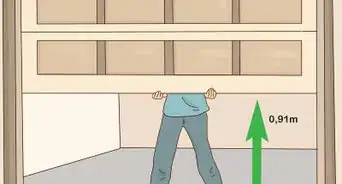
1Cut a toilet paper tube so it’s 2 to 4 in (5.1 to 10.2 cm) long. You can also use a paper towel tube, a wrapping paper tube, or a plastic wrap tube. Use a knife to trim it down until it's just a bit longer than your sensor.[1]
- If the tube is too long, it could block your sensor completely.
-
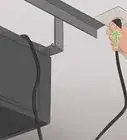
2Slide the tube over the electric eye. Situate the tube so it’s centered over the electronic eye. If your tube has bent at all, straighten it out so it doesn’t block the sensor completely.[2]
- The sensor is usually near the bottom of the garage door track close to the opening of your garage.
Advertisement -
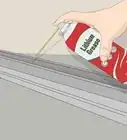
3Tape the tube to the back of the sensor. If you’re worried about your cardboard tube wiggling around, grab a few pieces of duct tape and secure it in place. Again, make sure the tube isn’t blocking the path of the sensor so your garage door still works.[3]
- The tube will keep the light from blinding the sensor while still leaving room in front for it to work!


PVC Pipe
-
1Cut a piece of 1 in (2.5 cm) wide PVC pipe to about 2 in (5.1 cm) long. Mark the length of your pipe with a pencil, then use a hacksaw to cut the excess off. You want the pipe to just barely stick out over the sensor so it doesn’t block it completely.[4]
- You can find PVC pipes in the plumbing section of most hardware stores.
- PVC pipes are ideal for snowy or rainy conditions, since they won’t get soggy like a cardboard tube.
-
2Drill 2 to 4 holes around the edge of one side of the pipe. The holes only need to be big enough to fit a zip tie in, so you can use a size 11 drill bit (or whatever you have on hand). Use your drill to make a few holes near the edge of one side of the pipe.[5]
- The zip ties will connect the pipe to your sensor, so it’s super important to make these holes.
-
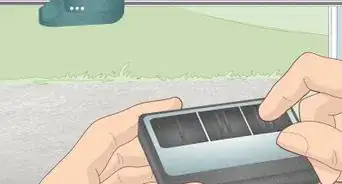
3Slide the pipe over your sensor. Make sure the pipe is centered over the sensor so it doesn’t block it. If you need to double check, look for a green light on your sensor.[6]
- If the sensors are misaligned, they’ll flash red.
-
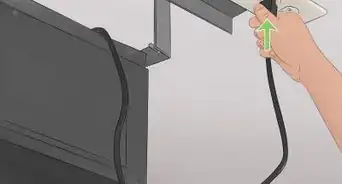
4Attach the pipe to the sensor with zip ties. Slide a zip tie into one of the holes on your pipe, then connect it around the back of the sensor box. Use 1 to 3 more zip ties to make sure your PVC pipe stays on the sensor for good.[7]
- If you need to remove the pipe for whatever reason, just cut the zip ties to take it off.
- Check on the pipe periodically to make sure it hasn’t slipped down and blocked the sensor by accident.


Sun Shield
-
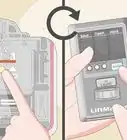
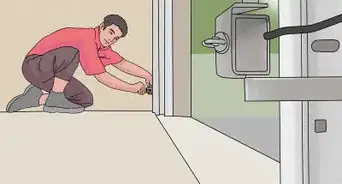
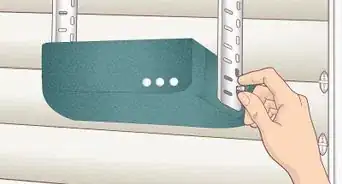
1Unscrew the wing nut from your garage door sensor. The wing nut is on the outside of your sensor, so you can easily reach it with your hands. Turn it counterclockwise until the nut comes off entirely, then set it in a safe spot so you don’t lose track of it.[8]
- Sun shields are usually small black boxes made of cardboard, so they won’t stick out or detract from the overall look of your garage. You can buy sun shields online or at most hardware stores.
- When you purchase a sun shield, make sure you get one for your sensor’s make and model. You can find that info on your garage door user manual.
-
2Fold the sun shield to make a box around the sensor. Take your sun shield out of the packaging and take a look at the instructions. Slide the short flap of the sun shield onto the right side of the sensor, then fold the long flap over the sensor to create a small box. Align the hole of the sun shield with the bolt sticking out of the sensor.[9]
- You can find sun shields at most hardware stores or from your garage door company.
-
3Slide the shield in place, then replace the wing nut. Make sure the sensor can still peek through the hole in the sun shield. You’ll know the shield is in place when you can see a small, hollow box on one end of the sensor. Grab the wing nut and turn it clockwise on the bolt to keep the sun shield in place.[10]
- You can put sun shields on both of your sensors or just one.
-
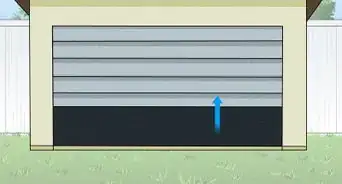
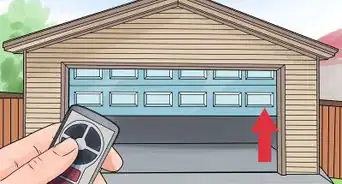
4Adjust your sensors until the green light shows. If your sensors are misaligned, they won’t work. Wiggle the sensor up and down just slightly until the green light shines to indicate that it’s aligned.[11]
- Now your garage door sensors are free from being blinded by the sun!


Community Q&A
-
QuestionHow do I secure the door opener from manually opening it?
 Community AnswerOnly if you have indoor access to the garage, should you tamper with the manual override. If so, then you simply detach the override lock cable. This can be done at the track arm or others require removal from the lock cylinder.
Warnings
- Always make sure your sensors are aligned before using your garage door.⧼thumbs_response⧽
Things You’ll Need
Cardboard Tube
- Cardboard tube
- Knife
- Duct tape
PVC Pipe
- PVC pipe
- Hacksaw
- Drill
- Zip ties
Sun Shield
- Garage door sensor sun shield


References
- ↑ https://www.youtube.com/watch?v=-vrpGpS6SFQ&feature=youtu.be&t=174
- ↑ https://www.youtube.com/watch?v=sVefTjULIQI&feature=youtu.be&t=39
- ↑ https://www.youtube.com/watch?v=-vrpGpS6SFQ&feature=youtu.be&t=221
- ↑ https://www.youtube.com/watch?v=-vrpGpS6SFQ&feature=youtu.be&t=519
- ↑ https://www.youtube.com/watch?v=tmZkcc-7ahk&feature=youtu.be&t=40
- ↑ https://www.youtube.com/watch?v=-vrpGpS6SFQ&feature=youtu.be&t=547
- ↑ https://www.youtube.com/watch?v=-vrpGpS6SFQ&feature=youtu.be&t=576
- ↑ https://www.youtube.com/watch?v=iFJd5n6MEX0&feature=youtu.be&t=8
- ↑ https://www.youtube.com/watch?v=yFL1XWc7Kwo&feature=youtu.be&t=123
About This Article