This article was co-authored by Art Fricke. Art Fricke is a home renovation and repair specialist and the owner of Art Tile & Renovation based in Austin, Texas. With over 10 years of experience, he specializes in bathroom and kitchen renovations. Art focuses on a single contractor approach to customized renovation work, and performs projects such as installing custom tile showers, fixing tiled shower leaks, replacing cracked tiles, and installing floor and wall tile.
There are 7 references cited in this article, which can be found at the bottom of the page.
This article has been viewed 124,960 times.
Adding a backsplash to your kitchen is a great way to create atmosphere with color and texture. Thankfully, the process of applying a backsplash is easy. Here is the best way to apply a backsplash to your kitchen, using both traditional tiles and a peel-and-stick method.
Steps
Installing a Traditional Tile Backsplash
-
1Get all of your supplies. Installing a traditional tile backsplash in your kitchen requires several different items. Make sure you are fully prepared before starting your project.
- The materials you need to have prepared before you begin include your tile, tile adhesive, and grout.
- Make sure you have the necessary tools, including a notched trowel, tape measure, sponge, level, utility knife, and a tile cutter. You may need spacers for tiles that are not attached together in sections.
- You may want to use something to cover your countertops during this process to keep them clean.
-
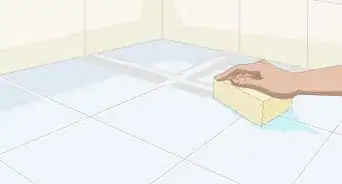
2Clean your walls. In order for the tile adhesive to stick the walls, they must be free of any dust or grease.[1] Wipe them down with a damp rag, and give enough time for them to completely dry.[2]Advertisement
-
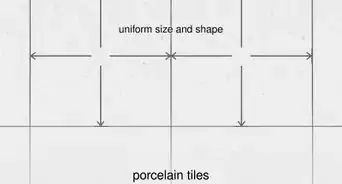
3Measure your space. It is important to make sure you get a good measurement so you know exactly what size you should cut your tiles.[3]
- Choose a stopping point, either directly below your cabinets or at an arbitrary point on the wall.
- Make sure that you have enough tiles to fill the measured space, as well as a few extras for precaution.
- Use a level and straight edge to mark your stopping point along the wall.
-
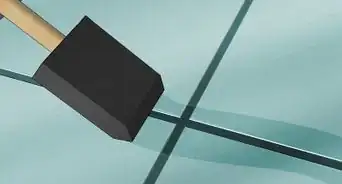
4Apply the tile adhesive. Use your trowel to smooth the tile adhesive across the wall, working in small sections. If you apply too much at once, it will begin to dry before you get a chance to attach the tiles.[4]
- Always start applying your tiles from the bottom center, and working outwards from there.
- Don’t apply the tile adhesive to the backs of the tiles, as it will be more difficult to attach them to the wall.
-
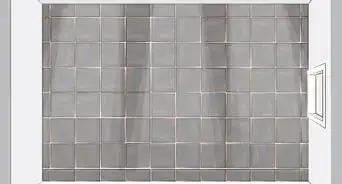
5Firmly attach your tiles. Press them into the tile adhesive on the wall, using a level to make sure they are even. Push them a few times to make sure they are secured to the wall.[5] [Image:Install a Kitchen Backsplash Step 5.jpg|center]]
- If your tiles are not attached together in sections, use spacers to make sure they are all evenly spaced.
- Wiggle the tile a little bit against the wall to ensure suction with the adhesive.
-
6Completely cover your wall. Attach all remaining tiles to your wall using this method, until you reach the edges. Before you stick your tiles to the edges of the wall, cut off any excess or oddly shaped corners to make sure the fit is perfect.[6]
- Always cut out holes for outlets or odd edges prior to attaching the tile to the wall.
- Any empty spaces can be filled with pieces of spare tile you cut to size with your tile cutter or utility knife.
-
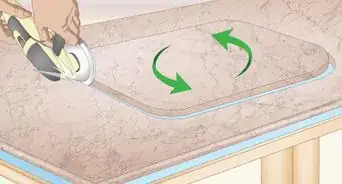
7Apply grout. Use your (cleaned) trowel to spread grout evenly across the tiles. Don’t worry about covering the tiles, as that is what is supposed to happen. You will remove the unnecessary grout later.[7]
- Spread the grout at a 45 degree angle in a sweeping pattern.
- Allow a few minutes for the grout to set, and then use a damp sponge to clean off excess grout. All of the cracks between the tiles should be filled, while the remaining tiles should be cleaned of all unnecessary grout.[8]
-
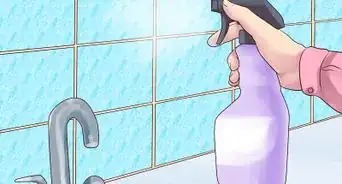
8Wipe down tiles. After the grout has completely dried, clean it off again with a dry cloth.
-
9
-
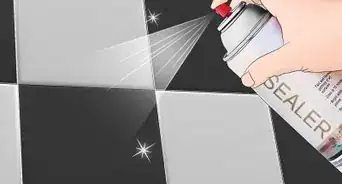
10Enjoy your new tile backsplash! Once you have completed all the installation steps, managing your new backsplash is easy. Wipe it down occasionally with a generic kitchen or glass cleaner to keep your backsplash looking its best.


Applying a Peel-and-Stick Tile Backsplash
-
1Gather your supplies. You will need to have your peel-and-stick tiles prepared, a tile cutter or utility knife, and level. Pretty basic, huh? If you tiles are not stuck together on sheets, you may also need spacers to make sure they are all evenly spread.
-
2Clean your walls. The sticky backings of your tiles can’t adhere to walls if they are dusty or greasy.[11] Use a damp rag to completely wipe down walls, and then let them dry completely.
-
3Measure your space. It is important to make sure you get a good measurement so you know exactly what size you should cut your tiles.
- Choose a stopping point, either directly below your cabinets or at an arbitrary point on the wall.
- Make sure that you have enough tiles to fill the measured space, as well as a few extras for precaution.
- Use a level and straight edge to mark your stopping point along the wall.
-
4Stick your tiles to the wall. Peel the backing off the tiles, and stick them to your desired location. Always start from the bottom center of the wall and work your way out.[12]
- Firmly press the tiles each time you stick them to the wall, to make sure they are firmly adhered.
- Hold a straight edge or level to the sides of your tile as your press, to make sure that they don’t shift out of alignment.
-
5Finish attaching tiles. Work your way across the wall, until the entirety of your desired space is filled up. Cut any pieces to fit outlet holes or edges and corners before you attach them to the wall.
-
6Enjoy your new tile backsplash. To keep it looking its best, wipe the backsplash clean with water or a generic kitchen cleaner occasionally.


Community Q&A
-
QuestionDoes the countertop need to be installed before tiling the backsplash?
 DonaganTop AnswererYes. You will want the backsplash to extend a bit over the counter.
 -
QuestionIf I have a textured wall of semi-gloss paint, do I need to sand it or do anything besides wash it?
 Community AnswerYou need to sand it down with the softest sanding brush possible.
 -
QuestionWhat type of adhesive should I use?
 Community AnswerThe adhesive is already on the peel and stick tile. There is no need to use additional adhesive.


References
- ↑ Art Fricke. Home Renovation & Repair Specialist. Expert Interview. 1 July 2020.
- ↑ https://www.thisoldhouse.com/how-to/how-to-install-simple-tile-backsplash
- ↑ https://www.thisoldhouse.com/how-to/how-to-install-simple-tile-backsplash
- ↑ https://www.thisoldhouse.com/how-to/how-to-install-tile-backsplash
- ↑ https://www.thisoldhouse.com/how-to/how-to-install-tile-backsplash
- ↑ https://www.popularmechanics.com/home/interior-projects/a8730/kitchen-backsplash-tile/
- ↑ https://www.bobvila.com/articles/how-to-grout-tile/
- ↑ Art Fricke. Home Renovation & Repair Specialist. Expert Interview. 1 July 2020.
- ↑ Art Fricke. Home Renovation & Repair Specialist. Expert Interview. 1 July 2020.
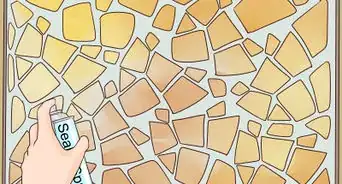
- ↑ https://www.bobvila.com/articles/how-to-seal-grout/
- ↑ Art Fricke. Home Renovation & Repair Specialist. Expert Interview. 1 July 2020.
- ↑ https://www.epicurious.com/expert-advice/how-to-make-a-diy-kitchen-backsplash-article
About This Article

To install a peel-and-stick kitchen backsplash, start by wiping down your walls with a damp rag to help the tiles stick to the surface. Once the walls are dry, measure the area you want to cover and draw a stopping point on the wall to show where the tiles should stop. Then, peel the backing off your tiles and stick them to the wall, beginning at the bottom. Continue sticking tiles to your wall until you've covered the entire area, cutting them to size if necessary. For tips on how to keep your backsplash clean, read on!