wikiHow is a “wiki,” similar to Wikipedia, which means that many of our articles are co-written by multiple authors. To create this article, 26 people, some anonymous, worked to edit and improve it over time.
This article has been viewed 205,903 times.
Learn more...
SSL certificates are how websites and services earn validation for the encryption on the data sent between them and their clients. They can also be used to verify that you are connected with the service you wish to be connecting with (e.g., am I really signing into my email provider or is this a fraudulent clone?). If you are providing a website or service that requires a secure connection, you may wish to install an SSL certificate to validate your trustworthiness. Read on after the jump to learn how.
Steps
Using Microsoft Internet Information Services (IIS)
-
1Generate a Certificate Signing Request (CSR). Before you can purchase and install an SSL certificate, you will need to generate a CSR on your server. This file contains your server and public key information, and is required to generate the private key. You can create a CSR in IIS 8 with just a few clicks of the mouse:[1]
- Open the Server Manager.
- Click Tools and select Internet Information Services (IIS) Manager.
- Select the workstation you are installing the certificate on under the Connections list.
- Open the Server Certificates tool.
- Click the Create Certificate Request link in the upper-right corner, under the Actions list.
- Fill in the information in the Request Certificate wizard. You will need to enter your two-digit country code, the state or province, city or town name, full company name, section name (i.e. IT or Marketing), and the common name (typically the domain name).
- Leave the “Cryptographic service provider” set to default.
- Set “Bit length” to “2048”.
- Name the certificate request file. The file name doesn't matter, as long as you can find it amongst your files.
-
2Order your SSL certificate. There are several services online that offer SSL certificates. Make sure to only order from a reputable service, since you and your customer’s security is at stake. Popular services include DigiCert, Symantec, GlobalSign, and more. The best service for you will vary depending on your needs (multiple certificates, enterprise solutions, etc.).
- You will need to upload your CSR file to the certificate service when you order it. This will be used to generate the certificate for your server. Some providers will have you copy the contents of the CSR file, while others will have you upload the file itself.
Advertisement -
3Download your certificates. You will need to download the Intermediate Certificates from the service that you purchased your certificates from. You will receive your Primary Certificate via email or through the customer area of the website.
- Rename the Primary Certificate to “yoursitename.cer”.
-
4Open the Server Certificates tool in IIS again. From here, click the “Complete Certificate Request” link underneath the “Create Certificate Request” link you clicked to generate a CSR.
-
5Browse for the certificate file. Once you’ve located it on your computer, you’ll need to apply a “Friendly name” to it, which is the quick name for identifying the certificate on your server. Store the certificate in the “Personal” store. Click OK to install the certificate.
- Your certificate should appear on the list. If it does not, ensure that you are using the same server that you generated the CSR on.
-
6Bind the certificate to your website. Now that the certificate has been installed, you’ll need to bind it to the website that you want to protect. Expand the “Sites” folder in the Connections list, and then click on the website.
- Click the Bindings link in the Actions list.
- Click the Add button in the Site Bindings window that appears.
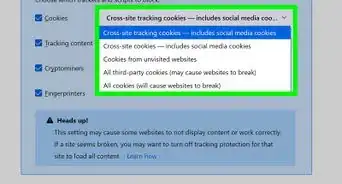
- Select “https” from the “Type” dropdown menu, and select your installed certificate from the “SSL certificate” dropdown menu.
- Press OK and then Close.
-
7Install the Intermediate Certificates. Find the Intermediate Certificates that you downloaded from the certificate provider. Some providers provide more than one certificate that needs to be installed, while others only have one. Copy these certificates to a dedicated folder on your server. [2]
- Once the certificates have been copied to the server, double-click it to open the Certificate Details.
- Click the General tab. Click the “Install Certificate” button at the bottom of the window.
- Select “Place all certificates in the following store” and then browse for the Local store. It can be found by checking the “Show physical stores” box, selecting Intermediate Certificates, and then clicking Local Computer.
-
8Restart IIS. In order to start distributing certificates, you’ll need to restart your IIS server. To restart IIS, click Start and then select Run. Type “IISREset” and then press Enter. The Command Prompt will appear and display the status of the IIS restart.[3]
-
9Test your certificate. Use various web browsers to test that your certificate is working properly. Connect to your website using “https://” to force the SSL connection. You should see the padlock icon in your address bar, usually with a green background.


Using Apache
-
1Generate a Certificate Signing Request (CSR). Before you can purchase and install an SSL certificate, you will need to generate a CSR on your server. This file contains your server and public key information, and is required to generate the private key. You can generate a CSR directly from the Apache command line:
- Start the OpenSSL utility. This can usually be found at /usr/local/ssl/bin/
- Create a key pair by entering the following command:
openssl genrsa –des3 –out www.mydomain.com.key 2048
- Create a passphrase. This passphrase will need to be entered whenever you interact with your keys.
- Start the CSR generation process. Enter the following command when prompted to create the CSR file:
openssl req –new –key www.mydomain.com.key –out www.mydomain.com.csr - Fill out the requested information. You will need to enter your two-digit country code, the state or province, city or town name, full company name, section name (i.e. IT or Marketing), and the common name (typically the domain name).
- Create the CSR file. Once the information has been entered, run the following command to generate the CSR file on your server:[4]
openssl req -noout -text -in www.mydomain.com.csr
-
2Order your SSL certificate. There are several services online that offer SSL certificates. Make sure to only order from a reputable service, since you and your customer’s security is at stake. Popular services include DigiCert, Symantec, GlobalSign, and more. The best service for you will vary depending on your needs (multiple certificates, enterprise solutions, etc.).
- You will need to upload your CSR file to the certificate service when you order it. This will be used to generate the certificate for your server.
-
3Download your certificates. You will need to download the Intermediate Certificates from the service that you purchased your certificates from. You will receive your Primary Certificate via email or through the customer area of the website. Your key should look similar to this:
-----BEGIN CERTIFICATE-----

[Encoded Certificate]

-----END CERTIFICATE-----
- If the certificates are in a text file, you will need to change it to a .CRT file before uploading it
- Check the keys that you download. There should be 5 dashes “-” on either side of the BEGIN CERTIFICATE and END CERTIFICATE lines. Also ensure that there are no extra spaces or line breaks inserted into the key.
-
4Upload the certificates to your server. The certificates should be put in a folder dedicated to certificates and key files. An example location would be /usr/local/ssl/crt/. All of your certificates need to be in the same folder.
-
5Open the “httpd.conf” file in a text editor. Some versions of Apache have an “ssl.conf” file for the SSL certificates. Only edit one of the two if you have both. Add the following lines to the Virtual Host section:
SSLCertificateFile /usr/local/ssl/crt/primary.crt
SSLCertificateKeyFile /usr/local/ssl/private/private.key
SSLCertificateChainFile /usr/local/ssl/crt/intermediate.crt
- Save the changes to the file once you are finished. Re-upload the file if necessary.
-
6Restart your server. Once the file has been changed, you can start using your SSL certificate by restarting your server. Most versions can be restarted by entering the following commands:
apachectlp stop
apachectl startssl
-
7Test your certificate. Use various web browsers to test that your certificate is working properly. Connect to your website using “https://” to force the SSL connection. You should see the padlock icon in your address bar, usually with a green background.[5]


Using Exchange
-
1Generate a Certificate Signing Request (CSR). Before you can purchase and install an SSL certificate, you will need to generate a CSR on your server. This file contains your server and public key information, and is required to generate the private key.
- Open the Exchange Management Console. You can find this by clicking Start, clicking Programs, selecting Microsoft Exchange 2010, and then clicking Exchange Management Console.
- Once the program loads, click the Manage Databases link in the center of the window.
- Select “Server Configuration”. This is located in the left frame. Click the “New Exchange Certificate” link in the Actions list on the right side of the screen.
- Enter a memorable name for the certificate. This is for your own convenience and reference, and will not affect the certificate.
- Enter your configuration information. Exchange should automatically select the proper services, but if it does not you can set them yourself. Make sure all of the services you need protected are selected.
- Enter in your organization information. You will need to enter your two-digit country code, the state or province, city or town name, full company name, section name (i.e. IT or Marketing), and the common name (typically the domain name).
- Enter a location and name for the CSR file that will be generated. Make note of this location for the certificate ordering process.
-
2Order your SSL certificate. There are several services online that offer SSL certificates. Make sure to only order from a reputable service, since you and your customer’s security is at stake. Popular services include DigiCert, Symantec, GlobalSign, and more. The best service for you will vary depending on your needs (multiple certificates, enterprise solutions, etc.).
- You will need to upload your CSR file to the certificate service when you order it. This will be used to generate the certificate for your server. Some providers will have you copy the contents of the CSR file, while others will have you upload the file itself.
-
3Download your certificates. You will need to download the Intermediate Certificates from the service that you purchased your certificates from. You will receive your Primary Certificate via email or through the customer area of the website.
- Copy the certificate file that you receive to your Exchange server.
-
4Install the Intermediate certificate. In most cases, you can copy the provided certificate data into a text document and save it as “intermediate.cer”. Open the Microsoft Manage Console (MMC) by clicking Start, selecting Run, and then typing in “mmc”.
- Click File and select Add/Remove Snap In.
- Click Add, select Certificates, and then click Add again.
- Select Computer Account and then click Next. Choose Local Computer for the storage location. Click Finish and then OK. This will return you to the MMC.
- Select Certificates in the MMC. Choose “Intermediate Certification Authorities” and then select Certificates.
- Right-click on Certificates, choose All Tasks, and then choose Import. Use the wizard to load the Intermediate Certificates that you obtained from your certificate provider.
-
5Open the “Server configuration” section in the Exchange Management Console. See Step 1 for information on how to open it. Click your certificate in the center of the window and then click the “Complete Pending Request” link in the Actions list.
- Browse for your Primary certificate file and then click Complete. Once the certificate has been loaded, click Finish.
- Ignore any errors that say the process failed; this is a common bug.
-
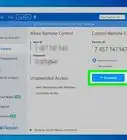
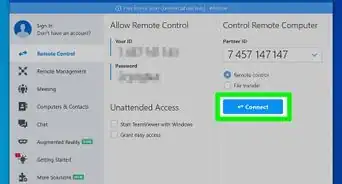
6Enable the certificate. Once the certificate has been installed, click the “Assign Services to Certificate” link towards the bottom of the Actions list.
- Select your server from the list that appears and click Next.
- Select which services you want to protect with the certificate. Click Next, then Assign, and then Finish.


Using cPanel
-
1Generate a Certificate Signing Request (CSR). Before you can purchase and install an SSL certificate, you will need to generate a CSR on your server. This file contains your server and public key information, and is required to generate the private key.
- Login to cPanel. Open the control panel and look for the SSL/TLS Manager.
- Click the “Generate, view, upload, or delete your private keys” links.
- Scroll down to the “Generate a New Key” section. Enter in your domain name, or select it from the drop-down menu. Select 2048 for “Key Size”. Click the Generate button.
- Click “Return to SSL Manager”. From the main menu, select the “Generate, view, or delete SSL certificate signing requests” link.
- Enter in your organization’s information. You will need to enter your two-digit country code, the state or province, city or town name, full company name, section name (i.e. IT or Marketing), and the common name (typically the domain name).
- Click the Generate button. Your CSR will be displayed. You can copy this and enter it into your certification order form. If the service requires the CSR as a file, copy the text into a text editor and save it as a .CSR file.
-
2Order your SSL certificate. There are several services online that offer SSL certificates. Make sure to only order from a reputable service, since you and your customer’s security is at stake. Popular services include DigiCert, Symantec, GlobalSign, and more. The best service for you will vary depending on your needs (multiple certificates, enterprise solutions, etc.).
- You will need to upload your CSR file to the certificate service when you order it. This will be used to generate the certificate for your server. Some providers will have you copy the contents of the CSR file, while others will have you upload the file itself.
-
3Download your certificates. You will need to download the Intermediate Certificates from the service that you purchased your certificates from. You will receive your Primary Certificate via email or through the customer area of the website.
-
4Open the SSL Manager menu again in cPanel. Click the “Generate, view, upload, or delete SSL certificates” link. Click the Upload button to browse for the certificate that you received from the certificate provider. If the certificate came as text, paste it into the box in the browser.
-
5Click the “Install SSL Certificate” link. This will finalize the installation of the SSL certificate. Your server will restart, and your certificate will begin being distributed.
-
6Test your certificate. Use various web browsers to test that your certificate is working properly. Connect to your website using “https://” to force the SSL connection. You should see the padlock icon in your address bar, usually with a green background.


-Step-7.webp)


References
- ↑ http://www.entrust.net/knowledge-base/technote.cfm?tn=8712
- ↑ http://www.sslshopper.com/article-installing-an-ssl-certificate-in-windows-server-2008-iis-7.0.html
- ↑ http://www.digicert.com/ssl-certificate-installation-microsoft-iis-8.htm
- ↑ https://support.globalsign.com/customer/portal/articles/1221018
- ↑ http://www.digicert.com/ssl-certificate-installation-apache.htm
About This Article
1. Generate a CSR on your server.
2. Order a certificate.
3. Download the certificate.
4. Upload the certificate to the server.
5. Enter the cert info in httpd.conf or ssl.conf.
6. Restart Apache.