This article was co-authored by Grant Wallace and by wikiHow staff writer, Hunter Rising. Grant Wallace is a Landscaper and Owner of Grantlanta Lawn in Atlanta, Georgia. With over seven years of experience, he specializes in lawn maintenance and landscape installation. In 2012, he earned his BA from the University of West Georgia. Grant has been profiled in Shoutout Atlanta, Canvas Rebel, and Voyage ATL.
There are 7 references cited in this article, which can be found at the bottom of the page.
This article has been viewed 44,038 times.
Concrete slabs have a variety of uses, including home foundations, walkways, and patios. If you pour your concrete on uneven ground, the slab may look crooked or get damaged as it dries. Luckily, there are ways to smooth the surface in a few hours with some basic tools and a bit of hard work. As long as you take time to flatten the ground and make a solid base, your slab will last for a long time without sinking or cracking.
Steps
Marking the Slab Location
-
1Contact utility companies to check for underground lines. Call your electric, gas, and water companies and let them know where you plan on digging. The utility companies will send someone to your home to check for any pipes or lines and let you know if it’s safe to dig. If there are pipes or lines where you want to put the slab, you may need to find a new location to put it so you don’t cause any damage.[1]
- If you live in the United States, you can call 811 to connect directly to your local utility companies.
-
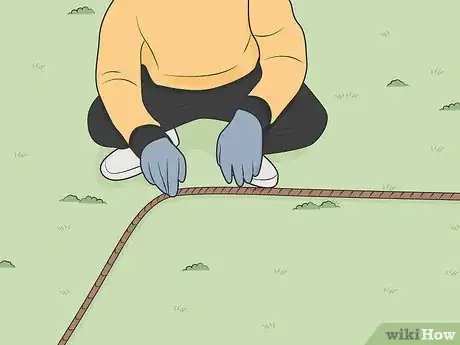
2Plan a rough outline for your slab with rope. Once you choose a location, lay a rope down on the ground to mark 1 side of the slab. Bend the rope whenever you reach a corner to continue outlining the slab’s shape. Keep laying out the length of rope until you have the entire slab roughed in.[2]
- If you don’t have rope, you can also set boards on the ground to make your outline.
- You may also spray paint the ground directly to draw the perimeter of the slab.
Advertisement -
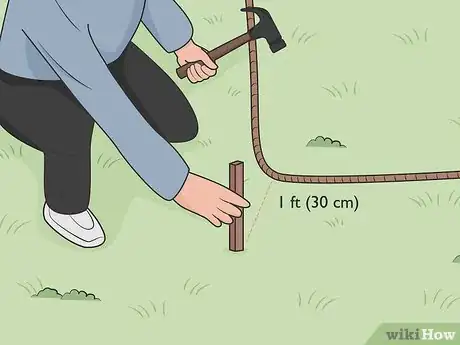
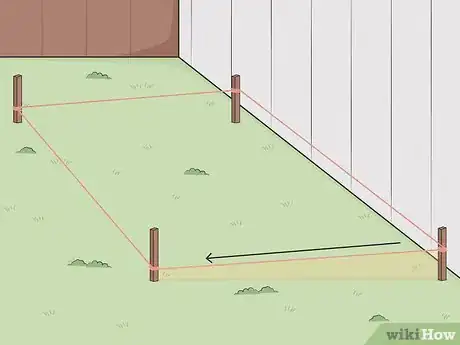
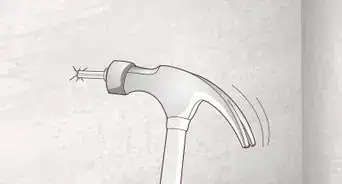
3Drive 2 stakes 1 ft (30 cm) out from each corner of the outline. Hold a wooden stake in one of the corners formed by the rope. Move the stake 1 foot (30 cm) out from the corner so it stays in line with one side of the outline. Use a hammer to drive the stake into the ground so about 8 inches (20 cm) sticks out of the ground. Hold another stake in the same corner and move it in line with the perpendicular side of the outline until it’s 1 foot (30 cm) away. When you’re finished, the corner of the rope and the 2 stakes should form a triangular shape. Place 2 more stakes in the other corners of the outline so there are 8 total.[3]
- After placing the stakes, you can move the rope.
- Avoid putting the stakes directly where you want the corners of your slab since you’ll need to level the ground extending past the slab to ensure it doesn’t sink.
- If you have corners of the slab that butt up against your home, only place 1 stake in the corner so it’s in line with the side perpendicular to your home.
-
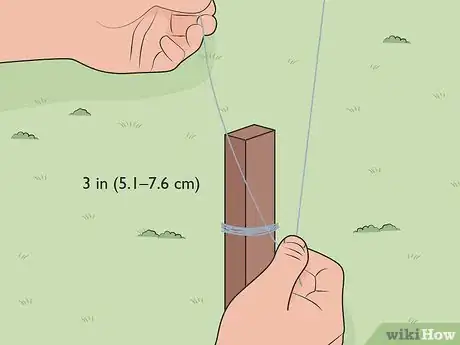
4Tie mason’s string around the stakes to form your slab’s perimeter. Measure 2–3 in (5.1–7.6 cm) down from the top of a stake and tie a piece of mason’s string around it. Pull the string straight toward the stake that’s directly across from it to mark off the side of your slab. Cut the piece of string and tie it tightly around the stake. Use a new piece of string to connect the stakes on the next side of the slab so it intersects the first piece you tied. Wherever the 2 strings cross one another will be the corner of your slab. Keep tying the strings between your stakes until you’re surrounded the entire perimeter.[4]
- Mason’s string is braided and thicker than a regular string to help it stay straight. You can buy mason’s string from your local hardware store.
- Make sure you tie the string at the same height on each stake so the string stays level. If it helps you, draw lines that are 2–3 inches (5.1–7.6 cm) down from the top of each stake so you have a reference mark.
-
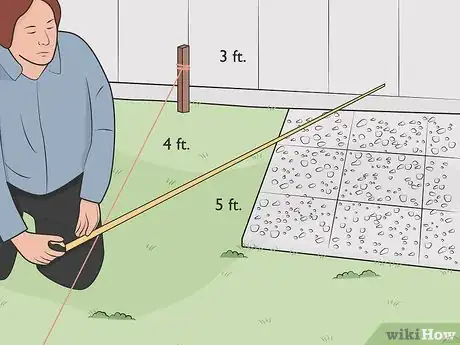
5Check if the strings are perpendicular with a 3-4-5 triangle. Start where the strings intersect in a corner. Measure out 3 feet (0.91 m) along 1 side and 4 feet (1.2 m) along the other and mark the locations. Then measure between the 2 marks. If you get exactly 5 feet (1.5 m), then your corner is square. Otherwise, reposition the stakes until the marks are 5 feet (1.5 m) apart.[5]
- This works due to the Pythagorean theorem, which states the squares of a right triangle’s sides total the square of the longest side. For example, if the sides of the triangle are 3 and 4 feet (0.91 and 1.22 m), then 32 + 42 = 25. Then, find the square root of 25 to determine the longest side is 5 feet (1.5 m).
Variation: If you don’t want to measure, you can also hold a speed square in each corner to see if it forms a 90-degree angle.
-
6Slope the strings away from your foundation if the slab connects to your home. Avoid keeping the slab flat if it’s directly adjacent to your home since water could pool on the surface and damage your home. Find the length of the slab’s side in feet and multiply your measurement by ⅛ to find out the slope in inches. Go to the 2 stakes that are furthest from your home and move the strings down by the measurement you found.[6]
- For example, if the side of your slab is 12 feet (3.7 m), then multiply 12 x ⅛ = 1 ½. Move the string on the stake down by 1 1⁄2 inches (3.8 cm).
- You do not have to slope slabs if they aren’t directly next to your home.
Excavating the Site
-
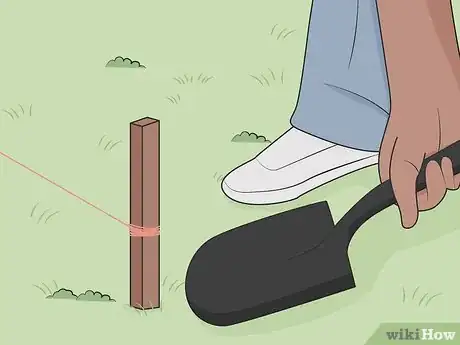
1Remove the grass and sod in the area between your stakes. Use a shovel or a hoe to cut through the surface so it’s easier to remove the grass. Scoop the clumps of grass out of the ground to expose the soft soil underneath. Leave about 4–6 inches (10–15 cm) of grass between your stakes and the edge of where you’re digging.[7]
- If you have dead spots in your yard, fill them in with the clumps of grass.
-
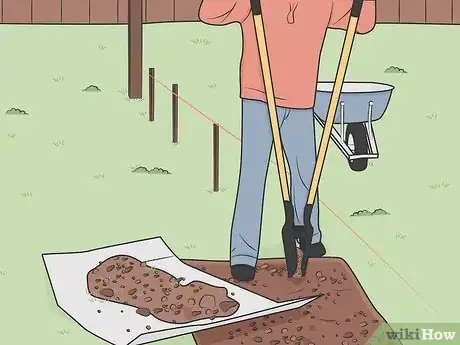
2Dig out the area until it’s 6–8 in (15–20 cm) below the strings. Start from the outer edges and work toward the middle of the hole so it’s easier to maintain a consistent depth. If there are tree roots or large stones in the soil, be sure to remove them from the hole as well. As you dig, measure from your strings to the ground to ensure it’s at least 6 inches (15 cm) deep.[8]
- Even though the strings mark the edges of your slab, dig 6 inches (15 cm) out from them. That way, you’ll create a larger base so the slab is less likely to get damaged as it ages.
- If you’re digging for a large slab, try renting an excavator instead so you don’t get as exhausted.
-
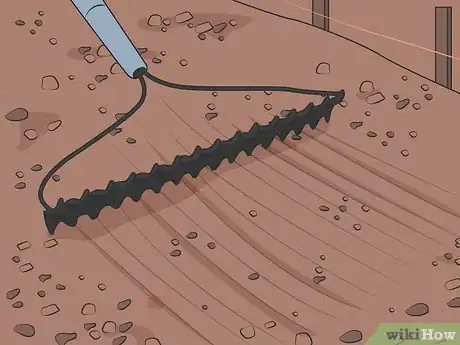
3Rake the soil to fill in any low spots. It’s normal if you have some high and low spots in the hole after digging with your shovel, so try to make the ground as level as you can. Flip the rake upside-down so the tines point up. Drag the rake across the soil to spread to help flatten raised areas and backfill any places you dug too deep.[9]
Variation: If your soil has a lot of clay, fill in the lowered areas with gravel, sand, or dry well-draining soil instead of spreading the clay.[10]
-
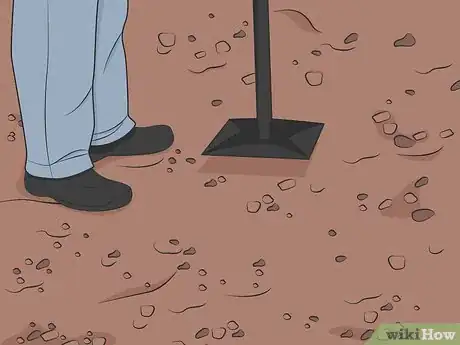
4Compact the soil with a tamper to smooth it out. A tamper is a long-handled flat piece of metal that’s used to compress soil and gravel. Set the tamper down in the corner of your hole and press down with your entire bodyweight. Move the tamper over so it overlaps the first section by 2–3 inches (5.1–7.6 cm) before pressing down again. Work your way across the entire hole until the ground has an even surface.[11]
- You can buy a hand tamper from your local yard-care or hardware store.
- You can also rent an electric plate tamper that vibrates and automatically compacts soil as you move it around.
- If you don’t tamp the soil, the slab may sink further into the ground as it settles.
-
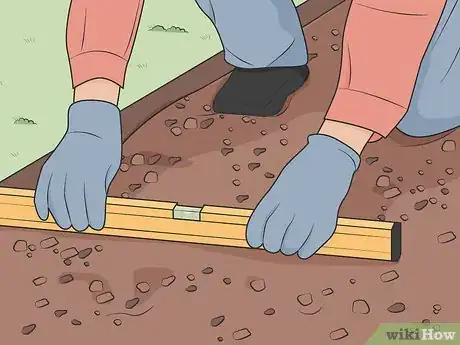
5Test if the soil is flat with a 4–6 ft (1.2–1.8 m) level. Lay your level on the ground so it’s parallel with the sides of your hole and check the bubble in the middle. If the bubble is in the middle, then the soil is level and ready for the next step. Otherwise, remove excess soil from raised areas and put it into any spots that are too deep. Move the level 1 foot (30 cm) over and continue checking across the length of the hole.[12]
- If you don’t want to get your level dirty, lay a straight board on the soil and set your level on top of it.
Filling in the Subbase
-
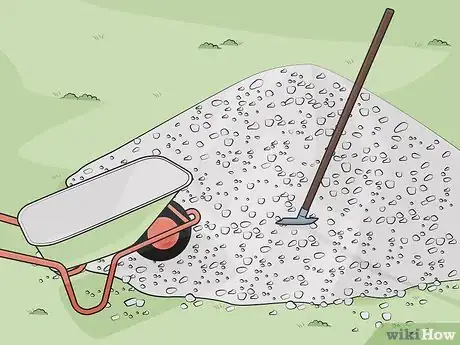
1Buy enough gravel or crushed stone to fill the hole 1⁄2 ft (0.15 m). Measure the length and width of your hole in feet or meters with a measuring tape so you know the dimensions. Multiply the dimensions by 1⁄2 foot (0.15 m) to find the total volume of gravel or crushed rock you need for the hole. Buy the crushed rock or gravel from a landscaping or outdoor supply store to use for your subbase.[13]
- For example, if your hole is 12 ft × 10 ft (3.7 m × 3.0 m), then your calculation would be: 12 x 10 x ½ = 60 cubic feet (1.7 m3) of gravel or crushed rock.
- Avoid too small or too large gravel. You want something that's small, thin, flat, and that compacts well together.
- Depending on how big and heavy the slab might be, it's a better idea to fill the whole with 1 ft (0.30 m) of rock.
Tip: If you need more gravel or crushed rock than you’re able to transport on your own, you can usually have it delivered to your home.
-
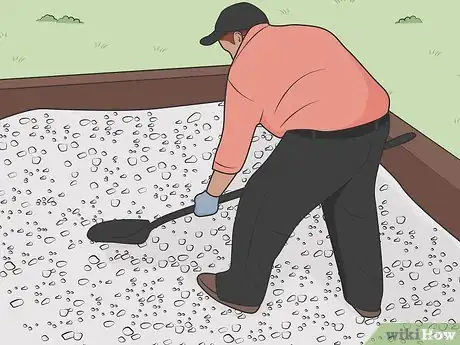
2Spread the gravel or crushed stone evenly in the hole. Fill a wheelbarrow with the gravel or crushed rock and pour it directly into the hole. Use a rake or a shovel to distribute the gravel throughout the hole so there aren’t any raised or lowered areas. Keep adding the gravel until it’s about 1–2 inches (2.5–5.1 cm) from the top of the hole.[14]
- Transporting gravel or crushed rock can be really tiring, so ask someone to help so you don’t get too exhausted. Otherwise, try to take frequent breaks so you can stretch and relax.
-
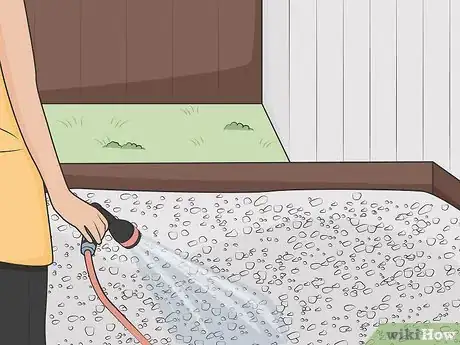
3Wet the gravel until it’s damp. Use a showerhead attachment on your garden hose and spray the gravel with it. Keep the hose moving at all times so water doesn’t puddle up in one area. Once you wet all of the gravel, turn off your hose and set it aside.[15]
- Wetting the gravel helps smaller pieces sink in deeper and makes the subbase more compact.
-
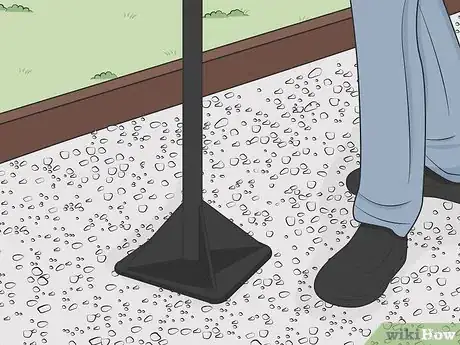
4Compress the subbase with your tamper to flatten it. Set your tamper on top of the gravel in the corner of your hole and press it down as hard as you can. Lift the tamper up and move it over so it overlaps the first section by about 2–3 inches (5.1–7.6 cm). Continue compacting the gravel throughout the entire hole until you don’t see footprints when you walk over it.[16]
- You can usually rent tampers from your local hardware store if you don’t have your own.
- If you don’t compact the subbase, then the gravel may shift or settle over time and cause the concrete to crack or sink.
- When you’re finished, there should be around 2–4 inches (5.1–10.2 cm) of space from the subbase surface to the top of your hole.
-
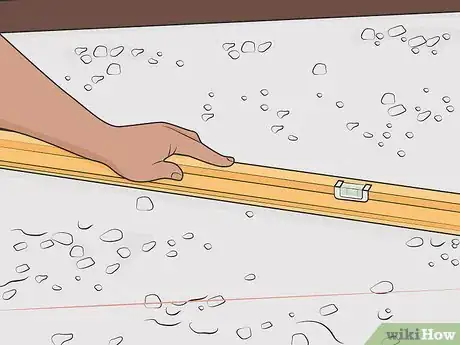
5Check the subbase with your level to see if there are high or low spots. Lay a scrap board across the gravel at the edge of your hole and set your level on top of it. Look at the bubble in the middle of the level and make sure it’s perfectly centered. If it’s not, then fill in and tamp more gravel to raise any lowered areas. Once you have the ground level, you’re ready to start pouring concrete.[17]
- Always check the gravel with a level because even though it may look flat, it may be more crooked than you think.
Warnings
- Avoid pouring your concrete slab directly onto the soil since it could sink or crack as it settles.[19]⧼thumbs_response⧽
Things You’ll Need
Marking the Slab Location
- Tape measure
- Rope
- Wood stakes
- Hammer
- Mason’s string
- Speed square
Excavating the Site
- Shovel
- Rake
- Hand tamper
- 4–6 ft (1.2–1.8 m) level
Filling in the Subbase
- Gravel or crushed rock
- Wheelbarrow
- Shovel
- Rake
- Hose
- Hand tamper
- 4–6 ft (1.2–1.8 m) level
Expert Interview
Thanks for reading our article! If you'd like to learn more about levelling a site, check out our in-depth interview with Grant Wallace.
References
- ↑ https://www.bobvila.com/articles/how-to-pour-concrete/
- ↑ https://www.bobvila.com/articles/diy-concrete-patio/
- ↑ https://www.bobvila.com/articles/diy-concrete-patio/
- ↑ https://cloud.chiefarchitect.com/1/pdf/magazine-articles/tips-for-pouring-a-concrete-slab.pdf
- ↑ https://www.bobvila.com/articles/diy-concrete-patio/
- ↑ https://www.bobvila.com/articles/how-to-pour-concrete/
- ↑ https://www.nytimes.com/1999/07/04/nyregion/home-clinic-considerations-for-building-a-concrete-slab.html
- ↑ https://www.bobvila.com/articles/diy-concrete-patio/
- ↑ https://youtu.be/fsGX746uYjY?t=37
- ↑ https://www.nytimes.com/1999/07/04/nyregion/home-clinic-considerations-for-building-a-concrete-slab.html
- ↑ https://www.bobvila.com/articles/how-to-pour-concrete/
- ↑ https://www.bobvila.com/articles/how-to-pour-concrete/
- ↑ https://www.bobvila.com/articles/how-to-pour-concrete/
- ↑ https://www.bobvila.com/articles/how-to-pour-concrete/
- ↑ https://www.nytimes.com/1999/07/04/nyregion/home-clinic-considerations-for-building-a-concrete-slab.html
- ↑ https://www.nytimes.com/1999/07/04/nyregion/home-clinic-considerations-for-building-a-concrete-slab.html
- ↑ https://www.bobvila.com/articles/how-to-pour-concrete/
- ↑ https://www.bobvila.com/articles/how-to-pour-concrete/
- ↑ https://www.bobvila.com/articles/diy-concrete-patio/

