This article was co-authored by wikiHow staff writer, Nicole Levine, MFA. Nicole Levine is a Technology Writer and Editor for wikiHow. She has more than 20 years of experience creating technical documentation and leading support teams at major web hosting and software companies. Nicole also holds an MFA in Creative Writing from Portland State University and teaches composition, fiction-writing, and zine-making at various institutions.
The wikiHow Tech Team also followed the article's instructions and verified that they work.
This article has been viewed 278,614 times.
Learn more...
This wikiHow teaches you how to use Microsoft Word to create a billing invoice. An invoice is an itemized list of products sold or services rendered that you can use to bill your clients. The simplest way to get started is to use one of Microsoft's free invoice templates, but you can also create one from a blank document.
Steps
Downloading a Free Template
-
1Open Microsoft Word for Windows or macOS. You'll find it in the Start menu under Microsoft Office on a PC, and in the Applications folder on a Mac.
- Use this method to quickly and easily build an invoice from a pre-made template. Templates save you the trouble of having to figure out what to include, but can be customized to fit your needs.
- You can also download free Word templates from the Microsoft Office template site. It's best not to download templates from other websites, as some may contain viruses.
-
2Locate the template search bar and select New. Opening Word should display the "New" screen automatically—this screen says "New" at the top and displays a search bar with the text "Search for online templates" inside.[1] If you don't see this search bar, click the File menu at the top-left, then select New to bring it up.Advertisement
-
3Type invoice into the Search bar and press ↵ Enter. A list of matching results will appear.
-
4Click an invoice to see a preview. A larger version of the invoice will appear, along with a brief description.
- If you decide not to use the template, click the X at the top of the window to return to the list.
- Some nice, simple options are Invoice (Timeless) and the one that's just called Invoice.
-
5Click Create to use the template. It's on the template's preview window. This downloads the template and opens it automatically.
-
6Replace the pre-filled information with your own. Each field typically contains some text meant to guide you through filling out the invoice. You can just click the mouse before a bit of information, press ← Backspace or Delete to get rid of what's there, and type your own information.
- In addition to filling out the blanks, you can also add more details to the invoice, such as a logo, extra field, or special lines and colors.
-
7Save your completed invoice. To do so, click the File menu, select Save As, and then save the file to the desired location on your computer. Once you've created the invoice, you can print or email it to your client(s).


Creating an Invoice from Scratch
-
1Open Microsoft Word for Windows or macOS. You'll find it in the Start menu under Microsoft Office on a PC, and in the Applications folder on a Mac.
- Use this method if you want to design an invoice from scratch. This method is best for those who are proficient at using Word features, including creating headers and tables.
- Before creating your own template, check out some online invoice examples before you begin. If your invoice is specific to your business, try searching for your type of business and the words "sample invoice" for specific examples (e.g., sample doctor invoice, freelance writer invoice sample).
-
2Click Blank Document on the "New" screen. If you don't see the "New" screen, click the File menu and select New now.
-
3Create an invoice heading. A heading that includes your business name, contact information, and the word "Invoice" should appear somewhere near the top of the document. You can design and stylize this information any way you wish, but try to keep it simple and consistent with your other business materials.
-
4Display the invoice date(s). The issuing and due date (if applicable) should be visible near the top of the document, preferably very close to the word "Invoice."
- To insert today's date quickly, click the INSERT tab at the top of Word, click Date & Time, and then choose a date format. Be sure to remove the check mark from the "Update automatically" box so the date doesn't change every time someone opens the file.[2]
-
5Number the invoice. Every invoice should contain a unique number (in a sequence) for your records. The sequence can be global (for all clients) or per client. You can add this to the header if you wish, but it can really be placed anywhere.[3]
- If each client will have their own invoice numbering sequence, you may want to include the client's name as part of the number (e.g., wikiHow1, wikiHow2 if the client is wikiHow).
-
6Add the client's address or contact information. Preface this with the word "To" (or something similar) that makes it obvious who is being charged.
- You may wish to address the invoice directly to a specific person at a company, or to the Accounts Payable department.
-
7Create an itemized list of products sold or services rendered. The best way to do this is by creating a table with several rows and named columns. See How to Create a Simple Table in Microsoft Word to get started with tables.
- Create columns for for quantity, item/service name or description, unit price/rate, and total price for the quantity purchased. Make sure to label these columns with headers so the client understands the charges.
-
8Display the total bill amount. This should appear right below the list of itemized charges, preferably in a bold-faced type so it's easy to see.
- If you're charging sales tax, you should display a subtotal of the itemized charges, with the tax listed beneath it, with the percentage to the left of the tax dollar amount, then the adjusted total below that.
- Double-check your math to make sure it's accurate.
-
9Include the terms of payment. You can display the terms of payment either above or below the billing information. Common terms of payment are "Due on receipt," "Due within 14 days," "Due within 30 days," or "Due within 60 days."
- You may also wish to include a memo at the bottom covering methods of payment, general information, or just a thank-you to the client for using your services.
-
10Save your completed invoice. To do so, click the File menu, select Save As, and then save the file to the desired location on your computer. Once you've created the invoice, you can print or email it to your client(s).


Community Q&A
-
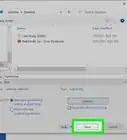
QuestionHow do I save an invoice as a document or a PDF instead of a template?
 Community AnswerIn Word, there is an option to 'Save As...' which is located in the File menu (or the Office button only in 2007). From there, you can choose to save as a regular document, or as a PDF if using 2007 or later. You can also change the file type while choosing a location to save your invoice.


References
About This Article

1. Open Word.
2. Click File.
3. Click New.
4. Type "invoice" into the search and press Enter.
5. Select a template and click 'Create.
6. Fill out the fields.
7. Print or email the invoice.