This article was co-authored by wikiHow Staff. Our trained team of editors and researchers validate articles for accuracy and comprehensiveness. wikiHow's Content Management Team carefully monitors the work from our editorial staff to ensure that each article is backed by trusted research and meets our high quality standards.
wikiHow marks an article as reader-approved once it receives enough positive feedback. In this case, 83% of readers who voted found the article helpful, earning it our reader-approved status.
This article has been viewed 169,602 times.
Learn more...
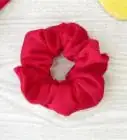
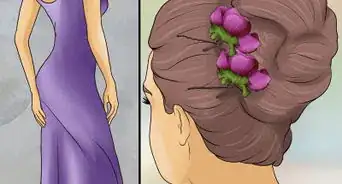
Coordinate outfits and gently hold your hair up with made-from-scratch scrunchies. Say bye-bye to hair breakage with a 90's throwback accessory that's easy to make in about 30 minutes. Sew some up by hand or use the help of a sewing machine. It’s perfect if you have extra fabric lying around.
Steps
Measuring and Cutting the Materials
-
1Measure and cut the elastic. Use elastic that’s between 1/2 inch (1.27 cm) and 1 inch (2.54 cm) wide. It should be about 4 inches (10 cm) long, or 1 inch (2.5 cm) more if your hair is extra thick.[1]
-
2Measure the fabric. Your final piece of fabric should be about 8 inches (20.32 cm) long and 4 inches (10 cm) wide if you use 4 inches (10 cm) of elastic. Add 2 inches (5.1 cm) onto the length if you added 1 inch (2.5 cm) to the elastic length. There's no need to adjust the width of the fabric. Fold the longest side of a rectangular piece of fabric at about 4 inches (10 cm) from the edge in order to cut along the fold.[2]Advertisement
-
3Cut along the edge of the fold with sharp scissors. Remember to always cut a little bit of extra fabric just in case you need more to sew. Feel free to cut past your initial measurements. Oftentimes you can take fabric in, but you can’t take it out once it’s cut.[3]


Sewing It Together
-
1Sew the fabric with the right sides facing each other. Fold the fabric you cut out in half lengthwise so that the printed or colored side is facing inwards. Pin and sew a straight line by hand or with a sewing machine, leaving about 1/2 inch (1.25 cm) seam allowance.
-
2Turn the fabric right side out. After you sew the long side of your fabric, you should have a tube with two open ends. Turn the tube so the printed sides are facing out.
-
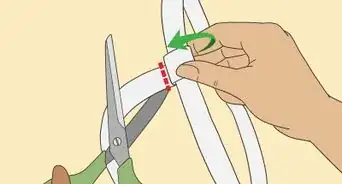
3Add the elastic. Attach a safety pin to one end of the elastic, and feed it through the fabric tube. Make sure to hold the other end of the elastic so it is not pulled through the tube. Pin the two ends of elastic together so that they overlap slightly.
-
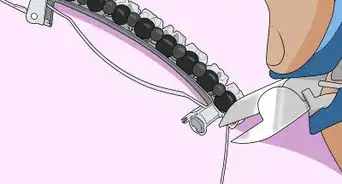
4Sew the elastic together. Sew stitches in the shape of a square so that the square covers the overlap, and then sew a diagonal through this box. The x-box stitch will ensure that the elastic will not come apart when you tug on it.[4]
- Hand sew or use a sewing machine for this part.
- Make sure not to sew the fabric to the elastic during this step.
-
5Sew the fabric ends together by hand. Use a whip stitch so the stitching will not be seen from the outside of the scrunchie. To make a whip stitch, first place the raw edges of the fabric on top of each other and fold the ends slightly inward. Sew stitches around the ends, alternating the stitch between each fabric end.[5]


Decorating and Using Your Scrunchie
-
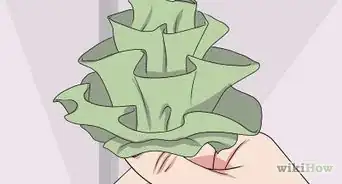
1Accessorize your scrunchie. Tie or sew coordinating ribbons, bows and other accessories to add unique flair to your scrunchie. Use bells for Christmas, dangling hearts for Valentine's Day or red and blue ribbon for 4th of July. Be creative by attaching silk flowers or sequins.[6]
-
2Test the strength. Carefully pull your hair into a loose ponytail. The scrunchie should be able to be pulled like a regular elastic. If the scrunchie breaks, don't be discouraged! Try making another, but focus on strongly sewing the elastic together.
-
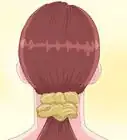
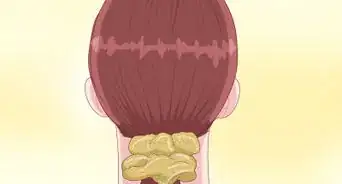
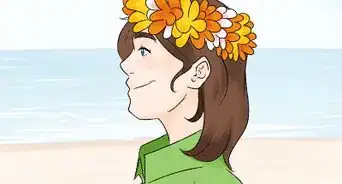
3Wear it! Sweep your hair off your shoulders or neck and show off your new scrunchie. Wear a loose ponytail, or pull your hair up with a regular elastic and put your homemade scrunchie over the top if you want it extra tight.


Community Q&A
-
QuestionWill it fit over a bun?
 Community AnswerYes, depending on the stretchiness of the the scrunchies and the type of bun.
 -
QuestionIs it difficult to make scrunchies? Would scrunchies look cute on a side ponytail?
 Community AnswerIt depends on your sewing experience, but I would say it's pretty easy. And yes, they look super cute on side ponytails.
 -
QuestionWill the scrunchie break easily?Community AnswerIf you stitch correctly and stitch or tie the elastic well, then it shouldn’t break easily.
Warnings
- Do not let small children have the scrunchie if you used ribbon or small parts.⧼thumbs_response⧽
Things You'll Need
- Elastic (1 inch (2.5 cm) recommended)
- Fabric (about 1⁄8 yard (0.11 m))
- Needle
- Thread
- Sewing Machine (Optional, but recommended)
- Ribbon (Optional)
- Bells, danglies, other decorations (Optional)


References
- ↑ http://www.joann.com/sewing/sewing-and-quilting-supplies/elastic/
- ↑ http://www.ikatbag.com/2009/06/operation-summer-hair-rescue-part-1-how.html
- ↑ https://snapguide.com/guides/make-an-easy-hair-scrunchie/
- ↑ http://www.sew4home.com/tips-resources/sewing-tips-tricks/how-sew-x-box-secure-straps-more
- ↑ https://www.ifixit.com/Guide/How+to+Sew+a+Whip+Stitch/21025
- ↑ https://www.favecrafts.com/Hair-Accessories/How-to-Make-Hair-Accessories-16-Free-Patterns
About This Article

To make a hair scrunchie, start by cutting a piece of elastic that's about 4 inches long and 1/2 an inch wide. Then, cut your piece of fabric so it's 8 inches long and 4 inches wide. Next, fold the fabric in half lengthwise so the printed side is facing inward and sew the edges together. Once you've done that, turn the fabric right-side out and slide the elastic through the tube of fabric. Finally, sew the ends of the elastic and fabric together and then you're done! To learn how to add cute embellishments to your scrunchie, scroll down!