This article was co-authored by wikiHow Staff. Our trained team of editors and researchers validate articles for accuracy and comprehensiveness. wikiHow's Content Management Team carefully monitors the work from our editorial staff to ensure that each article is backed by trusted research and meets our high quality standards.
There are 8 references cited in this article, which can be found at the bottom of the page.
The wikiHow Video Team also followed the article's instructions and verified that they work.
This article has been viewed 31,417 times.
Learn more...
Whether you're using it in your home or outdoors, wood signs can add a rustic touch to your decor. Once you've found the right piece of wood, washing, sanding, and cutting the wood can help you make a clean, stylish sign. Then, you can apply paint, wood stain, and letters or designs to decorate your sign. With a little time and effort, you'll be able to make a beautiful wood sign!
Steps
Finding and Cleaning Wood
-
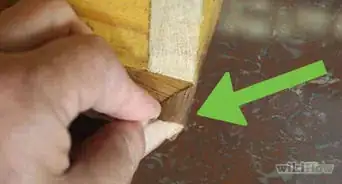
1Purchase a block of wood from a hardware or craft store. Choose a piece of wood with the approximate size or shape of your intended sign. If you can't find a block in the right size, choose a piece that is slight larger, as you can always cut it to size later.
- Soft wood like pine, beech, or spruce generally makes for good wooden signs.
- Some large businesses also discard their wood from pallets or boxes when they're done using them. Contact businesses in your area and ask if they have extra lumber to get wood for free.[1]
-
2Clean the wood with soap and water. Mix dish soap and water in a bucket at a ratio of 2 tablespoons (30 mL) to 1 US gal (3.8 L), and dip a washcloth in the solution. Scrub the entire surface of the wood block with the washcloth, focusing on particularly dirty or dusty areas.[2]
- If you just bought the wood from a store and it looks clean, you may not need to wash it.
- Towel or air dry the wood afterward to prevent it from growing mold or mildew.
Advertisement -
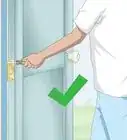
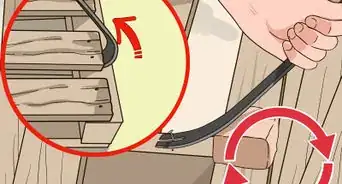
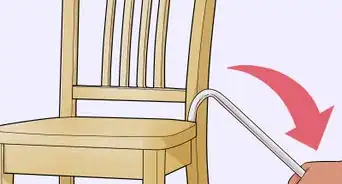
3Cut the wood block to size, if needed. If your wood block is too large, measure the dimensions you want on the wood and apply painter's tape along the lines that you to cut. Then, secure the wood block to a flat surface with clamps and cut along the tape's line with a hand or electric saw.[3]
- Wear goggles and earplugs while cutting with saws, and work carefully to prevent injuries or uneven lines.[4]
- The tape prevents the wood edges from splintering while you cut it.
-
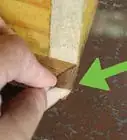
4Sand the wood block. Press a 220-grit sandpaper block on the the wood block and rub it in circular motions. Rub the wood block from one end to the other until the entire block is smooth to the touch.[5]
- After sanding the wood block, brush it with a dry washcloth to get rid of any sandpaper dust.


Painting or Staining Wood Signs
-
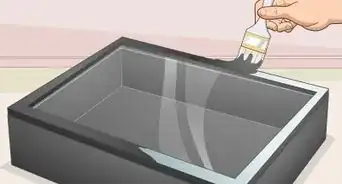
1Apply a wood primer to the sign's surface. Dip a bristle brush in the wood primer and spread it along the wood's surface in long, even strokes. After applying the coat, wipe off any excess primer with a washcloth and let it dry for an hour.[6]
- Priming the wood helps the paint or wood stain achieve a smoother, more uniform texture.
- You can buy wood primer from most hardware or craft stores.
-
2Paint the wood surface if you want bold, solid colors. Dip a bristle brush in the paint and apply it to the wood's surface in long, even strokes. Let the first coat dry for about 30-60 minutes, then add additional coats if desired for a brighter color.[7]
- Latex or water-based paint is ideal for painting wood signs. You can buy it from most craft or hardware stores.
- Depending on your design preferences, you can paint the entire wood block or just the front.
-
3Apply a wood stain for a more rustic look. Dip a washcloth or bristle brush in the wood stain and use long strokes to coat the entire surface. After staining the surface, dab off excess puddles of wood stain with a dry washcloth.[8]
- If the stain isn't dark enough, apply 2-3 more coats of wood stain after letting it dry for 30-60 minutes.
-
4Add a wood sealant to protect outdoor signs. Dip a bristle brush in the wood sealant and brush it into the wood along the grain. After coating the surface in the sealant, leave the wood sign undisturbed overnight to let the sealant cure.[9]
- Oil- or water-based polyurethane stains are usually best for wood signs.
- You can buy wood sealants from craft or hardware stores as well as online.


Adding Letters or Other Designs
-
1Spray paint the design on using a stencil. Trace the outline of the letters or design onto paper or vinyl, and use scissors to cut out the outline. Tape the paper or vinyl to the wood sign and apply the spray paint about 2–3 inches (5.1–7.6 cm) away from the surface.[10]
- If you cut the stencil out of vinyl, remove the backing before
-
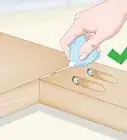
2Apply decal stickers for a sleek, smooth surface. Remove the backing from the decal stickers and carefully lay them over your wood sign's surface. Smooth out any bubbles, as well as folded or uneven areas, with your fingers after rolling on the sticker.
- You can make your own decal stickers or contact a graphic design business to purchase vinyl stickers.
-
3Trace the design onto the wood sign with paint. Using a pencil, draw the outline of the design onto the wood. Then, dip a bristle brush in the paint and trace over the outline as neatly as possible, working slowly to prevent any mistakes. Use a small bristle brush to trace tinier, more intricate designs without smudging the block.[11]
- This generally results in a less even design than stencil or vinyl options.
-
4Draw the design using a felt-tipped marker or paint pen. Apply a thin coat of craft glue over the wood's surface where you want to draw the design, and wait for it to dry for about an hour. Then, make the design using a permanent felt-tipped marker or a paint pen, working slowly to prevent mistakes while you work.[12]
- The glue prevents the marker or paint pen from bleeding into the wood while you're drawing the design.
- Trace the outline of the letters first with a pencil for more even lines.
-
5Add an extra layer of wood sealant to protect your design from wear. After applying or drawing the design, dip a bristle brush in wood sealant and apply it to the sign along the grain. Leave the wood sign undisturbed overnight (at least 12 hours) to let the sealant cure.[13]
- Wood sealant will prevent the paint, vinyl, or marker from fading or flaking off over time.
- Apply the extra layer over the design even if you've already applied sealant over a wood stain or paint coat.
Warnings
- Be careful when handling sharp objects like saws or scissors, and wear safety goggles and earplugs while handling electric cutting tools.⧼thumbs_response⧽
Things You'll Need
- Wood block
- Washcloth
- Dish soap
- Bucket
- Water
- Wood primer
- Paint or wood stain
- Wood sealant
- Painter's tape (optional)
- Saw (optional)


References
- ↑ https://www.thekimsixfix.com/2014/11/how-to-make-pallet-wood-sign.html
- ↑ https://www.thekimsixfix.com/2014/11/how-to-make-pallet-wood-sign.html
- ↑ https://www.youtube.com/watch?v=y0IcTl8D91Q&feature=youtu.be&t=297
- ↑ https://www.heytherehome.com/cut-thin-wood-without-splintering/
- ↑ https://www.apieceofrainbow.com/diy-painted-wood-sign/
- ↑ https://www.bobvila.com/articles/30124-dream-it-do-it-how-to-paint-wood-furniture/
- ↑ https://www.apieceofrainbow.com/diy-painted-wood-sign/
- ↑ https://www.thekimsixfix.com/2014/11/how-to-make-pallet-wood-sign.html
- ↑ https://www.bobvila.com/articles/how-to-waterproof-wood/
About This Article

To make a wooden sign, start by purchasing a block of wood from a craft or hardware store and cleaning it with soap and water. Once the wood is completely dry, use a hand or electric saw to cut it to the size and shape you want your sign to be. Then, sand the entire wooden block in a circular motion with 220-grit sandpaper until all the sides are smooth and even. After brushing off all the sandpaper dust, use a paintbrush to apply a coat of wood primer. Let the primer dry, then brush on a coat of wood stain or any color paint you like. Finish by using a stencil and spray paint to add letters or designs to your sign. To learn more, like how to protect your sign from water damage, scroll down!