This article was co-authored by wikiHow Staff. Our trained team of editors and researchers validate articles for accuracy and comprehensiveness. wikiHow's Content Management Team carefully monitors the work from our editorial staff to ensure that each article is backed by trusted research and meets our high quality standards.
wikiHow marks an article as reader-approved once it receives enough positive feedback. In this case, 96% of readers who voted found the article helpful, earning it our reader-approved status.
This article has been viewed 43,119 times.
Learn more...
Wind chimes are beautiful ornaments that make a soft clinking noise when the wind blows through them. They can be bulky, however, which doesn't suit everyone's tastes. If you are one of these people, why not make a beaded wind chime instead? They are pretty and delicate, and can be made in any color you wish. Best of all, if you use glass or crystal beads, they can double up as sun catchers!
Steps
Using Driftwood
-
1Drill some holes into a piece of driftwood.[1] Use an electric drill and a small drill bit to do this. You can drill as many or as few holes as you'd like, but try to space them evenly. Make sure that you are drilling all the way through the wood.
- Can't find any driftwood? Use a branch or a dowel instead.
-
2Decide how long you want your chimes to be, then cut your string twice as long.[2] The best type of string to use would be nylon beading thread, fishing line, or beading wire. You will need one length of string for each hole that you made.
- The strings don't all have to be the same length.
Advertisement -
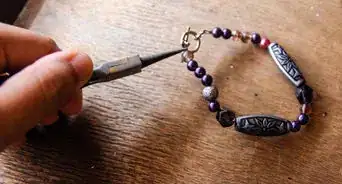
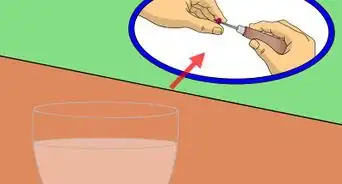
3Tie a mini bell to the end of each string. Use a tight, double knot, and don't trim off the tail end.[3] For a stronger hold, slip a crimp bead over the knot, and pinch it shut with a pair of pliers.[4]
- Don't have bells? Use anything else that will make noise when clinked together. Metal charms, shells, and keys would all work great!
-
4Slip glass beads onto the string. Make sure to push the first couple of beads through both strands of string so that the tail end from the knot doesn't stick out. You can string the beads randomly or use a pattern. Leave a few inches/centimeters at the other end of the string empty.
- Consider adding some metal and wood beads for an interesting effect.[5]
-
5Pull the string through the holes in the driftwood. At this point, take a look at the chime, and decide whether or not you are happy with the length. If something is too long, pull a few beads off. You can make your wind chime look more interesting by varying the lengths.
-
6Thread a large bead onto the string and tie the string around the bead in a tight knot. Make sure that the bead is large enough so that it doesn't slip through the hole in the wood.[6] The bead will help keep the string in place.
-
7Pull the string back down the hole. Thread it back through the last couple of beads on your chime, then cut off the excess.[7]
-
8Cut some twine, and wrap both ends around your chime to make the hanger. Tie the ends of the twine to itself with a knot to secure it.[8]
- If you'd like something fancier, drill a hole into each end of the driftwood, then insert a small hook. Attach the hooks to a delicate chain.


Using an Embroidery Hoop
-
1Take apart an embroidery hoop. Discard the outer part with the metal ring, and keep the smooth, inner part. You can use a plastic embroidery hoop or a wooden one. If you use a wooden embroidery hoop, you can paint it any color you wish.
-
2Paint the embroidery hoop, if desired, and let it dry. You can leave wooden embroidery hoops plain for a rustic effect, or you can paint them with acrylic paint. Painting plastic hoops is not recommended because the paint is more likely to chip off.
- If you will be using this wind chime outside, spray the hoop with a clear, acrylic sealer once the paint has dried.
-
3Cut some string twice as long as you want your chimes to be. You can have as many or as few chimes as you want. They can all be the same length, or they can be different lengths. The best type of string to use for this would be nylon beading thread or fishing line.
-
4Tie a metal charm to the end of each string. You can use small bells, metal findings, keys, or anything that will make a sound when clinked together. Some people like to use vintage spoons!
-
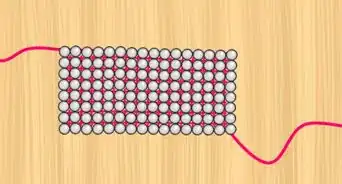
5Slip assorted beads onto the string. Be sure to slip the first couple of beads through both the string and the tail end. This will keep everything looking neat, and prevent the tail end of the knot from sticking out. Leave a few inches/centimeters at the end of each string empty.
-
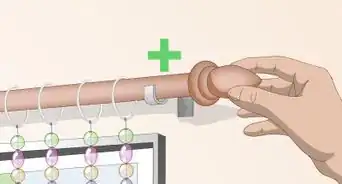
6Tie the strings to the embroidery hoop. Wrap the string around the hoop a few times tightly, so that the last bead bumps up against the bottom edge. Tie the tail end to the string in a tight, double knot, then feed it back down through the beads.
-
7Cut 4 equal-length pieces of string. You will be using this to hang your wind chime, so choose something sturdy. Fishing line or twine would work well, but ordinary thread or yarn won't.
-
8Tie the end of each string to the embroidery hoop. Wrap the string around the hoop a few times, then tie it to itself. While the beaded strings are hanging down, these strings should be hanging up. Try to space these as evenly as you can.
-
9Tie the ends of the strings together, then slip them over a hook. Gather the loose ends of your strings together, and check that the tension is even. Tie them together into a single knot, then slip them over a hook. Use the hook to hang your wind chime.


Using a Terracotta Pot
-
1Paint a small terracotta pot with acrylic paint, and let it dry.[9] Once it dries, you can move on to the next step, or you can add more designs. You can also seal it with acrylic sealer if you'd like to make it last longer.
-
2Cut your string a little longer than you want it to be. You can use just about any type of string you want. Yarn, fishing line, and twine will all work well—it just needs to be thin enough to fit through your beads. You can cut as many strings as you want.
-
3Tie a bead, bell, or other charm onto the end of each string. Not only will this keep the rest of the beads from sliding off, but it will also add some weight and design to your chimes.
-
4Thread the beads onto each string, leaving a few inches blank. You can follow a specific pattern, or you can string the beads randomly. You can use the same type of bead, or you can mix-and-match glass, plastic, wood, or metal beads.
-
5Hot glue the strings to the inside rim of your pot. For extra support, tie a knot at the end of each string first, just above the last bead.[10]
-
6Cut a long piece of thick cord, fold it in half, and feed the loose ends through the hole at the top of your wind chime.[11] You will be using this cord to hang up your wind chime, so make sure that it is sturdy. Slip the loose ends of the cord down through the hole and into the pot.
-
7Tie the ends into a thick knot to keep the loop from falling out. If you need to, hot glue the knot to the inside of the pot. When you are done, use the loop to hang up your wind chime.
- If the cord still falls through the hole: slip the cord through the pot, then through a washer, then tie the cord into a knot.


Things You'll Need
Using Driftwood
- Driftwood, branch, or dowel
- Nylon beading thread, fishing line, or beading wire
- Mini bells
- Glass beads
- Electric drill and small drill bit
- Twine
Using an Embroidery Hoop
- Wooden embroidery hoop
- Acrylic paint
- Paintbrushes
- Nylon beading thread, fishing line, or beading wire
- Mini bells
- Glass beads
Using a Terracotta Pot
- Terracotta pot
- Acrylic paint
- Paintbrushes
- Beads
- String
- Hot glue gun and hot glue sticks


References
- ↑ http://rhythmsofplay.com/diy-sea-glass-wind-chime-suncatcher/
- ↑ http://rhythmsofplay.com/diy-sea-glass-wind-chime-suncatcher/
- ↑ http://gardentherapy.ca/beaded-wind-chime/
- ↑ http://rhythmsofplay.com/diy-sea-glass-wind-chime-suncatcher/
- ↑ http://gardentherapy.ca/beaded-wind-chime/
- ↑ http://gardentherapy.ca/beaded-wind-chime/
- ↑ http://gardentherapy.ca/beaded-wind-chime/
- ↑ http://gardentherapy.ca/beaded-wind-chime/
- ↑ http://www.oneartsymama.com/2013/02/beaded-windchime.html
About This Article