wikiHow is a “wiki,” similar to Wikipedia, which means that many of our articles are co-written by multiple authors. To create this article, 9 people, some anonymous, worked to edit and improve it over time.
There are 10 references cited in this article, which can be found at the bottom of the page.
This article has been viewed 25,778 times.
Learn more...
You can make a new belt with only a few tools and a little time. Learn how to make a nice belt of full grain leather and pay much less than you pay in a store. You can also find out how to make inexpensive and fun fabric belts if you have a sewing machine. Last, you can learn to make simple ribbon belts with D hooks out of velvet ribbon, Jacquard print ribbon or cotton webbing.
Steps
Making Leather Belts
-
1Buy your belt blank. If you want a quality leather belt, buy a full grain leather belt blank. Full grain leather belt blanks are generally inexpensive, costing around $13 dollars. You can buy a leather belt blank online from Ebay or you can go to a leather store.
-
2Buy a belt buckle to match your belt blank. You can buy silver or gold roller belt buckles from department stores like Walmart or Target. You can buy roller buckles and a variety of big belt buckles from Western stores.Advertisement
-
3Consider buying a belt keep. A belt keep is a little leather strip that holds the overlapping belt strap. Find one that is the same width/color as your belt blank. This should only be about a dollar. When you go to buy your belt buckle, ask about a belt keep.
-
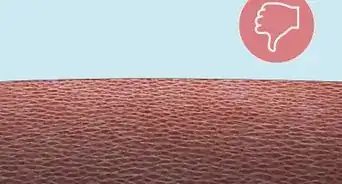
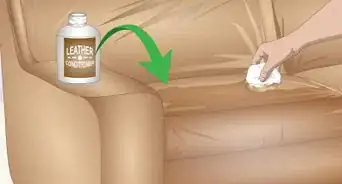
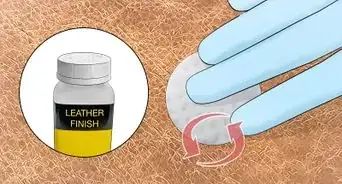
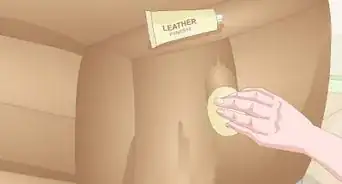
4Buy leather balm to condition the leather. Because the leather that you are buying is untreated, you will need to preserve it by conditioning the leather with a balm. You can also use a water based leather dye to preserve your leather instead if you would like.
- If you do not condition or dye your leather and water gets on your leather blank, your leather will stain forever.
-
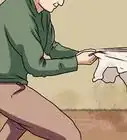
5Put the buckle into the leather blank. On the side with the holes, insert the middle pin of the buckle through the hole and fold the leather strap down. Then snap the snaps into place to secure your strap.
-
6Mark on the inside of the belt the place for your hole. Put on your belt and cinch it to a place where it is comfortable. Mark on the inside of the belt with a sharpie where you will punch a hole.
-
7Punch the hole with a leather hole punch. If you don’t have a leather hole punch you can very carefully use a power drill to make your hole(s). You can also add more holes and space them about an 1 inch apart.
-
8Put your belt back on and measure the overlap. Once your belt is back on, you should see how much you want your belt strap to overlap in the front. Use a sharpie to mark the place on the inside of your belt.
-
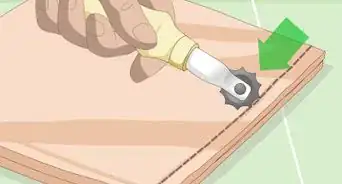
9Trim and shape the end of your strap. Where you marked with your sharpie, you should shape an end. You can use a gatorade cap to make a half circle shape on the strap. With an Xacto knife, carefully cut out the shape in the leather.
-
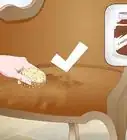
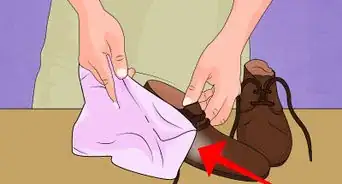
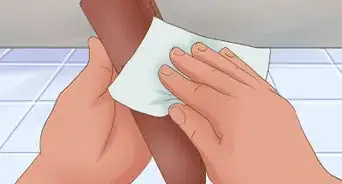
10Apply leather balm to your belt. Using a soft cloth like a t-shirt, rub leather balm into your strap. Apply the balm liberally but evenly to the belt so that the color is consistent. You should use the balm on both sides of your strap. The balm will make the leather a little bit darker. Let the leather dry completely.
- If you are going to dye your leather, now is the time to do so.


Making Fabric Belts
-
1Choose a fabric and plastic belt buckle. Choose a fabric you want to make a belt out of. Get a plastic belt buckle to go along with the fabric. You should buy a plastic belt buckle that doesn’t have a tongue. You can find these belt buckles at craft stores, or you can buy them online at Etsy where there is a variety of stylish belt buckles.[4] [5]
-
2Measure your waist or hips and add 6 inches. Depending on where you want to wear your belt, measure around your body. Use a measuring tape, and have a pencil and pen out to write down the measurement. You will add 6 inches to account for sewing on the belt buckle and the overlap of the belt.
-
3Measure the inside width of your belt buckle. The inside width of your belt buckle will determine how wide your belt is. Write down the measurement.
-
4Cut the fabric and interfacing to size plus an inch for the width. Cut three strips, two of the strips should be fabric and one is the interfacing. Use a pair of sharp scissors to cut your fabric.
- Interfacing is a stiff fabric that is used to reinforce fabric, think of the material in the shirt collar that makes it stiff.[6]
-
5Pin together the strips of fabric. The first layer should be print side facing up. The second layer should be print side facing down and the third layer should be the interfacing. The interfacing should be on the top. Use straight pins, and pin together the fabric down each of the long sides of the interfacing.
-
6Draw a stitching line down each side of the fabric. Lay your belt buckle over the strips to see how wide you need your strap. Use a pencil and measuring tape, and mark the width you want. Then draw straight lines down the length of the fabric to the correct width. These lines will help you sew a straight line and should ensure that you are making a strap that is the right width. Typically, you will stitch about a ⅕ of an inch away from the sides.
-
7Sew down the sides of the strips of the fabric only. Use a sewing machine and removing the pins as you stitch, sew down each side of the fabric following the stitching line. Do not sew the ends of the fabric yet.
-
8Trim away excess fabric. First, lay your belt buckle back on the fabric to verify it is the right width. Then on both sides of the stitching, you should trim away the excess fabric.
- If the stitching is too wide for the belt buckle, go over the fabric again with your sewing machine to make the strap the correct width.
-
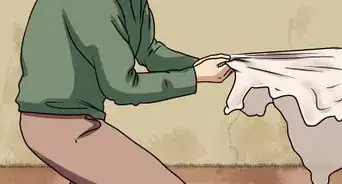
9Flip the fabric right side out. Hook a safety pin (the bigger the better) to one end of your fabric strap. Push the safety pin through the tube to the other side. You will have to bunch the fabric as you go to get it through.
-
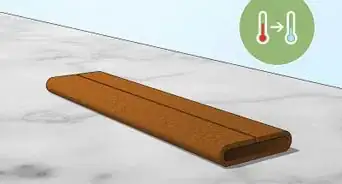
10Iron your belt flat. Using the cotton setting, iron down the length of your belt. Iron so that the belt is as wide as possible.
-
11Tuck the fabric into one end of the fabric tube, and sew it closed. Fold a small amount of the fabric in the tube. Using your sewing machine, sew over the end to neatly sew the bottom of your belt closed. Trim off any excess threads.
-
12Insert the belt buckle through the unclosed end of the belt strap. Fold an inch or so of the fabric over the belt buckle, and then stitch it closed to secure the buckle in place. You can sew this fold in place by hand as most sewing machines probably won’t be able to fit between the buckle and the place you are sewing.
- Sew the fold so that the edge will be hidden by your belt buckle.


Making Ribbon or Cotton Webbing Belts
-
1Choose a ribbon or cotton webbing for the strap. This method contains 3 different ways to make a ribbon or cotton webbing belt. Depending on how thick you want your belt and what style of belt you want to wear, find a material that is right for you. There are great materials for belts including Jacquard ribbon, velvet ribbon and cotton webbing. All of these can be found at craft stores or online. Follow the inline citations with the descriptions below for more information. As you follow the steps, skip to the ones that apply to your chosen option.
- Jacquard ribbon is a patterned ribbon that was historically woven using a loom. With Jacquard ribbon you have a wide variety of patterns to choose from. Making a belt out of Jacquard ribbon usually requires a sewing machine to make. Buy at least 2 ½ yards in length (depending on your size) because you will need to double the measurement for the belt.[7]
- Velvet ribbon belts can be great to wear with winter clothes. This is the simplest belt to make and only require iron-on tape and D hooks. Buy at least 2 ½ yards in length (depending on your size) because you will need to double the measurement for the belt.[8]
- Cotton, acrylic or polyester webbing for your strap are great durable belts that look good with jeans or cinching tops. You should buy a strap 1 ¼- 1 ½ inches wide and 2 to 3 mm thick. You can also decorate the strap with lace if you would like.[9]
-
2Buy two D rings to go with your fabric. Make sure to buy D rings that are slightly wider than the width of your fabric. At a craft store, you will find these rings in silver or gold, typically, and you may also find plastic D rings as well.
-
3Position the D rings. How you position the D ring depends on what material you are making your belt out of:
- For Jacquard ribbon, slip your D rings into one side of the ribbon, and fold the ribbon in half. Make sure your ribbon is pattern side out. Your D rings should be at one folded end.
- For velvet ribbon, slip the two D rings in one side of the ribbon. Fold the two sides of the ribbon into the middle so they meet. The fuzzy side of the ribbon should be facing out, and the D rings should be at one folded end of the ribbon.
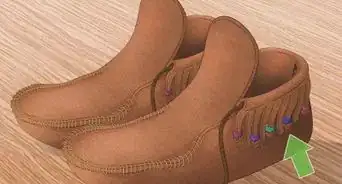
- For cotton webbing, at one end of the cotton webbing, slip the two D rings and fold the cotton webbing over. The cotton webbing doesn’t have to overlap a lot, maybe an inch over itself. Then sew the fold shut with a sewing machine or a strong needle. If you want to add a lace decoration to your belt, do not sew the end of the D rings yet.
-
4Sew one long side of the belt of the Jacquard ribbon.[10] For your Jacquard ribbon belt, you will sew the two strips of ribbon together. The ribbon is folded in half so that it is two strips. Use a sewing machine to sew the two strips together. Sew very close to the edge. Starting near the D rings at one folded end of your ribbon, sew and backstitch near the D rings. Then continue sewing down the length of the strip. Back stitch when you get to the end of the strip.
-
5Sew the end of the Jacquard belt. When you get to the cut end of your ribbon, fold the cut edges over twice in small folds. Pivot and sew down the folds to close the end shut. Then pivot again to sew up the other side of the ribbon.
-
6Sew the other long side of the Jacquard belt. After you pivot, sew a couple of inches and then do a back stitch. Continue sewing up the other long side of the ribbon. When you get to the D rings, do a back stitch to finish sewing your ribbons together. You are done!
-
7Fuse your velvet ribbon together with iron-on tape. Cut off 1 ¼ yard (or the length of your ribbon when folded in half) of your iron-on tape. Peel off the backing, and sandwich between the two layers of velvet ribbon.
-
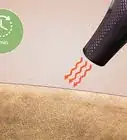
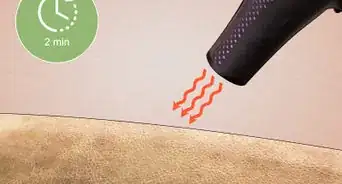
8Iron the tape to fuse it together with the velvet. Place scrap velvet on top of the belt to protect the velvet. Then set your iron on the cotton setting, and iron over the belt to fuse the two sides of the ribbons together. You are done!
-
9Add lace to your cotton webbing belt. Place a piece of lace down the center of your cotton webbing, and using your sewing machine, sew down both sides of the lace to secure it to your belt. Use a wide zigzag stitch.
- Cut off excess lace. Trim any lace threads on the belt as well.
- Sew your D hooks into place now. Fold one end of the belt over the two D hooks so that the fold encases the hooks and overlaps a little. Sew the fold into place using a sewing machine or a strong needle.
-
10Add a belt tip to your cotton webbing belt. These tips should match the width of your cotton webbing (usually 1 ¼ -1 ½ inches). They can be found at craft stores. Belt tips have teeth at the bottom that will sink into the belt. Using a hammer, put the belt tip at the end of your belt, and then hammer it into place. Hammer enough so that the teeth go all the way in.
- Your belt tip should go in fairly easily. You don’t need to use much force when hammering the belt tip in place.


Things You'll Need
Ribbon Belt
- Velvet ribbon, Jacquard ribbon, or cotton webbing
- Two D hooks
- Iron-on tape for velvet ribbon
- Sewing machine for Jacquard ribbon
- Belt tips and lace for cotton webbing (optional)
Leather Belt
- Belt blank
- Belt buckle
- Leather balm
- Leather hole punch or power drill
- Xacto knife
- Gatorade size bottle cap
Fabric Belt
- Fabric
- Interfacing
- Scissors
- Straight pins
- Safety pin
- Sewing machine
- Plastic belt buckle

References
- ↑ http://www.primermagazine.com/2012/learn/how-to-make-a-90-belt-for-only-23
- ↑ http://springfieldleather.com/Leather/Belt-Blanks-Strips-Straps/
- ↑ https://www.google.com/webhp?sourceid=chrome-instant&ion=1&espv=2&ie=UTF-8#q=where+to+buy+leather+belt+blanks&safe=active&tbm=shop
- ↑ http://www.abeautifulmess.com/2014/08/make-your-own-fabric-belts.html
- ↑ https://www.etsy.com/market/plastic_belt_buckle
- ↑ http://www.joann.com/fabric/utility-fabric/interfacing/
- ↑ https://www.google.com/webhp?sourceid=chrome-instant&ion=1&espv=2&ie=UTF-8#safe=active&tbm=shop&q=jacquard+ribbon
- ↑ https://www.google.com/webhp?sourceid=chrome-instant&ion=1&espv=2&ie=UTF-8#q=cotton+webbing&safe=active&tbm=shop
- ↑ https://www.google.com/webhp?sourceid=chrome-instant&ion=1&espv=2&ie=UTF-8#safe=active&tbm=shop&q=velvet+ribbon
About This Article
If you want to make your own leather belt, buy a full-grain leather belt blank online or from a leather store. Insert the middle pin of a belt buckle through the first hole on the leather blank and fold the leather strap down. Then, press the snaps closed on the blank to secure the buckle. Put the belt around your waist and mark on the inside of the leather where you want the hole to go. Then, use a leather hole punch to make the hole in your belt. Trim and shape the end of your belt, then apply leather balm to the belt and let it dry. If you’d like to learn how to make a fabric belt, keep reading!