This article was co-authored by wikiHow Staff. Our trained team of editors and researchers validate articles for accuracy and comprehensiveness. wikiHow's Content Management Team carefully monitors the work from our editorial staff to ensure that each article is backed by trusted research and meets our high quality standards.
There are 11 references cited in this article, which can be found at the bottom of the page.
This article has been viewed 34,480 times.
Learn more...
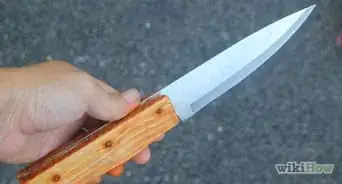
A dagger is essentially a long knife with a point on the end instead of a rounded blade. They can also have a double-edged blade. Daggers can come in a variety of shapes, sizes, and designs, and you can actually make one yourself if you have the right tools and material. The project is relatively difficult and requires working knowledge of specialized power tools, but if you take your time, and do it safely, you can make your very own dagger.
Steps
Cutting a Dagger Blank
-
1Use 1⁄4 in (0.64 cm) steel 5–6 inches (13–15 cm) wide for your blank. A dagger blank is a solid piece of steel cut in the shape of a dagger without a handle or a sharpened edge. Use a sheet of steel thick enough to form a sturdy blade and long enough for the dagger you want to make.[1]
- Daggers are usually between 9–14 inches (23–36 cm) long.
- You can find 1⁄4 in (0.64 cm) steel at your local hardware, home improvement store, or by ordering it online. You may also be able to find some at your local scrapyard.
-
2Print and cut out a template for your dagger on paper. Look up a dagger design online that fits to scale, and choose one that’s between 9–14 inches (23–36 cm) long and 3–4 inches (7.6–10.2 cm) wide. Print out the design on paper and cut it out with a pair of scissors, making sure the edges are clean so you have a good working template to use.[2]
- You could also draw your own design on a piece of paper and then cut it out to trace over the steel.
Advertisement -
3Trace the outline of the dagger on the steel with a marker. Place the template against the surface of the steel and line it up evenly. Use a marker to carefully trace the outer edges of the dagger on the surface of the steel to give you a cutting guide.[3]
-
4Attach a cutoff wheel to an angle grinder and put on safety gear. An angle grinder is a handheld power tool used to grind and cut surfaces. A cutoff wheel is a blade specially designed to cut hardened surfaces such as steel. Press the spindle lock button on the back of the grinder and undo the nut in the center of the spindle with a wrench. Place the wheel on the spindle and tighten the nut with a wrench. Put on pair of safety glasses and a face mask to avoid breathing in or getting the steel dust in your eyes.[4]
- You can find angle grinders and cutoff wheels at your local hardware store.
- Steel dust can really irritate your eyes and respiratory system, so be sure to wear safety protection.
-
5Score along the outline of your dagger with the angle grinder. Scoring is the process of partially cutting through a surface so a section can be snapped from it. Start the angle grinder so the blade is rotating and press the edge of the cutoff wheel against the surface of the steel. Trace the outline of your dagger with the blade to score the design in the steel.[5]
- Cut about halfway through the sheet of steel to make it easy for you to break off extra pieces.
-
6Snap off the dagger from the steel with a pair of vice grips. Vice grips are pliers that lock into place to give you a stronger grip. Attach the vice grips to a section you scored and use a twisting motion to snap off the metal pieces around your outline to leave just your dagger design.[6]
- If a section is too difficult to snap off, try scoring it a little bit more with your angle grinder.
- You can find vice grips at your local hardware or home improvement store.
-
7Clamp the blank in a vise and file the edges with a flat bastard file. A flat bastard file is a thin metal file that’s used to smooth and file down steel edges. Place your dagger blank in a vise and tighten it so it’s held firmly and securely. Hold a flat bastard file at a 90-degree angle to the edges of the dagger and move the file forward and backward to shave down the sharp edges.[7]
- Don’t try to make a sharp edge yet, just clean up the rough edges.


Attaching a Handle
-
1Use 2 stabilized hardwood blanks to form your dagger handle. Wood blanks are thin strips of wood used for various carving purposes. Measure the length and width of your dagger handle and choose wood blanks that match the dimensions. Go with hardwood such as oak, maple, or cherry, which are more durable. Look for wood blanks that have been injected with stabilizing filler so they’re more resistant to moisture and rotting.[8]
- You can find hardwood blanks at your local hardware store or by ordering them online.
- If the blanks you have are too long, cut them so their length matches the length of your dagger handle. You can sand down the width later.
-
2Measure and mark 2 spots on the wood and the dagger handle. Find the centerline of the handle of your dagger blank and use a ruler or tape measure to mark a spot 1–2 inches (2.5–5.1 cm) from the top of the handle. Then, mark a spot 1–2 inches (2.5–5.1 cm) from the bottom of the handle. Measure the space between the 2 markings and make markings that match them on the centerline of your 2 wood blanks.[9]
- It’s really important that your measurements match so the holes you drill line up.
-
3Drill holes through the wood and the dagger handle. Take a power drill and insert a metal-cutting bit into it. Drill holes through the markings you made on the handle of the dagger blank. Then, drill through the holes you marked on both of the wood blanks.[10]
-
4Connect the wood to the handle with brass pins and a ball-peen hammer. Brass pins are small pieces of metal you can use to attach the wood blanks to the handle. Line up the holes drilled through the wood blanks and dagger blank and slide a brass pin through them. Use a ball-peen hammer to tap the brass pin so it expands and is securely attached. Then, drive the other brass pin into the handle.[11]
- Tap both sides of the pins to flatten them so they’re flush with the wood of the handle.
- You can find brass pins at your local hardware store.
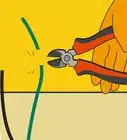
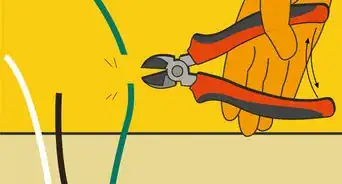
- If the pins are too long, use a pair of wire cutters to trim them to size.
-
5Sand the wooden handle with increasingly finer sandpaper. Start with coarse-grit sandpaper such as 40 or 80-grit. Sand the entire surface of the wood to smooth out all of the edges. Switch to finer sandpaper such as 100 or 120-grit and smooth the surface even more. Finally, finish with even finer sandpaper like 220-grit to polish the handle.[12]
- You can use standard sandpaper or an electric sander to make the job easier.
- If your handle is too wide, use an electric sander to sand it down to size.
-
6Apply hempseed oil to the handle and let it dry. Hempseed oil is a natural wood finisher. Spread the oil over the surface of the wood and rub it in with a clean cloth to form a protective layer and a fine finish. Allow the handle to fully dry.[13]
- If you don’t have hempseed oil, you can use linseed oil, walnut oil, or Danish oil.


Sharpening the Blade
-
1Wrap cardboard around the handle and secure it with duct tape. To protect the wood of the handle, take a clean piece of cardboard and wrap it tightly around the handle. Use a strip of duct tape to secure the cardboard.[14]
- You could also wrap newspaper or thick fabric over the handle to protect it.
-
2Clamp the dagger in a vise to secure it. Place your dagger in a vice with the edge you want to sharpen facing up. Tighten the vice so the blade doesn’t wiggle or move at all.[15]
- Make sure you have plenty of room around the clamp so you’re able to move around the dagger.
-
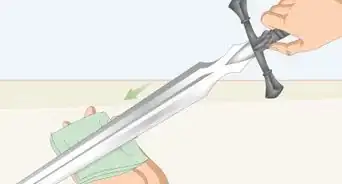
3File the blade down at a 20-degree angle to form an edge. Take your flat bastard file and hold it at a 20-degree angle to the edge of the dagger. Move the file forward and backward along the blade to shave down the edge and make it sharp. If you want to sharpen both sides of your dagger, remove it from the clamp, flip it over, clamp it back into place, and file down the other side.[16]
- Try not to file in 1 spot for too long or you may create a divot or low spot. Keep the file moving along the edge.
-
4Hone the edge of the blade with a diamond grit sharpening hone. A diamond grit sharpening hone is a flat device that refines the edge of a blade to form a fine, sharp point. Hold the edge of your dagger against the top of the hone and pull it across the surface over and over until it’s sharp. Then, flip over the blade and hone the other side to form a point.[17]
- If you’re making a double-edged dagger, hone both sides.
- Look for diamond grit sharpening hones at your local hardware store or look online to order one.
-
5Finish the edge with a ceramic-stick hone. A ceramic-stick hone is a sharpening tool that uses 2 ceramic sticks to bring an edge to an even finer point. Insert the edge of your dagger between the ceramic sticks and pull the blade through. Repeat the process until the edge reaches a fine point.[18]
- Be sure to hone both sides if you’re making a double-edged dagger.


Community Q&A
-
QuestionDo I need to drill holes for handle before heat treatment?
 GabrielCommunity AnswerYou can drill holes for the handle before or after heat treatment, but it is usually easier to do so before hardening or tempering with heat. It also may distort, depending on metal or alloy composition and the different type of treatment you use.
 -
QuestionDo I have to heat treat it? If so, will a normal wood fire be hot enough?
 Luke BrunsCommunity AnswerHeat treating will make it stronger and more durable. If you plan on hanging it up for decoration, then don't worry about it. A wood fire will take you a long time and you will need to add a constant air supply to heat it up. A better and cheaper alternative is regular grill charcoal. It gets hotter, but that will need an air supply too.
 -
QuestionCan we use other materials for the dagger?
 Wesley StewartCommunity AnswerYou can use almost any metal and make a dagger. If you use aluminum your dagger would likely fail, although there are some aluminum alloys that are quite strong. I recommend steel, stainless steel, iron, copper and tungsten as material. Tungsten is an extremely hard metal with a very high melting point (6192 degrees F, 3422 C) so it takes a higher skill set. If you have a bunch of old pre-1982 pennies, you can smelt them down and you will have the copper for your next dagger.
Warnings
- Wear safety glasses and a face mask when you’re cutting metal to avoid the dust.⧼thumbs_response⧽
Things You’ll Need
- 1⁄4 in (0.64 cm) steel about 5–6 inches (13–15 cm) wide
- Marker
- Cutoff wheel
- Angle grinder
- Wrench
- Vice grips
- Vise
- Flat bastard file
- Coarse and fine-grit sandpaper
- Hempseed oil
- Cloth
- 1 brass pins
- Ball-peen hammer
- 2 hardwood blanks
- Cardboard
- Duct tape
- Diamond grit sharpening hone
- Ceramic-stick hone


References
- ↑ https://youtu.be/4hFz3tP8XCs?t=11
- ↑ https://youtu.be/4hFz3tP8XCs?t=35
- ↑ https://youtu.be/U2k7fSphrBA?t=318
- ↑ https://youtu.be/KGkDcntMWMc?t=174
- ↑ https://youtu.be/4hFz3tP8XCs?t=230
- ↑ https://youtu.be/4hFz3tP8XCs?t=254
- ↑ https://extremehowto.com/how-to-make-a-knife/
- ↑ https://extremehowto.com/how-to-make-a-knife/
- ↑ https://youtu.be/U2k7fSphrBA?t=729
- ↑ https://youtu.be/GAmg2iLl1_Y?t=110
- ↑ https://youtu.be/GAmg2iLl1_Y?t=136
- ↑ https://www.artofmanliness.com/articles/how-to-make-a-knife-from-an-old-saw-blade/
- ↑ https://www.artofmanliness.com/articles/how-to-make-a-knife-from-an-old-saw-blade/
- ↑ https://www.artofmanliness.com/articles/how-to-make-a-knife-from-an-old-saw-blade/
- ↑ https://www.artofmanliness.com/articles/how-to-make-a-knife-from-an-old-saw-blade/
- ↑ https://www.artofmanliness.com/articles/how-to-make-a-knife-from-an-old-saw-blade/
- ↑ https://extremehowto.com/how-to-make-a-knife/
- ↑ https://extremehowto.com/how-to-make-a-knife/
About This Article