X
This article was co-authored by wikiHow Staff. Our trained team of editors and researchers validate articles for accuracy and comprehensiveness. wikiHow's Content Management Team carefully monitors the work from our editorial staff to ensure that each article is backed by trusted research and meets our high quality standards.
This article has been viewed 24,010 times.
Learn more...
If you have the DIY spirit and children who would love a little enclosed space for playtime or reading, there’s no need to rush out and buy a tent. You can easily make your own, even if you aren’t a master sewer. You can make one out of a bedsheet or a shower curtain, then add a few extra touches afterward to spruce your tent up even more.
Steps
Method 1
Method 1 of 3:
Using a Bedsheet
-
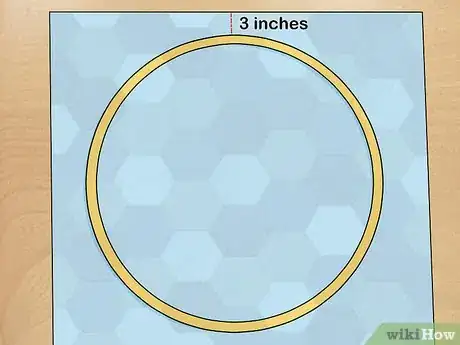
1Place your hoop on top of the sheet. First, lay out and straighten a king-sized sheet with its patterned side facing down. Then place your hoop on the sheet’s underside (the one that’s facing up), along its widest edge. Center the hoop along that edge with about three inches (7.6 cm) of fabric between the two.[1]
-
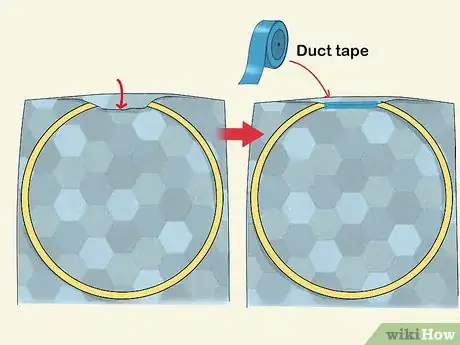
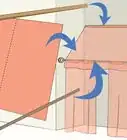
2Fold the fabric over the hoop and tape it in place. Fold those three inches of fabric over the hoop’s closest end, so that its patterned side is now facing up. Now cut off a strip of duct tape. Tape the sheet’s edge to where it meets the underside, inside the hoop, creating a loop around the hoop.[2]Advertisement
-
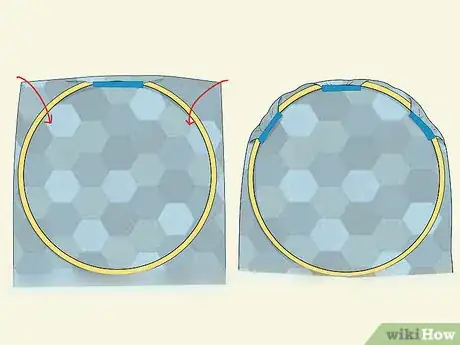
3Secure the sheet’s two corners. Choose either corner of the same edge to start. Pull it over the hoop until it’s opposite from where you taped the middle. Feed about three inches of the corner under the hoop and line it up with the sheet’s other edge. Pinch the two together and use another strip of tape to create another loop. Then repeat with the other corner.[3]
-
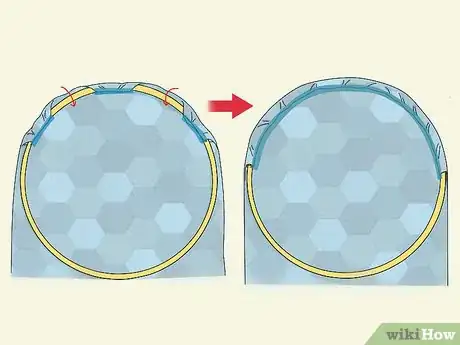
4Work your way back to the middle. At this point, it may be easier to set the hoop on two sawhorses (or something similar) so you can kneel or stand in the middle. Starting from either corner, continue pulling about three inches of fabric over the top of the hoop, taping its edge to the sheet’s underside, until you reach where you placed your first piece of tape. Repeat along the other side until you’ve created a continuous loop around the whole hoop.[4]
-
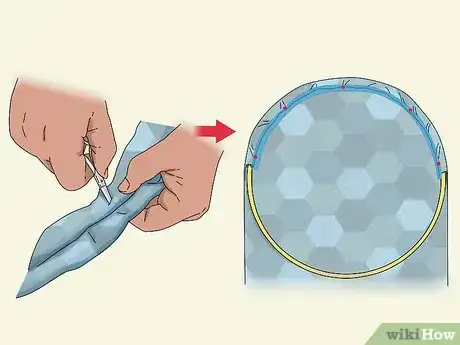
5Cut holes through the tape and sheet. Think of your hoop as a compass, with a north, south, east, and west pole (with your tent’s open flaps being one of those poles). Use a small knife, scissors, or something similar to poke holes through the duct tape and sheet at each pole. Make each just large enough to thread your twine through. Make at least a total of five holes (with one through each flap of your tent’s opening) so that weight is distributed evenly when hung.[5]
-
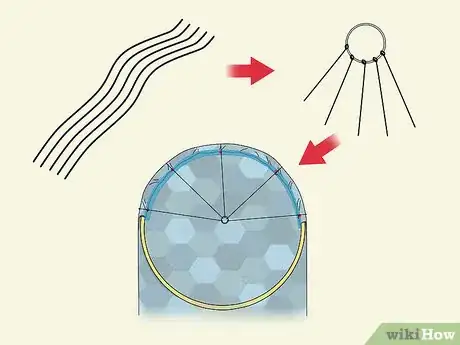
6Tie equal lengths of twine to the hoop and binder ring. Cut five equal lengths of twine, one for each hole. Exactly how long doesn’t really matter, as long as they’re long enough to reach the binder ring when centered over the hoop and hung from the ceiling. Tie one end of each length to the ring, then thread the other end through a hole and tie it around the hoop.[6]
- Twine can unravel over time, but you can prevent these by wrapping each end with duct tape.
-
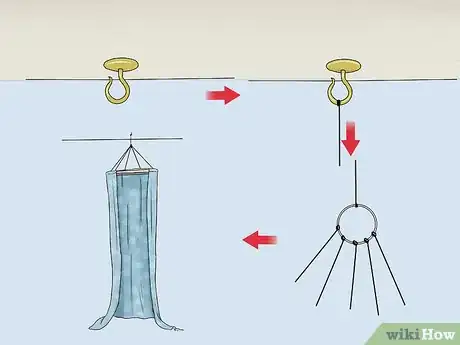
7Hang your tent with one more length of twine. Install a hook into your ceiling. Cut one more length of twine and tie one end to the hook. Again, exact length doesn’t matter, as long as it’s short enough to keep the tent’s bottom from bunching on the floor. Tie the length’s other end to the book ring, and your tent is ready for use![7]
- If you want to hang it outside, no need for a hook. Simply tie one end of your last piece of twine around a tree branch or similar object.
Advertisement
Method 2
Method 2 of 3:
Making a Tent with Shower Curtains
-
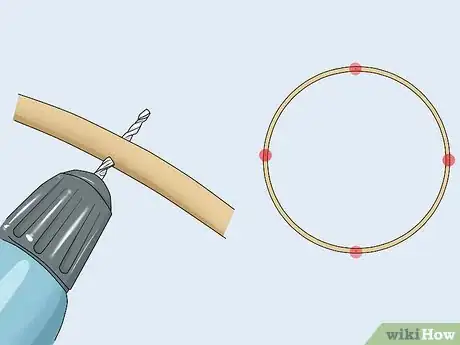
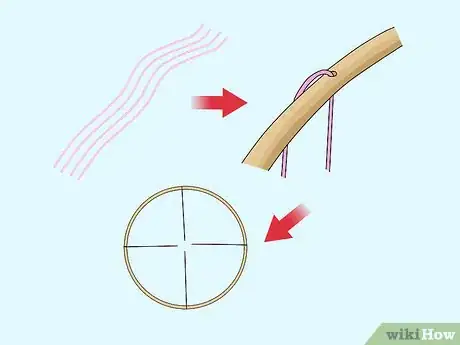
1Drill holes in your hoop. Use a drill bit large enough for your nylon rope to fit through. Drill four holes at equidistant points along your hoop. Think of it in terms of a compass, with one hole at north, south, east, and west.[8]
-
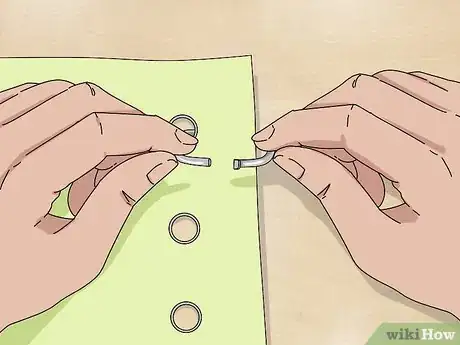
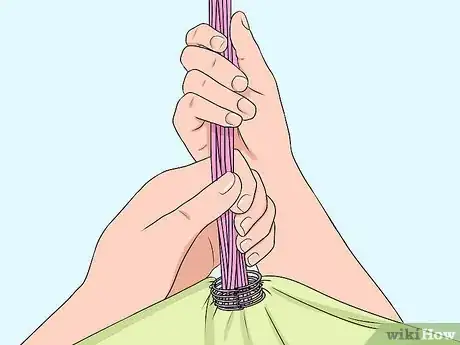
2Fit one binder ring through all your curtains’ holes. The larger your binder ring, the easier this will be. Starting at one end of your first shower curtain, pass the ring through the curtain’s first hole. Bunch the curtain up and hook the second hole onto the ring. Continue until all holes have been hooked, then begin again with the second curtain. Close the ring when finished.[9]
- This can be tough, so if you need more than two hands to keep the curtains bunched up as you work, ask for help.
-
3Thread equal lengths of rope through the holes. Cut four equal lengths of nylon rope, one for each drilled hole in your hoop. Thread each one through the hole. Then pull half of the length through.[10]
- Exact length doesn’t matter. You just want them short enough to keep the shower curtains from bunching up on the floor when your tent is hung.
-
4Hang your curtains over the hoop. First, pinch all the loose ends from your nylon rope together. Thread these through the binder ringer from underneath the bunched curtains. Once the rope’s free ends pass up through the binder, pull them taut and twist them together to form one big rope. Use this to tie a knot, while leaving enough rope above the knot to hang your tent from a ceiling hook.[11]
-
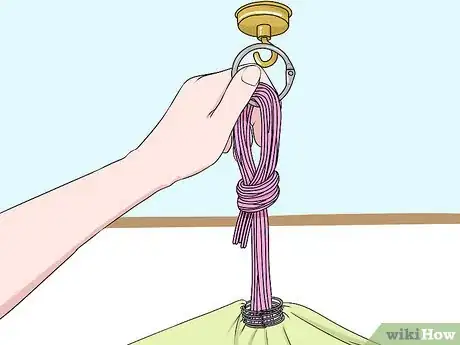
5Hang your tent from the ceiling. Install a hook in your ceiling. Twist the loose ends of rope back into one big rope and tie it into a second knot, as close as you can to its very end. Hook a second binder ring through the rope underneath this top knot. Close the ring and hook that over the ceiling hook.[12]
Advertisement
Method 3
Method 3 of 3:
Sprucing Up Your Tent
-
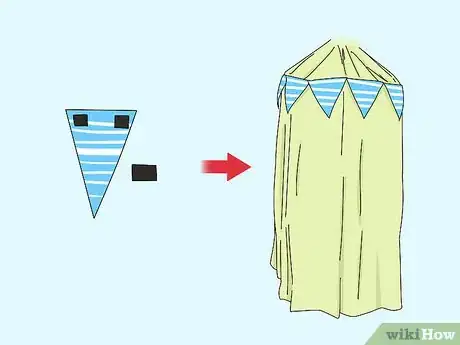
1Add bunting along the hoop. Choose the fabric of your choice to accent your tent’s color(s), patterns, and/or textures. Cut it into triangles or any other shape that pleases you. Attach adhesive velcro strips to the backs of these. Attach corresponding strips along your tent, over the hula hoop. Then simply press the two strips together to attach your bunting.[13]
-
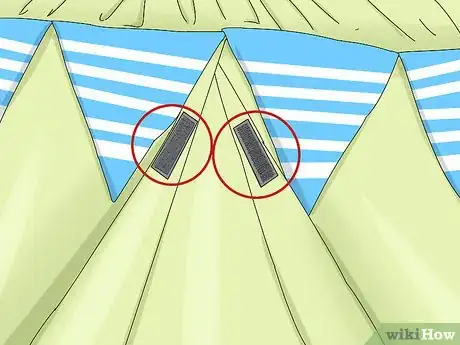
2Create seals. Give yourself the ability to close your tent’s flap. Attach adhesive velcro strips along the edge of one flap, facing inside. Then, for each strip used, attach a corresponding one on the inside of your other’s flaps edge. Pinch the strips together to keep the flaps from whipping open when you’d rather seal yourself off from the world.[14]
-
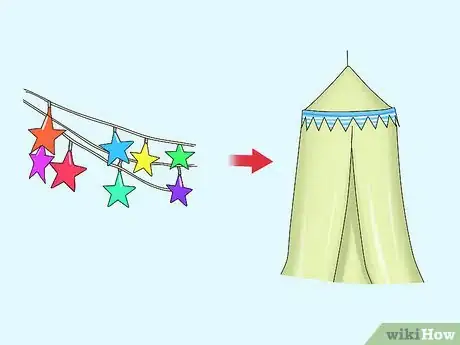
3Add lighting. Use adhesive strips or tape to line the hoop with strands or strips of decorative lights on the inside and/or outside of your tent (like Christmas, star, or fairy lights).[15] However, be sure to use LED lights. Avoid using other bulbs, like incandescent ones, since these emit far more heat and pose a fire risk.[16]
Advertisement
Things You’ll Need
Bedsheet Method
- 1 hula hoop
- 1 king-size bedsheet
- Twine
- 1 book ring.
- Duct tape
- Small knife or scissors
Shower Curtain Method
- 1 hula hoop
- Nylon rope
- 1 shower curtain
- 2 large binder rings
- Power drill
References
- ↑ http://hoosierhomemade.com/easy-diy-hula-hoop-tent
- ↑ http://hoosierhomemade.com/easy-diy-hula-hoop-tent
- ↑ http://hoosierhomemade.com/easy-diy-hula-hoop-tent
- ↑ http://hoosierhomemade.com/easy-diy-hula-hoop-tent
- ↑ http://hoosierhomemade.com/easy-diy-hula-hoop-tent
- ↑ http://hoosierhomemade.com/easy-diy-hula-hoop-tent
- ↑ http://hoosierhomemade.com/easy-diy-hula-hoop-tent
- ↑ http://makinglemonadeblog.com/how-to-make-diy-no-sew-kids-canopy-tent/
- ↑ http://makinglemonadeblog.com/how-to-make-diy-no-sew-kids-canopy-tent/
- ↑ http://makinglemonadeblog.com/how-to-make-diy-no-sew-kids-canopy-tent/
- ↑ http://makinglemonadeblog.com/how-to-make-diy-no-sew-kids-canopy-tent/
- ↑ http://makinglemonadeblog.com/how-to-make-diy-no-sew-kids-canopy-tent/
- ↑ http://makinglemonadeblog.com/how-to-make-diy-no-sew-kids-canopy-tent/
- ↑ http://makinglemonadeblog.com/how-to-make-diy-no-sew-kids-canopy-tent/
- ↑ http://makinglemonadeblog.com/how-to-make-diy-no-sew-kids-canopy-tent/
- ↑ https://www.lightrabbit.co.uk/are-led-light-bulbs-a-fire-risk
About This Article
Advertisement
