X
wikiHow is a “wiki,” similar to Wikipedia, which means that many of our articles are co-written by multiple authors. To create this article, volunteer authors worked to edit and improve it over time.
This article has been viewed 55,732 times.
Learn more...
Pringles are probably one of the more popular foodstuffs/DIY project. You get a fun snack and then an even 'funner' DIY project. Read here on how to make a fantastic diffuser with it.
Steps
-
1Get your Pringles can. If you want to use other chip brands that come in a can, just make sure it is reflective inside and fairly similar to the Pringles version.
-
2Be sure to clean out your can first. The chips won't do anything for your camera hardware.Advertisement
-
3Take your flash that you will be using and estimate the size of hole you will need for it. Trace it onto the can. You want to be sure that it is actually going to be a little undersized. You can't put the material you just cut off back on. It is better to work up to the correct size for your flash.
-
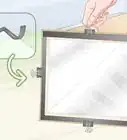
4Start cutting it out. Remember, you are cutting it smaller than you will need so it is okay if your cuts are a little crooked. You will be slowly paring it down and straighter.
-
5Keep trimming away at it until you got it right. Here, it is not quite the right size.
-
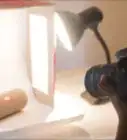
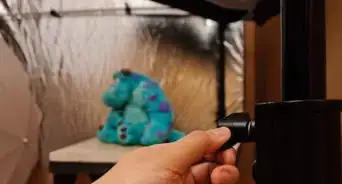
6Once, you have the correct size cut out, put your flash on your camera, as well as the setup you plan to use it with. Here it is paired with a set of extension tubes and a reversing ring used with a 50mm prime lens (an old one).
-
7Determine the best angle that you desire and mark it on the can. Like before, it doesn't need to be exact, but you will want to cut it out longer than you want. To ensure that the angle remains consistent, use some kind of straight edge.
-
8Start cutting away the bottom. As with the flash, do it piecemeal. Much easier to be more precise if you don't try to do it all in one cut.
-
9Continue until you think you have the right angle and try it out on your macro setup.
-
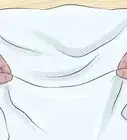
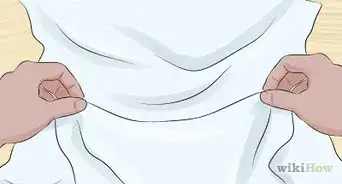
10Find something to use as the diffuser. If you have something sturdy and translucent, you can fasten it to the inside of the can. If you don't, try something else. In this picture, you see a Walmart bag 'donation'. The scrunchy was just the right size to hold it on securely.
-
11Try it out. Make any alterations that you need to.


Advertisement


References
- Idea for article comes from Flickr
About This Article
Advertisement