X
wikiHow is a “wiki,” similar to Wikipedia, which means that many of our articles are co-written by multiple authors. To create this article, volunteer authors worked to edit and improve it over time.
This article has been viewed 22,397 times.
Learn more...
Minecraft Alpha began in June 2010 and ended in December of that same year. Many people refer to Alpha as the “good ol’ days of Minecraft” because it was updated most frequently, giving players something to look forward to every week. Minecraft Alpha private servers allow people to enjoy the alpha version of the game with a small group of friends. If you want to bring back Minecraft’s heyday, make a private server from the “good ol’ days” yourself.
Steps
Method 1
Method 1 of 2:
Creating an Alpha Server Using a VPN
-
1Install a Virtual Private Network (VPN) software. To download free VPN software, open any web browser, and go to hamachi.en.softonic.com/download. Click the “Free Download” button in the center of the screen.
- After the program finishes downloading, double-click the .exe file either at the bottom of the browser or in your Downloads folder, click “Run” to begin the installer, and then “Accept” after reading the terms and conditions.
- Select “Custom” to avoid downloading unnecessary software, select “No,thanks,” then click “Next”; this will begin downloading Hamachi.
- Hamachi will automatically open after being downloaded.
- VPN software automatically sets up a virtual private network that makes it easy to create your own server.
-
2Download an alpha server. Go to mediafire.com/download/ng6o5fw0wmvh4hq/Minecraft_Server.exe. Click the green “Download” button to download an alpha 1.2.6 server.
- New servers are officially released with each update to the game. In order to host a server for a specific version of Minecraft, the game profile and the server must match. For example, if the latest server available is 1.7.9, attempting to use this server to play Minecraft version 1.7.2 will not work.
- Mineraft.net only offers the latest server version for download, so you must use an alternative website to download an older server.
Advertisement -
3Create a new folder on the desktop and name it “Alpha.” On your desktop, right-click any area. Select “New” then “Folders” to create a new folder. Right-click the new folder, select “Rename” then type in “Alpha.”
-
4Transfer the alpha server file to the Alpha folder. Open the Downloads folder, and drag the alpha server into the Alpha folder you just created.
-
5Set up a new network through the VPN software. Notice the IP address that the VPN shows at the top of the main menu in bold. This is not your actual IP address; this is what anyone who connects to your server will need to access it. It also needs to be added to the new network that was created.
-
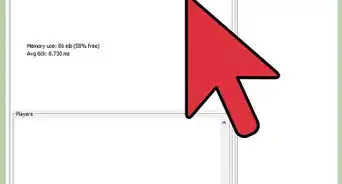
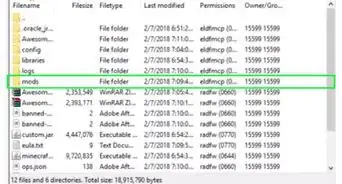
6Run the server. If the server is an .exe file, double-click the file to open the server. If the server is a .jar file, right-click the file and select “Open with Java Platform SE binary” to open the server.
- The first time the server is run, it will take a few minutes to add data files to that folder.
-
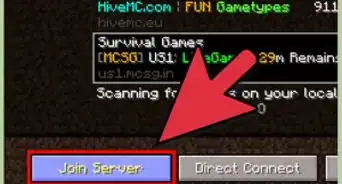
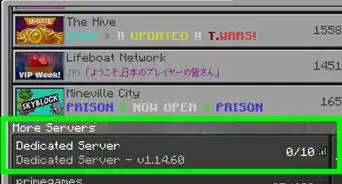
7Launch Minecraft and select “Multiplayer.” Run the Minecraft game by double-clicking its icon on your desktop; then on the main screen, click on “Multiplayer” from the options to launch a multiplayer game.
-
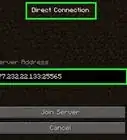
8Type in “localhost” in the IP textbox, and click “Connect.” After loading the map, you will be spawned into the server.
- For others to join the server, instead of typing “localhost,” they can type the IP address given by the VPN.


Advertisement
Method 2
Method 2 of 2:
Creating an Alpha Server Using Port Forwarding
-
1Open the Command Prompt. To do this, click the Start menu at the bottom-left side of the screen (or the Orb icon), type in “command,” and select the first search result.
-
2Type in “ipconfig.” Do not include the quotation marks. This will show all the IP addresses associated with your computer.
-
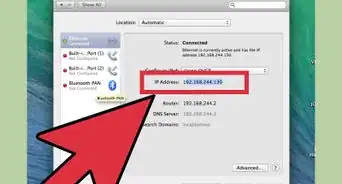
3Find “IPv4 Address.” Once you’ve found it, copy it down as you will need it later. It can be found on the list titled “Wireless LAN Adapter Wireless Network Connection.”
-
4Find the “Default gateway” in the same list as the IPv4. Copy the number on the second line. This number should look like “10.0.0.1.”
-
5Type the default gateway number into the address bar of a web browser. This will likely bring up a login screen. To log in, use the username “admin” and “password” as the password. This should work for most routers.
-
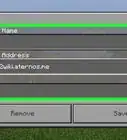
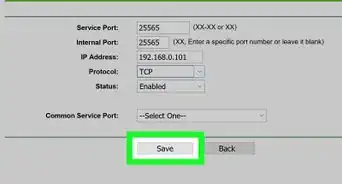
6Add a port-forwarding connection. Locate the “Advanced” section of Settings, and select “Add service.” Change the service name to “Other,” and type in the IPv4 address that you copied earlier. Change the start and end ports to 25565.
-
7Download a server version between 1.2.0 and 1.2.6. These are the versions included as part of the alpha stage of development.
- To download an alpha version, navigate to mediafire.com/download/ng6o5fw0wmvh4hq/Minecraft_Server.exe. In the top-right corner of the screen, click “Download,” and the server will automatically be saved in the Downloads folder.
- Getting an alpha server is important because the server version and the profile version must match in order to host a server.
-
8Create a new folder named “Alpha” on the desktop. On your desktop, right-click any area. Select “New” then “Folders” to create a new folder. Right-click the new folder, select “Rename” then type in “Alpha.”
-
9Transfer the server you’ve just downloaded into the folder you’ve just created. Drag the server from the Downloads folder to the Alpha folder on your desktop.
- When the server is run for the first time, other files containing server settings will be created in this folder.
-
10Open the server. This may be done two different ways depending on what type of file was downloaded:
- For an .exe file, double-click the file to launch the server.
- For a .jar file, right-click the file and click “open with Java Platform SE binary” to run the server.
-
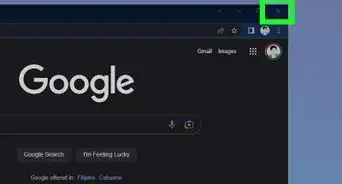
11Launch Minecraft in Multiplayer mode. To do so, open Minecraft by double-clicking its icon on your desktop or your programs list, and click “Multiplayer” on the main menu.
-
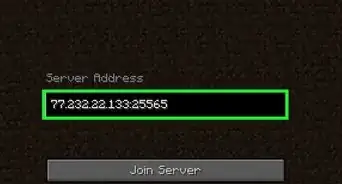
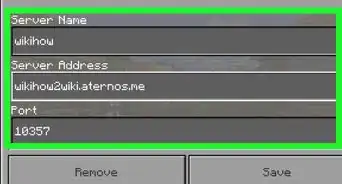
12Connect to your server. In the center of the screen will be a textbox, and to connect to your server, type in “localhost” in that textbox.
- For other people to connect to your server, go to cmyip.com, and give them your IP address at the top of the screen.


Advertisement
Community Q&A
-
QuestionWhat Minecraft version do I need to go with the same server version?
 Community AnswerTo play on a Minecraft server, use a version that the server is compatible with. Some servers allow several versions to join, while others only allow one. It depends on the server in question.
Advertisement


About This Article
Advertisement