X
wikiHow is a “wiki,” similar to Wikipedia, which means that many of our articles are co-written by multiple authors. To create this article, volunteer authors worked to edit and improve it over time.
This article has been viewed 42,516 times.
Learn more...
If you're producing your own YouTube videos, you may want to add a thumbnail to your creations. That's easily done in Photoshop!
Steps
-
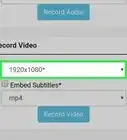
1Open a New Photoshop Document. Press Ctlr+N or go to File and then New.
- 1280×720 or 1920×1080 will be good for a thumbnail.
-
2Startup with the background. Fill the background with a gradient. To do this, select the gradient tool (hold down the Paint Bucket tool). Choose a fill option from the gradient samples. Then press and hold to make a starting point and ending point.Advertisement
-
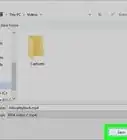
3Add a picture to the thumbnail. For example, you might add a logo. To add that image, go to File then Place.
-
4Add text. In order to do this press "T" and type what you want to display.
- Add some effects to the text if desired, such as drop shadow. To do this, hit Drop Shadow from the little FX icon.
-
5Put a rectangle behind the text (optional). Hold down the shape tools icon and select the rectangle tool. Then drag in your image to draw the rectangle; decrease its opacity to 50% or 25%.
- Make sure that the rectangle layer is under the text layer.
-
6Save the thumbnail. Go to File and choose Save for web. Select PNG-24 and press Save.


Advertisement


About This Article
Advertisement