This article was co-authored by wikiHow staff writer, Darlene Antonelli, MA. Darlene Antonelli is a Technology Writer and Editor for wikiHow. Darlene has experience teaching college courses, writing technology-related articles, and working hands-on in the technology field. She earned an MA in Writing from Rowan University in 2012 and wrote her thesis on online communities and the personalities curated in such communities.
The wikiHow Tech Team also followed the article's instructions and verified that they work.
This article has been viewed 2,009,688 times.
Learn more...
Have you found yourself watching YouTube videos and thinking, "I can do this too?" If you're confused about where to begin, don't worry—it's easy to make a YouTube video. YouTube videos can be as casual or as high-quality as you prefer. If you don't want or need to plan out your video, skip to the end of this guide for simple instructions on uploading your video to YouTube. This wikiHow article will teach you how to plan, film, and publish a video on YouTube.
Things You Should Know
- If you're just starting, it's best to use a webcam, your smartphone, or something that's relatively cheap and not as complicated as a DSLR camera.
- Record the video on your device, then transfer it to a computer if necessary.
- Go to youtube.com, sign in, and click "Upload" to begin uploading your video.
Steps
Equipment & Setup
-
1Select the right camera for your needs. If you're a beginner, you may already have all you need to record a video! However, there are a few things to take into consideration:
- Use a webcam for convenience. If you have a laptop with a built-in webcam, you can use it to make a YouTube video. Unlike your smartphone, you don't have to hold your webcam in your hand while recording your video, which is handy if you're making a vlog. However, built-in webcams tend to have poorer quality than many smartphone cameras. Still, a webcam will work if you don't want to purchase a digital camera.
- Use a smartphone for mobility. If you have an Android or iPhone, you can use its built-in camera and microphone to film anywhere. Premium smartphone models have amazing built-in cameras and can produce high-quality video. You could purchase a tripod if you want to record yourself doing something, or just hold the phone in your hand while you talk. You can then upload the video to YouTube straight from your phone or transfer the video to your computer first.
-
Use a digital video camera for high-quality filming. Professional YouTubers use high-quality DSLR cameras, which can get expensive. Fortunately, you can also make a YouTube video with a less-expensive digital camera, ranging from under $50 up to $200. Digital video cameras generally make higher-quality videos than webcams and smartphones, and you can typically put them into a tripod so you don't have to hold them in your hand the whole time.
- Most modern digital video cameras have a removable SD card that can be used to transfer videos to your computer. Double-check to ensure that your selected camcorder has an SD card, or can be easily connected to your PC or Mac before purchasing.
-
2Get screen recording software if needed. If you want to start a gaming channel on YouTube, make computer tutorials, or just record yourself doing something on your computer, you'll want to use software that records your screen. Software like OBS allows you to record your screen, your webcam or camera, and your voice all at the same time. You can even use it to stream live on YouTube.
- When recording, be sure that both the audio and video are properly being recorded by first making a test clip and viewing it.
Advertisement -
3Consider a dedicated microphone. Even though most phones and cameras have built-in microphones, having a dedicated microphone will improve your audio quality, which can make your YouTube videos sound more professional. Good sound quality can make or break a video; to this end, relying on your recording item's built-in microphone may not be ideal. Once you find a reasonably priced microphone, it's connect it to your computer.


Ideas & Planning
-
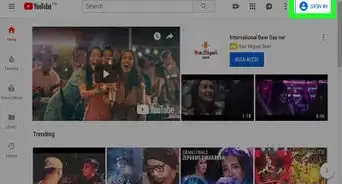
1Check current trends. Before you create a video on YouTube, you'll want to have an idea of the kind of content that people like to watch. Open up YouTube to see the most watched and trending videos on the left side of the page under Explore.
-
2Choose the type of video you want to create. YouTube hosts videos from millions of users from all around the world, but some types of videos are more popular than others. Before you set up your camera, you should have an idea of the genre or type of video you want to make. Some of the most popular YouTube genres are:
- Video blogs, or vlogs are regularly-updated series featuring a creator talking about whatever is on their mind, usually for 10 minutes or less.
- Gaming videos attract a lot of viewers, especially if you cover recent game releases.
- Tutorials and how-to videos can encompass literally any topic in which you are skilled.
- Montages are videos filled with images or video clips, set to music.
- Pet videos are always popular. These are typically recorded with a hand-held item, such as a smartphone or camcorder. They often feature the creator's pet doing something funny or endearing.
- Reviews are video blogs that review a product or service. Being sardonic and funny when reviewing something will get more people to watch.
- Comedy videos encompass a wide range of styles and approaches. They're best done with friends, and can feature anything from practical jokes, to silly dancing, to scripted sketches and beyond.
- If you're stumped, check out our guide on YouTube video ideas.
-
3Watch videos that are similar to the type you'd like to make. While you shouldn't copy another YouTuber's style or technique completely, watching the videos of a YouTuber you admire can give you great ideas for techniques to incorporate into your own video.
-
4Plan a personal video. Some people might not care about gaining a following and just want to upload a personal video to YouTube to share with people they know. This can be great if you want to share an experience with friends or relatives who can't be there to live it with you. In this case, you'll still want to plan your video ahead to ensure that you're creating a great YouTube video.
- Plan ahead of time to film events like family picnics, weddings, and birthdays so that you'll have the raw video to edit and upload to YouTube later.
- You can choose to make the YouTube video private so that only people with the specific URL (web address) of the video can view it. Still, there's no guarantee it won't eventually be seen by third parties. Keep the content of your video clean and in accordance with YouTube's guidelines.
-
5Consider making a video from other videos. This practice is especially popular with clips that don't belong to any specific YouTube user, such as clips of old cartoons and TV shows.
- If you're taking this route, you won't need video recording equipment, but you will need source files in the form of downloadable video clips (you can download YouTube videos for this purpose if need be).
- These "remix" videos often exist in legal limbo. You're unlikely to get in any trouble for making one, but if one of the copyright holders for the original clips in your video requests that YouTube remove it from their site, they will do so immediately.
-
6Write a script. While optional, doing this before settling on a video genre will help determine the kind of video you wish to record. Occasionally glancing at a script can help you keep on track, give your video more structure (and therefore more professional), and will mean you don't forget anything.


Setup & Recording
-
1Make sure you have plenty of light. If possible, film your YouTube video during the day, using natural daylight. If you're planning to do a nighttime scene, provide a little bit of light so people can see what you're doing.
- If you're recording yourself, you should sit facing the light, with the camera directly in front of you. Having your lighting source behind the camera illuminating your face will help you look better on video.
-
2Choose your clothing appropriately. If you're recording yourself and have a specific-colored background, don't wear that color. For example, if your wall is black, avoid black or other dark clothing. You'll also want to choose clothing colors that flatter your skin tone.
-
3Keep your background clean. People will think you are unorganized and messy if your background isn't clean enough, and a clean, professional-looking background is more pleasant to look at than is an untidy one.
-
4Begin recording. Once you've settled on an idea for your video, perform whatever tasks you must set up and prepare, then record the video.
- You may have to record multiple takes. This is completely normal, especially for a beginner.
Tip: Record more than you plan to use. You can edit out the extra bits later on; there's no reason to worry too much about getting the timing perfect from the beginning.
-
5Speak loudly and clearly. This serves the dual purpose of both ensuring that you make the most of your audio quality and capturing your audience's attention.
- If you're using a microphone, speak directly into it. This is especially important when you're using a recording item with a built-in mic.
-
6Be cautious when divulging personal information. Because YouTube is a public platform, there's no way of knowing who might find your video. Never provide your full name, phone number, or any information that can help people figure out where you live.


Uploading on a Computer
-
1Transfer the video to your computer if necessary. If the video is on an SD card from a camera, plug the SD card into your computer, open the SD card if it doesn't open automatically, and move your video from the "DCIM" folder onto your computer.
- Your computer may not have an SD card slot. If so, you'll need a USB card reader.
- There are many ways that you can use to transfer videos, like using a cloud service.
-
2
-
3Click Upload video. The video upload page will open.
-
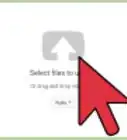
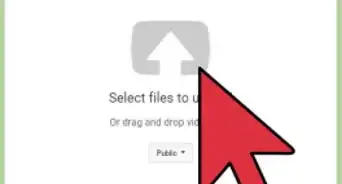
4Select your video. There are two easy ways you can select your video for upload:
- The easiest way is to drag the video file from your computer to the "Drag and drop video files to upload" window.
- You can also click SELECT FILES to choose the video file from another location on your computer and then click Open.
-
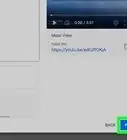
5Add a description and a title. Type a title for your video into the "Title" box, then type a description (optional) into the text box below the title.
- If you want to make it easy for people to find your YouTube video, make sure to use keywords that describe your video in the description field. For example, if you're making a gaming video, be sure to type the game's name into that field.
-
6Select a thumbnail. Click one of the thumbnails in the lower-right side of the page to set it as your video's thumbnail.
- If your video is under 60 seconds long, it will upload as a YouTube Short, which viewers can find by clicking the Shorts option.[1] You won't be able to select a thumbnail for a YouTube Short.
- You can also click Custom thumbnail here to select a custom thumbnail.
- If you want, you can change or edit the thumbnail later.
-
7Select your audience. If the video is for children, select Yes, it's made for kids. Otherwise, choose No, it's not made for kids. You can further age-restrict your video by clicking the Age restriction menu and making it only visible to viewers over 18.
-
8Scroll down and click SHOW MORE. This gives you additional options for your video.
-
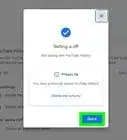
9Choose your preferences and click NEXT. Before you upload your video, you'll want to go through all of the options on the page to make sure you're setting yourself up for success:
- If your video contains a paid promotion (for example, if a company or influencer gave you something of value in exchange for making this video), you'll need to check the box under "Paid promotion.[2] "
- You can choose to automatically label chapters and key moments and tag places you mention.
- Select a category for your video from the "Category" drop-down menu.
- Choose whether to allow people to leave comments. You can also choose to moderate the comments and show or hide how many likes you get.
- Click NEXT once you're finished.
-
10Add additional video elements and click Next. On this screen, you can add subtitles, cards that appear on your video, and an end screen that promotes related content. If you're just uploading a personal video or don't want to mess with these settings, click Next without making changes.
-
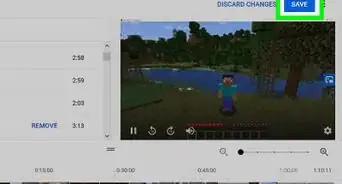
11Click Next on the copyright screen. YouTube will automatically check your video for copyright problems, such as licensed music playing in the background. If no problems are found, click Next to continue.
- If YouTube detects a copyright problem, follow the on-screen instructions to correct the issue.
-
12Select a privacy level and click Publish. Choose whether your want your YouTube video to be Private (only you can see it), Unlisted (not searchable, but visible to anyone with the URL), or Public (searchable and viewable to everyone). Then, click Save to post your YouTube video.
- Depending on the length of your video, it may take additional time to upload.


Uploading in the Mobile App
-
1Open the YouTube app on your Android, iPhone, or iPad. Tap the YouTube app icon, which resembles the YouTube logo.
-
2Tap the + icon. You'll see it at the bottom of the screen.
- You may have to allow YouTube access to your phone's camera, microphone, and/or camera roll before proceeding.
-
3Tap Upload a Video. This opens your phone or tablet's camera roll.
- If your video is less than 60 seconds long, it will upload as a YouTube Short.[3]
-
4Select a video to upload. Once you choose a video, you'll see a preview.
-
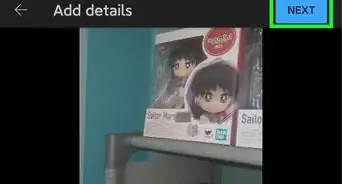
5Trim your video (if needed) and tap Next. You can edit your video's length by tapping and dragging one of the ends of the video bar left or right before tapping Next.
- If your uploading a video as a YouTube Short, you can add creative elements like text, voiceovers, sounds, and more.
-
6Add a video title and description.
- Tap the Create a title field to enter a title for your video.
- Tap Add description to type keywords and information that can better explain your video or help people find it easily when searching.
-
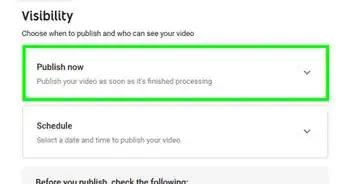
7Select your preferences. Before uploading, scroll down and go through the remaining options:
- Tap the Visibility menu to choose whether your want your YouTube video to be Private (only you can see it), Unlisted (not searchable, but visible to anyone with the URL), or Public (searchable and viewable to everyone).
- Tap the Audience menu to choose whether this video is specifically made for children.
- If you want to tag a location, tap Location to do so.
-
8Tap UPLOAD. It's at the bottom of the screen. Your video will begin to upload to YouTube.
- Once the video is live, you'll be able to view it on your channel.[4]


Community Q&A
-
QuestionIs there a way I can produce a video on my smartphone then upload it to YouTube without a computer?
 Community AnswerYou can make a video using camera on your iPhone and then go into Photos. Click Edit in the top corner and pick the video you want to upload to YouTube. Click Share and try to find the logo YouTube. You have to make sure you are signed in to YouTube first.
 -
QuestionHow do I upload a video from iMovie?Community AnswerGo into the main menu of iMovie and click on the arrow pointing to the right. You will see the logo "YouTube". Wait until it uploads. Just remember you have to be signed in first.
-
QuestionWhat if you don't have a camera?
 Community AnswerYou can use your phone or computer. Any technology gadget with pretty good quality will do.
Warning
- Don't plagiarize other people's content.
- Like any popular website with user-created content, YouTube is full of bullies, trolls, and other kinds of people who will attempt to bring you down. If ignoring them isn't enough, you can disable comments on your videos.


References
About This Article