X
wikiHow is a “wiki,” similar to Wikipedia, which means that many of our articles are co-written by multiple authors. To create this article, 40 people, some anonymous, worked to edit and improve it over time.
This article has been viewed 302,215 times.
Learn more...
This origami reindeer is a simple design, and can be attempted by a paper folder of any level. It's great for using up unwanted murky brown origami paper, and it can make for a creative Christmas decoration!
Steps
-
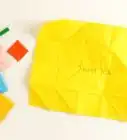
1Start with a square sheet of paper.
-
2Fold it across one diagonal, and unfold it again.Advertisement
-
3Fold one side of the square to meet the line made by the diagonal fold. Repeat this for the adjacent side of the square.
-
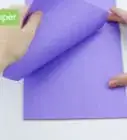
4Repeat the previous two steps for the remaining sides of the square without unfolding anything.
-
5Fold it in half, from point to point, as shown, and then unfold it.
-
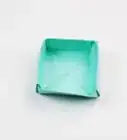
6Put your finger in one of the flaps and pull out the point, using the previous fold as a template, and press it down.
-
7Repeat the previous two steps for the other flap.
-
8Fold it in half along its length as shown.
-
9Pull the point that the flaps point towards back into the middle in a reverse fold. Flatten it down to construct the neck.
-
10Fold both of the flaps back as shown. These are your reindeer's front legs.
-
11Make a reverse fold at the top of the neck, beginning the formation of the head.
-
12Unfold the head as shown.
-
13Fold the point underneath to make the nose more flat.
-
14Fold the top of the head in half over to the opposite side as shown.
-
15Make a reverse fold and flatten as shown to create the beginnings of the hind legs.
-
16Make another reverse fold about halfway down the hind legs and flatten it to see the fully formed hind legs.
-
17Cut up the back of the neck as shown, without actually completely cutting off any part of the reindeer.
-
18Split the middle of this flap right up the back of the reindeer's neck. You'll end up with four little prongs.
-
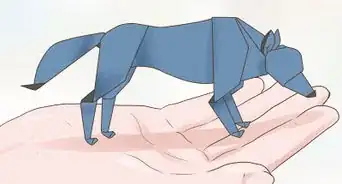
19Fold the prongs upwards to form antlers and complete the reindeer.
-
20Done.
Advertisement
Community Q&A
-
QuestionHow do I get the prongs?
 Community AnswerYou have to gently cut off just a sliver of the neck area, right about where the nape would be, while also making sure that you don’t cut it off completely. This is optional; if you’re making a doe, there will be no antlers.
 -
QuestionCan this be made with printer paper?
 ArtemiTop AnswererYes, but you will have to cut it into a square. Also, printer paper is usually more rigid and harder to fold, but if you have experience and patience, you can do it easily.
 -
QuestionMy deer is too big. What size square should I use?Community AnswerIt depends on how big you want it. The sides of your paper should be equal and the same length.
Advertisement
Warnings
- Be careful with scissors, and if you are a child, get parental supervision.⧼thumbs_response⧽
Advertisement
About This Article
Advertisement