This article was co-authored by wikiHow staff writer, Aly Rusciano. Aly Rusciano is a Creative Writer based outside of Nashville, Tennessee. She has over ten years of experience in creative, academic, and professional writing. Aly’s writing has been nationally recognized in the Sigma Tau Delta Rectangle and featured in Blue Marble Review, The Sunshine Review, PopMatters, and Cathartic Literary Magazine. She graduated from The University of Tennessee at Martin with a BA in English, focusing in Creative Writing and minoring in Theatre.
There are 13 references cited in this article, which can be found at the bottom of the page.
This article has been viewed 3,964 times.
Learn more...
Roast chicken. Pasta. Steamed vegetables. Chili. Yogurt. Oatmeal. Is there anything you can’t make in an Instant Pot? The possibilities are endless, and you may notice that each recipe asks for a pressure release: NPR (natural pressure release) or QR (quick release). Releasing the pressure is the final step of every Instant Pot dish, and knowing whether to use natural release or quick release can make the difference between a perfectly or overly cooked meal. Luckily, we’ve got everything you need to know in this guide.
Things You Should Know
- To use natural release with your Instant Pot, just let the pot release the pressure slowly. You don't have to do anything but wait!
- Use an automatic natural release (NPR) for soups, chilis, and oatmeals to let the pressure slowly release for up to 40 minutes.
- Opt for a manual quick release (QR) that takes 1 to 5 minutes if you want to avoid over-cooking delicate foods like fish, green beans, or pasta.
Steps


How to Use Natural Release
-
1Leave your Instant Pot alone after the timer goes off. The monitor will read “L000” and start counting up to “L001,” “L002,” and so forth with each minute. This number represents how long the pressure has been releasing.[6]
-
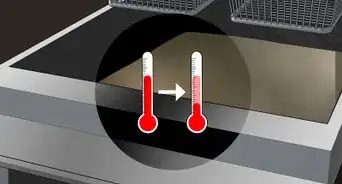
2Wait for the float valve to drop. The metal tube to the right of the release valve at the top of the Instant Pot is called the float valve and lets you know how much pressure is in the pot. As the pressure is released, the valve will start to sink.[7] This may take up to 30 minutes.
- If you’re unsure if the valve has dropped all the way, notice if you can see any hot air coming out of the release valve. No steam means all the pressure is released.
- Do not stick your hand or face near the release valve, as excess steam could burn you.
-
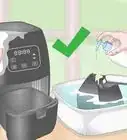
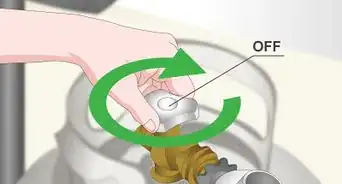
3Turn the Instant Pot off and remove the lid. Once all the pressure is released from your Instant Pot, power it down and twist off the lid.[8] Pull the top of the lid towards your body to protect yourself from any excess steam.


How to Use Quick Release
-
1Turn your Instant Pot off when the cooking cycle is complete. The last thing you want to do is release pressure before your delicious meal is done cooking! Listen for the finishing beep, or look to see if the monitor reads “L000.” Then, turn off the Instant Pot.[11]
-
2Move your Instant Pot into an open space. A quick release causes a hot stream of air to shoot out of the top of the pot. Make sure there are no cabinets or shelving over the pot so the steam can escape freely.[12]
-
3Use a wooden spoon to open the Instant Pot’s release valve. The release valve is located on top of the Instant Pot and is shaped like a dial. Stand back before opening it, as quick releases cause a dangerous eruption of hot steam. Hit the valve from “sealing” to “venting” with the back of the spoon. Hissing, hot air will be released immediately.[13]
- Move your head away from the Instant Pot to avoid getting burned.
-
4Remove the lid once the float valve is down. The metal tube next to the release valve will start to sink as hot steam erupts from the pot. Wait for a maximum of 5 minutes for the valve to drop all the way down before removing the lid.[14]


References
- ↑ https://www.instanthome.com/support/instant/resources
- ↑ https://youtu.be/eZs25HMglm4?t=689
- ↑ https://youtu.be/qwnhnrZ4r6o?t=62
- ↑ https://www.foodnetwork.com/how-to/packages/help-around-the-kitchen/difference-natural-release-quick-release-instant-pot0
- ↑ https://www.instanthome.com/support/instant/resources
- ↑ https://youtu.be/9b0JktJsWmk?t=284
- ↑ https://youtu.be/l-5TtraYIYg?t=63
- ↑ https://youtu.be/l-5TtraYIYg?t=68
- ↑ https://www.instanthome.com/support/instant/resources
About This Article