This article was co-authored by wikiHow staff writer, Janice Tieperman. Janice is a professional and creative writer who has worked at wikiHow since 2019. With both a B.A. and M.A. in English from East Stroudsburg University, she has a passion for writing a wide variety of content for anyone and everyone. In her free time, you can find her working on a new crochet pattern, listening to true crime podcasts, or tackling a new creative writing project.
The wikiHow Video Team also followed the article's instructions and verified that they work.
This article has been viewed 52,365 times.
Learn more...
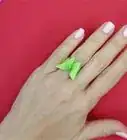
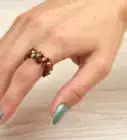
Jump rings are an important part of any handmade jewelry project because they help keep everything together. As important as these rings are, they’re actually very small, and can fit on top of your pinky fingernail. It only takes a minute to open and close these rings with a pair of pliers so you can continue making beautiful jewelry.
Steps
Unfastening the Jump Ring
-
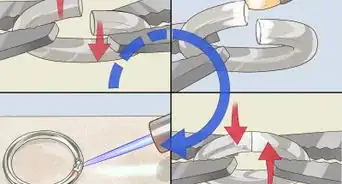
1Pick up the jump ring gently with a pair of chain nose pliers. Hold the pliers in your dominant hand and gently clamp down on 1 end of the jump ring. You can recognize the 2 ends easily because there's a slight gap between them. Lift the jump ring from the work surface.[1]
- Chain nose pliers have a thin, pointy mouth that clamps and bends small pieces of metal with ease.
- Avoid using your fingers to pry open jump rings. Jump rings are small, so the pointy end of the pliers is perfect for clamping them. Pliers also allow you to apply the necessary force to bend the metal ring.
-
2Use a second pair of pliers to clamp the other end of the ring. Hold another pair of pliers in your free hand so that you're working with both hands simultaneously. Clamp down on the opposite end of the ring, which is on the other side of the slight gap, with your non-dominant pliers.[2]
- The slight gap in the ring should be facing up.
Advertisement -
3Twist your rightmost pliers away from you to open the ring. Rotate the pliers in your right hand away from yourself, forcing the right side of the ring to move. At the same time, twist the left set of pliers towards you, to pry the ring open.[3]
- Focus on twisting both ends of the ring away from each other instead of just pulling them apart. Pulling the ends apart can distort the ring's shape.
Tip: You can also do this vice versa! All that matters is that you’re pushing both ends of the ring forward and backward.[4]
-
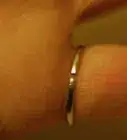
4Stop twisting when the gap is about 3 to 5 mm (0.12 to 0.20 in) wide. This doesn't have to be exact, but the gap needs to be large enough for a chain or band to fit through. Look at the size of the piece you're attaching to the jump ring and make sure the gap can support it.
-
5Thread any bands or chains onto the ring. Hold the jump ring with 1 set of pliers, then put the other pair down on your work surface. Take the band, bead, or chain that you’re using for your project and thread it onto 1 end of the jump ring.[5]
- Double-check that the band or chain is securely attached to the jump ring before you close the ring.


Closing the Ring
-
1Twist both pairs of pliers to bring the ends of the ring back together. Wiggle both sets of pliers so both ends of the jump ring are closer together. It’s okay if your jump ring isn’t completely back together—just do your best to get both ends of the jump ring moving.[6]
-
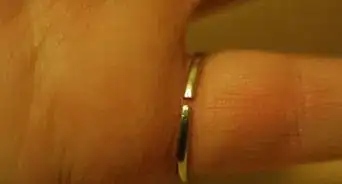
2Graze both ends of your jump ring against each another to close the gap. Use both pliers to move both ends of the rings toward one another. Try to brush both ends of the ring against one another so your ring doesn’t have any obvious gaps.
- You can even overlap the ends a tiny bit if you want it to be extra secure.
- If both ends of your ring are close enough to one another, they may “snap” together.
-
3Double-check that your ring is secure with no gaps. Check that the gaps are either gone or too minuscule to notice. Ideally, your gap should be thinner than the metal clasp of the band or chain that you’ve threaded on.

Community Q&A
Did you know you can get answers researched by wikiHow Staff?
Unlock staff-researched answers by supporting wikiHow
-
QuestionDo you find jump rings in the jewelry making section
 wikiHow Staff EditorThis answer was written by one of our trained team of researchers who validated it for accuracy and comprehensiveness.
Staff AnswerwikiHow Staff EditorStaff AnswerYes! Jump rings are an essential part of making handmade jewelry, and you should be able to find them in most any store that sells jewelry supplies.
Support wikiHow by unlocking this staff-researched answer.
-
QuestionHow do I prevent the nose pliers from putting grooves on the ring?
 Ryleigh HempeCommunity AnswerMost jewelry tools do not have grooves on the pliers, or they include a special set that are flat pliers without grooves. If you are unable to buy a new set, you could always try not gripping the jump ring quite as tightly or positioning the pliers on the ring differently.
 -
QuestionCan I open a jump ring only using my hands?Ryleigh HempeCommunity AnswerYou can if they are big enough, but generally you would want to use pliers or something to help you open a jump ring. You may have a hard time closing them if you are doing lots of work.
Warnings
- Never pull on the jump ring to open it, as this creates a large gap. Instead, always twist the pliers so the ends of the ring move forward and backward, but not left and right.[7]⧼thumbs_response⧽
Things You’ll Need
- 2 chain nose pliers
- Bands or chains (optional)


References
- ↑ https://www.kernowcraft.com/jewellery-making-tips/jewellery-making-basics/how-to-open-and-close-a-jump-ring
- ↑ https://www.beadshop.com/collections/how-to-open-and-close-jump-rings-securely
- ↑ https://www.kernowcraft.com/jewellery-making-tips/jewellery-making-basics/how-to-open-and-close-a-jump-ring
- ↑ https://www.beadshop.com/collections/how-to-open-and-close-jump-rings-securely
- ↑ https://m.youtube.com/watch?v=9GoA-OZjvKc&t=1m45s
- ↑ https://www.beadshop.com/collections/how-to-open-and-close-jump-rings-securely
- ↑ https://www.kernowcraft.com/jewellery-making-tips/jewellery-making-basics/how-to-open-and-close-a-jump-ring