This article was co-authored by wikiHow staff writer, Nicole Levine, MFA. Nicole Levine is a Technology Writer and Editor for wikiHow. She has more than 20 years of experience creating technical documentation and leading support teams at major web hosting and software companies. Nicole also holds an MFA in Creative Writing from Portland State University and teaches composition, fiction-writing, and zine-making at various institutions.
There are 10 references cited in this article, which can be found at the bottom of the page.
The wikiHow Tech Team also followed the article's instructions and verified that they work.
This article has been viewed 814,477 times.
Learn more...
This wikiHow teaches you how to remove the password from a protected Excel worksheet, as well as how to crack the password for an encrypted Excel file. In most cases, removing a password from an editing-locked worksheet inside of an Excel file is fast and easy! But if you need a password to even open the file, things get a bit tricky. There's no legitimate way to decrypt an Excel workbook without using a password cracker, which can be a very resource-intensive process, depending on the complexity of the password. Still, it's worth a try!
Steps
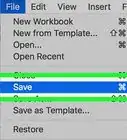
Removing Password Protection from a Sheet
-
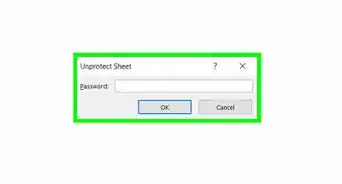
1Understand the conditions under which you can do this. If only a sheet in the Excel workbook is protected—that is, if you can open the Excel file and view its contents but not edit it—then you can use this method to remove the password protection on both Windows and Mac computers.
- If the Excel file itself is encrypted and requires a password to even view the contents, this method will definitely not work. You can try using a password cracker, but there are no guarantees.
- There's a chance this method won't work if the file was protected using the Microsoft 365 version of Excel.[1]
-
2Check to see if the Excel file is encrypted. The easiest way to do this is by double-clicking the Excel file. If the file opens and you can click Read Only to view the file, or if the file opens like usual when you double-click it, the file is not encrypted.
- If you're immediately prompted for a password upon double-clicking the file and not given the option to open it read-only, the file is encrypted and you cannot use this method to open it.
Advertisement -
3Make a copy of the workbook. In Finder or the Windows File Explorer, click the Excel file that contains the sheet you want to unprotect, then press Ctrl + C (Windows) or Command + C (Mac) and paste it into another folder by pressing Ctrl + V (Windows) or Command + V (Mac).
- This is necessary in case you accidentally corrupt the original version of the file in the process.
-
4Enable file extensions. Skip this step on a Mac. If you're using a Windows computer, you'll need to make sure you can view and change file extension names by doing the following:
- Open File Explorer by pressing Windows key + E.
- Click View.
- Check the "File name extensions" box.
-
5Change the Excel file into a ZIP folder. To do so:
- Windows — Right-click the Excel file, click Rename, delete the "xlsx" text at the end of the file's name, and type in zip. Make sure that you keep the period between the file's name and "zip". Press Enter and click Yes when prompted.
- Mac — Select the Excel file, click File, select Get Info, delete the "xlsx" text at the end of the file's name, and type in zip. Make sure that you keep the period between the file's name and "zip". Press Return and click Use .zip when prompted.
-
6Extract the ZIP folder. This process will vary depending on your computer's operating system:
- Windows — Right-click the ZIP folder, click Extract All... in the drop-down menu, and click Extract when prompted. The extracted folder should open.
- Mac — Double-click the ZIP folder, then wait for the extracted folder to open.
-
7Double-click the xl folder. This opens the folder.[2]
- If the extracted folder didn't open for some reason, first double-click the regular folder with the same name as your ZIP folder.
-
8Double-click the worksheets folder. It's near the top of the "xl" folder.
-
9Open the sheet in a text editor. Depending on your computer's operating system, do one of the following:
- Windows — Right-click the sheet you want to unlock (e.g., "Sheet1"), select Open with in the drop-down menu, and click Notepad in the resulting pop-out menu.
- Mac — Click the sheet you want to unlock (e.g., "Sheet1"), click File, select Open With, and click TextEdit.
-
10Remove the password protection code. Find the "sheetProtection" section that's inside the "< >" brackets, then delete everything from "<sheetProtection" to the closed bracket ("/>") on the other side of the sheet protection algorithm.
-
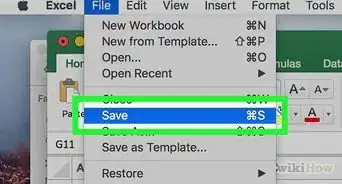
11Save your changes and close the text editor. Press either Ctrl + S (Windows) or Command + S (Mac), then click the X (or red circle on a Mac) in the corner of the text editor.
- If multiple sheets in the workbook are protected, you'll need to remove protection from each of them separately. Open any other protected sheet in your text editor and remove the same line, saving each as you go.
-
12Copy the "worksheets" folder. Click the "Back" button to go back to the "xl" folder, then select the "worksheets" folder and press either Ctrl + C (Windows) or Command + C (Mac) to copy it.
-
13Open the ZIP file (Windows) or the new folder (Mac). This is the file you renamed and then extracted earlier (the one ending in .zip, if you're using Windows). If you're using a Mac, just double-click the new folder that has the same name as the ZIP file.
-
14Replace the "worksheets" folder with your copied one. Navigate to the "worksheets" folder by double-clicking the "xl" folder, and then delete the "worksheets" folder inside. Next, right-click a blank place in the window and select Paste to paste the copied version.
- If you're using Windows, you've now added the copied folder back into the existing ZIP file.
- If you're using a Mac, you've added the copied folder to the extracted folder.
-
15(Mac only) Turn the folder back into a ZIP file. If you're using a Mac, press Control as you click the folder that you previously extracted—it's the folder with the same name as your spreadsheet. Then, select Compress from the menu. The folder is now a ZIP file again.[3]
-
16Change the ZIP folder back into an Excel file. Close the ZIP file, then do one of the following:
- Windows — Right-click the ZIP folder, click Rename, replace the "zip" text with "xlsx", and press Enter. Click Yes when prompted.
- Mac — Click the ZIP folder, click File, click Get Info, replace the "zip" text in the title with "xlsx", and press Return. Click Use .xlsx when prompted.
-
17Double-click the Excel file to open it. Now that you've removed password protection from the sheet, you'll be able to edit it as needed.
- If you receive an error that the Excel sheet is damaged, you probably removed extra code when you were attempting to remove the password protection algorithm. Repeat the above steps, making sure to only remove the text between the brackets (</>) and the brackets themselves.


Cracking a Workbook Password
-
1Understand that it may be impossible to crack the password. Modern versions of Excel, such as Excel 2019 and Microsoft 365, use advanced encryption techniques that make the methods used by password crackers virtually useless due to how long the password can take to crack. You'll have an easier time cracking a shorter password without special characters, although it may still be possible to crack more complex passwords using the right app.
- It is impossible to crack an Excel file without purchasing a password cracker, as free versions of reputable password crackers usually only cover up to Excel 2010.
- If your Excel file truly is encrypted, double-clicking the Excel file will prompt you for a password before you can view the file's contents. If this is the case (and you don't know the password), you'll need a password cracker to view its contents.
-
2Download and install PassFab for Excel. You can get it from https://www.passfab.com/products/excel-password-recovery.html. While many applications may claim to remove password encryption from password-protected Excel workbooks, PassFab is known for being safe and easy to use.[4] It can also decrypt Excel files made in all versions of Excel, including 2019 and Microsoft 365. There are two drawbacks, though:
- One is that the app only works on Windows, so Mac users will need access to a PC.[5] There may be a Mac alternative, but none have proven to be as reliable. If you don't have access to Windows, try searching for another Excel password-cracking app. Just be sure to research the app thoroughly before downloading and installing, as there are many rogue apps out there.
- The other is that the software is not totally free—there are some basic features in the trial version that may help crack your password, but you'll need to pay for a license if the password is at all complex. If you just need to crack one workbook, you can go for the one-month option that's only $15.95.[6] Just remember to cancel the subscription before the month ends so you aren't billed in the future.
-
3Open PassFab. After installing the app, you'll find it in your Windows Start menu.
-
4Click Recover Excel Open Password. It's the first of two options. This is the option you should choose if you are required to enter a password upon opening the workbook.
- If you just need to remove the password from a protected sheet inside a workbook and couldn't do so by editing the XML file, you can select Remove Excel Restriction Password instead and follow the on-screen instructions.
-
5Click the + and select your Excel file. This tells PassFab which file to crack.[7]
-
6Select a password recovery mode. Keep in mind that no matter which option you choose, cracking a password takes time. The app has to try all different combinations of letters, numbers, and symbols. This can take anywhere from a few minutes to a few months! There are three options you can choose from:
-
Dictionary Attack is a good option if you think the password is a simple word from the dictionary. You can also provide your own list of words to add in addition to the dictionary, such as common passwords used by your organization. Just add those potential passwords to a text file, save it, click Settings next to "Dictionary Attack," and select that file.
- This is the only free option, and it only includes a limited dictionary.[8] If you want to gain access to more options, click Upgrade Now to purchase a license.
- Brute Force with Mask Attack is a great option if you know any parts of the password, or want to include certain letters, numbers, or symbols in your cracking attempt. If you choose this option, click Settings beside it to customize the length of passwords to try, which characters to use, and prefixes and/or suffixes. Depending on the length and complexity of the password, this option can take a long time—hours, days, even weeks!
- Brute Force Attack is just like the previous option, except it's best for when you really have no idea what the password could be. It basically tries all possible combinations until it can figure out the password, which can definitely take a long time depending on its length.
-
Dictionary Attack is a good option if you think the password is a simple word from the dictionary. You can also provide your own list of words to add in addition to the dictionary, such as common passwords used by your organization. Just add those potential passwords to a text file, save it, click Settings next to "Dictionary Attack," and select that file.
-
7Click the blue Recover button. Let the password cracking begin! PassFab will attempt all possible combinations consistent with the cracking option you selected. The app will continue trying combinations until it guesses the password or runs out of options to try.
- This can take a while, and can consume a lot of resource on your computer. If you need to pause the cracking, click the stop button (the square) until you're ready to resume, and then click the play button to start again.[9]
- When PassFab finds the password, it will display it to you in plain text—you can then copy or type the password into Excel when opening the file to view its contents.
- Depending on the contents of the Excel file, it might be necessary to abandon your efforts if you haven't found the password within a reasonable period of time.


Community Q&A
-
QuestionCan I save the excel sheet in .CSV format then open in Excel?
 Marry.M.ChenCommunity AnswerYes, you can do that, save the excel sheet in .CSV format and open in Excel.
 -
QuestionWhat do I do if I get an error extracting a ZIP file?
 Community AnswerThe ZIP file itself may have a password rather than the spreadsheet; you can't use this method to crack the password. Try the methods in Remove the Password from a Zip File Without Knowing the Password .
 -
QuestionWhat do I do if I can't open my password protected Excel file?
 Community AnswerPassword crackers are the fastest and easiest option if you need to remove an Excel password. There are free password recovery tools, such as FreeWordExcel and Straxx. Unfortunately they have limited functionality, so if they won’t help in you that case, then you can try commercial software such as Excel password recovery master, Excel password recovery online services like Password-Find, there are a lot of options.


References
- ↑ https://www.youtube.com/watch?v=lu5vgcSXmFY
- ↑ https://www.alphr.com/remove-password-excel-2016/
- ↑ https://support.apple.com/guide/mac-help/zip-and-unzip-files-and-folders-on-mac-mchlp2528/mac#:~:text=Compress%20a%20file%20or%20folder,compressed%20file%20is%20called%20Archive.
- ↑ https://www.javatpoint.com/how-to-remove-passwords-from-excel-file
- ↑ https://www.passfab.com/products/excel-password-recovery.html
- ↑ https://www.passfab.com/purchase/buy-excel-password-recovery.html
- ↑ https://www.passfab.com/thankyou/install-excel-password-recovery.html
- ↑ https://www.passfab.com/guide/how-to-use-passfab-for-excel.html
- ↑ https://www.passfab.com/guide/how-to-use-passfab-for-pdf.html
About This Article

To open a password protected Excel file, start by double-clicking the file to see if you can read it. If it opens, copy and paste the file to create a backup in case you make a mistake. Then, open File Explorer, click “View” and check the “File name extensions” box. Once you’ve done that, right click the Excel file and rename the file extension to “.zip.” Next, right-click the file and select “Extract files.” After you’ve extracted the files, open the “xl” folder and then “worksheets.” Open the sheet inside with Notepad, search for the “sheetProtection” section inside the diamond brackets, then delete the text until the closed bracket. When you’ve deleted the sheet protection, save the file. Then, copy the “Worksheets” folder from the “xl” folder. Open the zip file you renamed earlier, and replace the “worksheets” folder inside with the one you just copied. To finish off, change the zip folder back to an Excel file by changing the extension back to “.xlsx.” For more tips, including how to crack an encrypted Excel file, read on!