X
This article was co-authored by wikiHow staff writer, Jack Lloyd. Jack Lloyd is a Technology Writer and Editor for wikiHow. He has over two years of experience writing and editing technology-related articles. He is technology enthusiast and an English teacher.
This article has been viewed 28,400 times.
Learn more...
This wikiHow teaches you how to organize photos using the Facebook website and the Facebook mobile app. To move photos between albums, you'll need to use the desktop version of the Facebook website. You can create new albums and add photos to them using either the Facebook website or the Facebook app.
Steps
Method 1
Method 1 of 3:
Moving Photos to Another Album on Desktop
-
1Open Facebook. Go to https://www.facebook.com/. This will open your Facebook News Feed if you're logged in.
- If you aren't logged in, enter your email address (or phone number) and password in the top-right side of the page.
- You can only perform this method on desktop.
-
2Click your name. This tab is in the top-right side of the Facebook page. Doing so takes you to your Facebook Timeline.Advertisement
-
3Click Photos. It's below your cover photo on your profile page.
-
4Click the Albums tab. This option is below and to the right of the "Photos" heading.
-
5Select an album. Click an album from which you'd like to move a photo. Keep in mind at the album you choose must be one you created, not a Facebook-created album.
- For example, you can't move photos from the "Timeline Photos" album.
-
6Select a picture you want to move. Hover your mouse cursor over the picture you want to move. You'll see a pencil-shaped icon appear in the top-right corner of the photo's thumbnail.
-
7Click the pencil icon. Doing so prompts a drop-down menu.
-
8Click Move to Other Album. It's near the bottom of the drop-down menu. Clicking this brings up a pop-up window.
-
9Choose a new album. Click the drop-down box below the "Select another album for this photo:" heading in the pop-up window, then click an album to which you'd like to move the photo. You can only select a user-created album (again, not a Facebook-created one).
-
10Click Move Photo. This blue button is at the bottom of the window. Doing so will remove your photo from its current album and move it to your specified album.
- If you want to move multiple photos, you'll need to repeat this process for each photo you want to move.


Advertisement
Method 2
Method 2 of 3:
Creating a New Album on Desktop
-
1Open Facebook. Go to https://www.facebook.com/. This will open your Facebook News Feed if you're logged in.
- If you aren't logged in, enter your email address (or phone number) and password in the top-right side of the page.
-
2Click your name. This tab is in the top-right side of the Facebook page. Doing so takes you to your Facebook Timeline.
-
3Click Photo/Video Album. It's an option at the top of the status box, which is just below your cover photo. A pop-up menu will appear.
-
4Click Create Album. This option is in the top-left side of the pop-up menu. Doing so opens a window for your new album.
-
5Enter your album's information. Fill out the following fields:
- Album name - Type in the name of your album here.
- Add a description - Type in a brief description for your album here. This step is optional.
-
6Determine who can view your album. Click the "Privacy" drop-down box at the bottom of the window, then click an audience.
-
7Click Create. It's in the bottom-right corner of the window. This will create your album and return you to your profile page.
-
8Click the Photos tab. It's below your cover photo near the top of your profile page.
-
9Click the Albums tab. You'll find this below and to the right of the "Photos" heading that's in the top-left side of the page.
-
10Click your new album. You may have scroll down to find the album.
-
11Click Add Photos. It's a link beneath the album's name near the top of the page. Doing so opens a window in which you can search for photos on your computer.
-
12Select photos to add. Click a photo you want to add, or hold down Ctrl (Windows) or ⌘ Command (Mac) and click multiple photos to select each one you click.
-
13Click Open. This will upload your photo(s) to your album.
-
14Click Post. It's in the lower-right corner of the album page. Doing so will post your photo(s) to your Facebook Timeline.


Advertisement
Method 3
Method 3 of 3:
Creating a New Album on Mobile
-
1Open Facebook. The Facebook app icon is a white "f" on a dark-blue background. Facebook will open to your News Feed if you're already logged in.
- If you aren't already logged in, enter your email address (or phone number) and password, then tap Log in.
-
2Tap ☰. It's either in the bottom-right corner of the screen (iPhone) or the top-right corner of the screen (Android). Doing so opens a menu.
-
3Tap your name. You'll find it at the top of the menu. This will take you to your profile page.
-
4Scroll down and tap Photos. This tab is just above the status box near the top of your profile page.
-
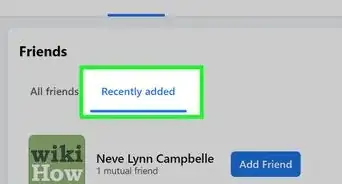
5Tap Albums. It's a tab in the upper-right corner of the page.
-
6Tap Create Album. This option is in the upper-left side of the Albums page.
-
7Enter your album's information. Fill out the following fields:
- Album name - Type in the name of your album here.
- Add a description (optional) - Type in a brief description for your album here.
-
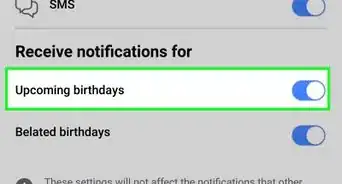
8Determine who can view your album. Tap the Friends or Public bar, then select an audience and tap Done.
-
9Tap Save. It's in the top-right corner of the screen.
-
10Tap your album. You may have to scroll down to find it. Doing so opens the album.
-
11Tap Add Photos/Videos. It's in the middle of the page. This will bring up your mobile device's camera roll.
- You may first have to tap the grid icon, which resembles four squares, on the left side of the page.
-
12Select photos to upload. Tap each photo you want to upload, then tap Done. This will add your selected photo(s) to your album.
-
13Tap Upload. It's in the top-right corner of the screen. Doing so confirms your decision and uploads the photo(s).


Advertisement


About This Article
Jack Lloyd
wikiHow Technology Writer
This article was co-authored by wikiHow staff writer, Jack Lloyd. Jack Lloyd is a Technology Writer and Editor for wikiHow. He has over two years of experience writing and editing technology-related articles. He is technology enthusiast and an English teacher. This article has been viewed 28,400 times.
How helpful is this?
Co-authors: 6
Updated: May 6, 2021
Views: 28,400
Categories: Facebook
Advertisement