This article was co-authored by James Guth and by wikiHow staff writer, Christopher M. Osborne, PhD. James Guth is the co-owner and founder of Chesapeake Painting Services LLC. With over 20 years of experience, James specializes in exterior and interior painting, drywall, powerwashing, wallpaper, staining, sealing, and carpentry. James holds a BS in Economics and Business Administration with a concentration in Finance from Towson University
This article has been viewed 1,044 times.
Hanging shiplap on the wall is a great way to add a modern farmhouse vibe to a kitchen, bath, or other space in your home. But how do you paint shiplap without getting unsightly globs of paint stuck in the grooves between the boards? You can definitely paint the boards before hanging them, but we’ll primarily focus here on painting already-installed shiplap with a sprayer or a roller and brush. So keep reading for help getting your shiplap looking ship-shape!
Things You Should Know
- Paint shiplap either before or after installing it, or do a mix of both. In any case, take time to do the proper prep work.
- Spray paint shiplap by using a steady back-and-forth motion and working from the top-down and then bottom-up at a slight angle.
- Paint with a brush and roller by brushing the seams between boards, then rolling the surface of the planks. Repeat this with each coat.
Steps


Prep Work
-
1Patch and sand the wood, unless you want an extra rustic look. To patch up shiplap, use a putty knife to apply wood filler over all the nail holes, knots, and other blemishes on the shiplap boards. Once the putty dries, smooth out the excess (and any rough surfaces on the boards) with 150-grit sandpaper.[4]
- If there are nail heads sticking up above the surface of the wood, tap them down with a hammer and a nail setter before using the wood putty.
-
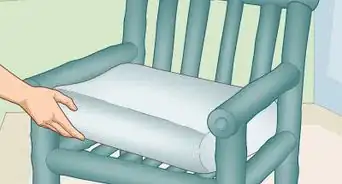
2Protect the surrounding area with tape and plastic sheeting. Taping and masking things off gets really tedious when you’re ready to just get painting, but it’s worth your time to do it. Run strips of painter’s tape along any trim pieces, baseboards, electrical outlets, etc., that butt up against the installed shiplap. Then, tape up plastic dropcloth sheeting as follows:
- If you’re painting with a sprayer, cover everything in the room—ceilings, walls, floors, furniture, you name it—with sheeting and tape. If you leave anything exposed, the overspray mist will find it!
- If you’re painting with a roller and brush, cover all surrounding walls, ceilings, and so on with at least 1 ft (30 cm) of plastic sheeting. When it comes to the floor, cover as much of it as possible—even the entire room—with plastic sheeting, adding thick paper or cardboard underneath if it’s a high-value flooring material.
-
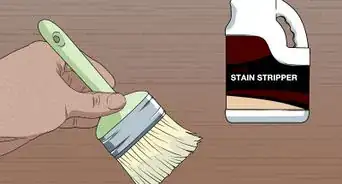
3Choose a stain-blocking primer and latex paint. Applying a good stain-blocking primer prevents bleed-through stains from knots in the wood. It also makes it easier to go from one color to another (especially from dark to light) if the shiplap is already painted. As for finish paint, latex is easy to work with and is usually required if you’re using a sprayer. Whites and off-whites look good on shiplap, but your color options are truly endless.[5]
- When it comes to choosing a paint sheen (finish), semi-gloss works best in a high-moisture or high-contact area, while eggshell or flat is best if you want to reduce reflection (such as near a sunny window).
- Using primer is really important on unpainted shiplap, since it keeps the wood from soaking up the moisture from the paint. But even if your shiplap is already painted, it’s a good idea to use primer.
- You can save some time by using an all-in-one primer and paint, instead of separate cans of primer and then finish paint. However, you won’t get quite the same level of stain-blocking coverage, and the final look of the finish paint might not be quite as crisp.


Paint Sprayer
-
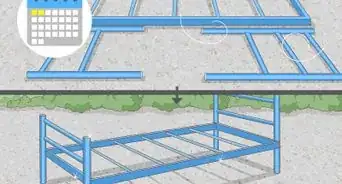
1Apply 1-2 primer coats and 2 finish coats. One coat of a good stain-blocking primer is sufficient in most cases. However, use 2 coats if the wood really soaks up the first coat so that it hardly looks like you added primer. Also use 2 coats if the wood has large knots or blemishes that may bleed through the primer. And always use at least 2 coats of finish paint to get full coverage.[6]
- Once you factor in prep work and drying times, accept that you’re looking at a full day’s job here—but the results are worth it!
-
2Fill the sprayer according to the product instructions. Pick out a paint sprayer that fits your needs and budget—they start at around $50 USD—and read the product manual carefully. While there are many similarities when it comes to using a paint sprayer of any type, different brands and models have unique care and use requirements as well.
- You may, for example, need to thin the primer/paint with water or paint thinner. Always follow the specific directions for your particular device.
-
3Spray in a side-to-side motion, applying light, even coverage. Once the sprayer is loaded and ready to go as directed, practice your spraying technique on a scrap of wood or cardboard. Hold the sprayer about 6–12 in (15–30 cm) from the surface and spray side-to-side using a steady, consistent, constant arm movement. Always keep your arm (and the sprayer) in motion whenever you’re squeezing the sprayer’s trigger.
-
4Coat the wall from the top downward, and then bottom-up. Instead of aiming the sprayer straight on, point it slightly downward. Start at the top of the shiplap and, working your way from side to side, move down to the bottom. Then, go from the bottom of the wall upward, this time angling the sprayer slightly upward. This counts as one coat.[7]
- Spraying at a slight angle from both above and below does a better job of getting paint into the hard-to-reach areas between shiplap boards.
-
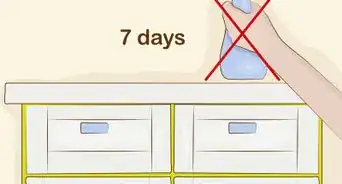
5Wait at least 1 hour before applying the next coat. This is the minimum recommended drying time, but you’ll get even better results if you wait 4 hours between coats of primer and/or paint. Continue to use the same spraying technique with each coat. After 2 coats of finish paint, your shiplap wall will be looking great![8]


Roller and Brush
-
1Apply primer along all the seams with an angled brush. Use a smaller angled paint brush that feels comfortable in your hand—a 2 in (5.1 cm) angled brush is a good choice here. Hold the tip of the brush in line with the seams so that you paint stripes that are about 1 in (2.5 cm) wide, not the full 2 in (5.1 cm) you’d get if you held the brush perpendicular. Brush with long back-and-forth wrist motions, pressing somewhat firmly to push primer into the gaps along the seams.[9]
- Just like if you were using a sprayer, plan on adding 1-2 coats of primer and 2 coats of finish paint. Just keep repeating the instructions in this section for each new coat.
-
2Remove wet primer globs with a putty knife as you brush. While you want to get primer onto the edges of all the boards, having clean seam lines between boards is a big part of shiplap’s appeal. Each time you stop to reload your brush, look over the area you just painted. Use a putty knife to clear out any globs that completely bridge the gap between shiplap planks. Wipe the putty knife on an old rag regularly to maintain a clean blade.[10]
- This is easiest to do while the primer is still wet, as opposed to when it’s tacky or fully dried.
-
3Roll downward, skipping the gaps, then upward over everything. After using a brush along the seams, utilize a paint roller to complete the initial primer coat. Lightly roll straight downward on the wall, lightening up even more (almost to the point of removing the roller from the wall) as you pass over each seam between boards. Once you’ve gone over the entire wall this way, roll over it again from the bottom up, this time using the typical “M” or “W” pattern and maintaining even pressure over the seams.[11]
- When adding primer or paint, get a thin, even coating on the roller (and therefore the wall) by running the roller brush back and forth on the ridges in the paint tray.
- Skipping over the seams on the first pass helps prevent primer or paint from completely gunking up the gaps between boards.
-
4Keep your glob-removing putty knife handy while rolling. No matter how light your touch is with the roller, you’ll end up clogging up some of the gaps between shiplap boards. Here again, your handy putty knife is your friend! Use the blade to swipe away any globs before they harden and mess up your excellent work.[12]
- Wait at least 1 hour, and better yet 4 hours, between each of your 1-2 coats of primer and 2 coats of finish paint.


References
- ↑ https://joyfulderivatives.com/how-to-paint-shiplap/
- ↑ https://wildfireinteriors.com/painting-shiplap/
- ↑ https://tantrumsandtools.com/how-to-paint-shiplap-cracks/
- ↑ https://joyfulderivatives.com/how-to-paint-shiplap/
- ↑ https://joyfulderivatives.com/how-to-paint-shiplap/
- ↑ https://joyfulderivatives.com/how-to-paint-shiplap/
- ↑ https://joyfulderivatives.com/how-to-paint-shiplap/
- ↑ https://joyfulderivatives.com/how-to-paint-shiplap/
- ↑ https://tantrumsandtools.com/how-to-paint-shiplap-cracks/
About This Article