This article was co-authored by Patrick Coye. Patrick Coye is the owner and operator of Patrick’s Painting & Home Improvement in Alexandria, Virginia. With over 15 years of experience in residential construction, Patrick specializes in painting, wallpaper removal/installation, drywall, staining decks and fences, and kitchen cabinetry painting. To date, Patrick and his team have painted over 2,000 houses and stained over 800 decks. Patrick's Company won a "Top Job" award from the American Painting contractor magazine in 2020.
There are 9 references cited in this article, which can be found at the bottom of the page.
This article has been viewed 23,083 times.
While painting a standard flat ceiling may seem doable, you may be intimidated by the idea of painting a tray ceiling. While it is a bit more challenging, you can make it happen by using the right tools and taking the right steps.
Steps
Deciding on a Style
-
1Go the popular route by painting everything but the crown molding. If you’re painting your first tray ceiling, or you just like a classic look, don’t paint your crown molding. As is, your ceiling’s crown molding probably matches the rest of the molding in the room. Because of this, it looks sophisticated, classic, and seamless to leave it that way and just paint the rest of your ceiling the same color as your walls.[1]
-
2Go simple and safe with all white. Another less intense option is to just paint everything in the room white, including the walls, the ceiling, and all of the crown molding. This will keep your tray ceiling from standing out too much, but will also look attractively clean and simple.[2]Advertisement
-
3Put similar colors side by side for a contemporary feel. If you’d like a more interesting, contemporary feel but you don’t want to go too bold, use 2 similar paint shades instead of just 1. This can provide a unique look that still ties everything in the room together.
- For example, paint the inset of your tray ceiling a few shades darker or lighter than the walls of the room or the rest of the ceiling.
-
4Enhance the architecture subtlety by painting everything 1 color. If your style is somewhat bold and unique, paint everything, including the walls, the ceiling, and the molding, the same color. This gives off a monochromatic vibe. Tie everything together by picking a color that matches some of the larger furniture pieces and/or accessories in the room.[3]
-
5Add dramatic effect by painting the tray inset a bright color. If you’re wanting to go in a bold direction, keep the walls, the ceiling, and the molding all a matching neutral, and paint the inset of the tray a beautiful, vibrant color, such as fire engine red. Then, decorate your room with some items of the same color, such as throw pillows in a living room or dishes in a dining room.[4]
- This is an even more striking style choice if the tray inset has a unique shape.
-
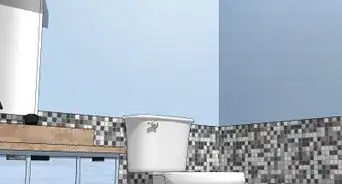
6Heighten the room by matching the room walls to the tray walls. The tray walls are the outside edges of the ceiling that don’t make up the tray inset or the crown molding around it. A simple way to enhance the appearance of your tray ceiling is to paint these tray walls the same color as the walls in the room, and then leave the crown and tray inset white. This can make the tray walls look like an attractive extension of the room’s walls.[5]
- This looks especially attractive on tray ceilings that don’t have crown molding.


Setting up Your Work Space
-
1Protect the furniture and floor and open a window for ventilation. Before you start painting, move everything you can out of the room so that it doesn’t get damaged by the paint. Then, lay down drop cloths to protect the floor and open up the windows in the room to provide some ventilation.[6] This way, the paint fumes can air out.
- If you don’t want to move your furniture, cover it with drop cloths instead.
- If there aren’t windows in the room, you can set up an air purifier that has a carbon component or an exhaust fan instead to help remove gases and odors.[7]
-
2Line the wall trim with painters tape.[8] Unroll and press down some painters tape all around the top edge of the walls in the room. This should allow you to get a crisp line and avoid accidentally getting paint on the walls.
- If your tray ceiling has crown molding, put tape down on the edges of the crown molding as well.
-
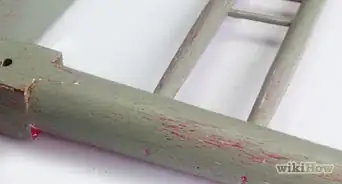
3Wipe down the ceiling with a damp cloth.[9] Lightly dampen a clean cloth with water. Then, get on a small ladder so that you can comfortably reach the ceiling. Wipe down the entire surface of the ceiling to remove any dust or dirt so that the paint rolls on nicely.
- You can also go over the ceiling with a hand-held vacuum to get it extra clean.


Priming and Painting the Ceiling
-
1Apply a coat of primer to the ceiling and let it dry. Paint primer acts as an extra layer of protection that can help the paint stick to the ceiling better.[10] Before you paint, pour some latex-based primer into a paint tray. Roll your roller into the primer and then cover as much of the ceiling as you can in small sections of straight lines. Then, use an angled brush to prime all of the edges that you couldn’t reach with a roller.[11]
- Give the primer at least 3 hours to dry thoroughly.
-
2Roll the roller into the paint tray and attach the roller to an extension pole. Once your primer is completely dry, pour some latex paint of your desired color into the deep side of a clean paint tray. Put a new nap on your roller and and roll small amounts of the paint up towards the shallow end of the tray until the nap is covered. Then, attach an extension pole to the roller to make the painting process easier.[12]
-
3Roll the paint onto the ceiling in overlapping straight rows. Typically, it’s best to paint in small sections of these rows, but the ceiling’s structure probably won’t allow this. Start painting at one of the ceiling corners and work your way across the ceiling as best you can.[13] Focus on covering as much of the tray walls and the tray inset as you can without getting too close to the edges, or to the crown molding if applicable.
- Roll slowly to prevent the paint from splattering.
-
4Use an angled brush on the difficult crevices. After doing all you can with the roller, go back with a clean angled brush and fill in all of the edges and crevices that the roller couldn’t get to. Expect this to take you more time than it would if you were painting a flat ceiling.
-
5Wait 4 hours before you use the room again. Give the ceiling at least 4 hours to dry completely after you’ve finished painting. Then, check to see if you missed any spots or if you need to apply a second coat. If necessary, fill in missing spots and/or apply another coat. After another 4 hours, you can put away the drop cloths and bring the furniture back into the room.[14]
- If it doesn’t look like you missed any spots or need to apply a second coat, go ahead and return the room to its former state.


Expert Q&A
-
QuestionWhat are some tips I should keep in mind when painting a ceiling by myself?
 Patrick CoyePatrick Coye is the owner and operator of Patrick’s Painting & Home Improvement in Alexandria, Virginia. With over 15 years of experience in residential construction, Patrick specializes in painting, wallpaper removal/installation, drywall, staining decks and fences, and kitchen cabinetry painting. To date, Patrick and his team have painted over 2,000 houses and stained over 800 decks. Patrick's Company won a "Top Job" award from the American Painting contractor magazine in 2020.
Painting SpecialistI would say uniform coverage is probably the most important part. Try to work in sections, such as back left, back right, middle left, and middle right. Don't just jump around all over the place. The most common mistake is not loading the roller with enough paint. Make sure the roller is at max capacity to hold the paint.
Warnings
- Paint contains fumes that can be harmful if inhaled. Wear a surgical mask to keep yourself from breathing in the fumes.⧼thumbs_response⧽
- When painting, always wear clothing that you don’t care for, as the paint may ruin it.⧼thumbs_response⧽
Things You'll Need
- Drop cloths
- Exhaust fans (optional)
- Painters tape
- Cloth
- Water
- Small ladder
- Vacuum (optional)
- Latex-based primer
- Paint trays
- Paint roller
- Naps
- Angled brush
- Latex paint
- Extension pole


References
- ↑ https://www.youtube.com/watch?v=Fl4UQByuqNA&feature=youtu.be&t=1m3s
- ↑ https://www.homedit.com/a-few-ways-of-turning-a-tray-ceiling-into-a-beautiful-focal-point/
- ↑ https://www.homedit.com/a-few-ways-of-turning-a-tray-ceiling-into-a-beautiful-focal-point/
- ↑ https://www.homedit.com/a-few-ways-of-turning-a-tray-ceiling-into-a-beautiful-focal-point/
- ↑ http://www.impressiveinteriordesign.com/man-cave-design-ideas-furniture/
- ↑ Patrick Coye. Painting Specialist. Expert Interview. 22 July 2020.
- ↑ https://www.care.com/c/stories/5940/is-low-voc-paint-safer/
- ↑ Patrick Coye. Painting Specialist. Expert Interview. 22 July 2020.
- ↑ Patrick Coye. Painting Specialist. Expert Interview. 22 July 2020.
- ↑ Patrick Coye. Painting Specialist. Expert Interview. 22 July 2020.
- ↑ https://www.youtube.com/watch?v=wJheDv8af4A&feature=youtu.be&t=23s
- ↑ https://www.bobvila.com/articles/2393-how-to-paint-a-ceiling/#.WlP7WCOZMdU
- ↑ https://www.youtube.com/watch?v=Ufkt6j1xhaw&feature=youtu.be&t=3m7s
- ↑ https://www.bobvila.com/articles/how-long-does-it-take-paint-to-dry/
About This Article

If you’ve already protected the floor and furniture, line the top edges of the walls and crown molding with painters tape and wipe the ceiling clean. Apply a coat of latex-based primer to the ceiling. Give it 3 hours to dry, pour some latex paint into a paint tray, and roll a roller in to coat the nap. Attach an extension pole to the roller and roll the paint onto the ceiling in straight overlapping rows where you can. Use an angled brush to fill in the edges and crevices. Wait 4 hours for the paint to dry. To learn how to pick a paint style, scroll down!