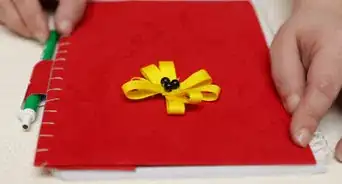
Feeling crafty? Want to transform your school, work, or personal journal cover from totally plain to uniquely your own? Maybe it’s because you’re feeling a bit of writer’s block or stuck in a mid-semester or creative slump. Here’s a guide to personalizing the notebook of your dreams.

1

Make a collage of images that inspire you.

  1. Turn the cover of your notebook into your own mood board. Use magazine or newspaper clippings, pages from old books, copies of personal photos, and other printed images. Lay out your design before gluing so you can easily make adjustments, then use a basic glue stick to glue each piece to your notebook cover.[1]
    • If you feel stuck, come up with a specific theme for your collage, such as music or film. That might make it easier to find related images.
  2. Advertisement
2

Draw your own design on the cover.

  1. Sketch on paper first to make sure it's laid out properly. Mark the size of your notebook on your paper and sketch your design as you want it to appear on the cover. Use pencil so you can easily erase any mistakes. Trace over the design in pen or marker once you're happy with it.[2]
    • If it's a personal journal, you can try doing a self-portrait. It doesn’t have to be perfect! Even a stick figure will do. Draw whatever you think represents your unique personality.
    • If you’re working on designs for school notebooks, find symbols that represent each subject, such as a globe for geography or a paintbrush for art.
3

Paint your cover with acrylic paint.

  1. Start with a base coat of white, then paint your design. Place a scrap sheet of paper between your cover and the first page of your notebook so you can paint all the way to the edges. Let the base coat dry completely, sketch your design in pencil, then paint the design you've created.[3]
    • Finish up with a paint varnish or seal (available online or at your local craft store) so your masterpiece will last.
  2. Advertisement
4

Decorate the cover with stickers.

  1. Choose stickers that represent your personality or the purpose of the notebook. Lay out the stickers before you peel the backs off so you can re-arrange them to get the look you want. Scrapbook supply companies make borders and accents that can also work well for this.
    • If you have sticker paper and access to a printer, you can also make your own stickers using a design you created digitally or found on the internet.[4]
5

Glue scrapbook paper over the front and back.

  1. Use Mod Podge glue or a glue stick to secure the paper to your cover. Buy the scrapbook paper you like online or at your local craft store. You can cover the entire front and back in the paper or cut out specific designs and glue those instead.[5]
    • If you're not great at free-handing shapes, use stencils (available in the scrapbook section of your local craft store) to keep things neat.
    • Contrasting colors and patterns can really pop and make your cover unique.
    • When you're done, paint over your creation with Mod Podge gloss to seal everything in place.
  2. Advertisement
6

Apply your favorite patterns of washi tape.

  1. Create a border or cover the whole notebook in contrasting patterns. Buy the washi tape you like online or at your local craft store, then decide what design you want to make. Because washi tape is masking tape, you can also use it to secure photos or other images onto the front of your notebook.[6]
    • For example, you could do "ribbons" in contrasting colors to cover the entire front of your notebook.
    • If you have a composition notebook with a vinyl or fabric binding, you can cover that in washi tape as well. It's an easy way to customize the binding that won't get ruined as you repeatedly open and close your notebook.
    • Unlike other types of tape, washi tape is easily removable and doesn't leave any residue behind, so if you make a mistake, you can easily take it off and start over.[7]
7

Weave ribbon over the front of the cover.

  1. Choose 2 contrasting ribbons to create your look. Cut the ribbon in strips and glue the ends of the vertical ribbons to the backside of the cover. Fold these ribbons over the top of the notebook and weave the horizontal ribbons over and under the vertical ribbons, gluing as you go.[8]
    • Cut your horizontal ribbons a little long so you can fold them over and glue the ends to the inside of the cover.
  2. Advertisement
8

Cover the notebook with a vinyl design.

  1. Vinyl covers are more versatile and more durable than cardboard. This option requires access to a few more tools, including a Cricut machine, but it works great to create customized, durable notebooks. Choose the vinyl colors and design you want, then use the machine to cut your design into the vinyl.[9]
    • If your notebook has a plastic cover, self-adhesive vinyl works great. For cardboard covers, you can also use iron-on or heat-transfer vinyl.
    • If you don't have a Cricut machine, you can still use self-adhesive vinyl to cover the entire front and back of your notebook. Then, you can draw or paint on the vinyl however you want to completely personalize the look.
9

Apply chalkboard paint to make your cover more versatile.

  1. You can change the design on a chalkboard notebook whenever you want. Buy chalkboard paint online or at your local craft store, then paint the cover with a sponge brush. You'll usually need 2-3 coats to get a smooth finish.[10]
    • "Season" your chalkboard paint by rubbing the side of a piece of chalk over the entire cover, then wipe it off with a dry paper towel or piece of cloth. That'll ensure you can erase designs completely.
    • Use regular chalk or special chalkboard markers to draw on your chalkboard notebook. Erase them whenever you want to draw something new.
  2. Advertisement
11

Add a custom pen or pencil holder.

  1. Use an elastic band and hot glue to keep your pen or pencil close at hand. Buy elastic bands online or at your local craft store. You can use any width or color that you want, so choose the one that best matches the overall style of your notebook. Start with a 2 inches (5.1 cm) piece and wrap it around the thinnest pencil or pen you might use.[12]
    • Hold the loop size as you glue the ends of the elastic together with a glue gun. Once the glue is dry, slide your pen or pencil inside the loop, then hot glue the loop to the back inside cover of your notebook.[13]
    • You can also hot glue an elastic band to the front of your notebook with multiple openings that will hold different pens or markers. This comes in handy if you're personalizing a bullet journal or art notebook and use several pens regularly.
  2. Advertisement

Community Q&A

  • Question
    How do I make a spiral notebook for science?
    Azaria Hindsman
    Azaria Hindsman
    Community Answer
    Get a bunch of papers or however many you need -- I'd recommend 100 sheets. Then get two pieces of cardboard that are the same size as your papers and put one on the bottom and one on the top. Then cut any excess cardboard off. Now you can put that together and punch holes through the left-hand margin of the stack. Then get a silver wire, get a skinny stick and curl the wire. Then you may apply your wire going through the holes. And then you're done!
  • Question
    Is it necessary to decorate the notebook?
    Ellie
    Ellie
    Community Answer
    No, it isn't. Some people just prefer to decorate it to make it feel more personalized.
  • Question
    How can I attach a pen to a notebook?
    Community Answer
    Community Answer
    You can tie a ribbon on, make sure it is a comfortable length for writing/doodling, then tie or glue the pen on. There are plenty of YouTube tutorials for projects like this.
Advertisement

About This Article

Jennifer Mueller, JD
Co-authored by:
Doctor of Law, Indiana University
This article was co-authored by wikiHow staff writer, Jennifer Mueller, JD. Jennifer Mueller is a wikiHow Content Creator. She specializes in reviewing, fact-checking, and evaluating wikiHow's content to ensure thoroughness and accuracy. Jennifer holds a JD from Indiana University Maurer School of Law in 2006. This article has been viewed 71,946 times.
How helpful is this?
Co-authors: 18
Updated: February 5, 2022
Views: 71,946
Categories: Notebooks
Advertisement