This article was co-authored by wikiHow staff writer, Eric McClure. Eric McClure is an editing fellow at wikiHow where he has been editing, researching, and creating content since 2019. A former educator and poet, his work has appeared in Carcinogenic Poetry, Shot Glass Journal, Prairie Margins, and The Rusty Nail. His digital chapbook, The Internet, was also published in TL;DR Magazine. He was the winner of the Paul Carroll award for outstanding achievement in creative writing in 2014, and he was a featured reader at the Poetry Foundation’s Open Door Reading Series in 2015. Eric holds a BA in English from the University of Illinois at Chicago, and an MEd in secondary education from DePaul University.
There are 13 references cited in this article, which can be found at the bottom of the page.
The wikiHow Video Team also followed the article's instructions and verified that they work.
This article has been viewed 28,976 times.
Learn more...
If you’re in school or work on a variety of projects, a single notebook can quickly become filled with random notes and unrelated ideas. This can create an organizational nightmare as you find yourself constantly flipping through your notebook to find the information that you need. Luckily, there are a variety of inexpensive products that you can buy to put dividers in your notebook. You can also create your own dividers if you’d like to add some designs or give your notebook a personal touch.
Steps
Using Simple Dividers
-
1Fold a sheet in your notebook to make an easy makeshift divider. Start by folding your sheet vertically in half. Then, turn the corners inward at the top and the bottom to make triangles. You can fold the paper in half vertically again or leave it as is. When you need to find this section in your notebook, it will be a lot easier to open to the section since the thicker folded divider will naturally help you find it.[1]
-
2Use post-it notes or sticky divider tabs to separate sections. Post-it notes are the perfect size for notebook dividers. Simply press the sticky side against the paper and leave 1–2 inches (2.5–5.1 cm) sticking out past the notebook. There are also sticky divider tabs that are designed to divide notebook sections. These have a slightly stronger adhesive. Some of them are also made out plastic if you want stronger dividers.[2]
- You can cut the post-it notes to make smaller dividers if you prefer. If you do this, be sure to cut vertically through the post-it notes so that there’s some adhesive left on the back. If you cut horizontally, you’re just turning the post-it notes into regular scraps of paper.
Tip: The sticky divider tabs won’t cost you more than $5 and they usually come in packs of a few dozen. These are a great option if you have a lot of notebooks or need a ton of dividers.
Advertisement -
3Cut tabs out of construction paper and tape them to your notebook. You can make simple dividers by cutting small half-circles or rectangles out of construction paper. Use scissors to cut your paper into 2 by 3 in (5.1 by 7.6 cm) pieces. To add them to your notebook, open to the page where you want to start a section. On the back of the page, tape the tab to paper so that part of the tab sticks out when you close the notebook.[3]
- Keep the dividers from getting bent or torn by covering them with clear packing tape.
- Use a variety of different colors to create a color-coded system.

Installing Store-Bought Dividers
-
1Purchase a set of dividers that match the size of your notebook. The dimensions of your notebook paper are typically printed on the front of the notebook. If they aren’t, use a ruler or measuring tape to determine the length and width of your pages. Buy your notebook dividers online or from an office supply store.
- Most spiral notebooks are either 8.5 by 11 inches (22 by 28 cm) or 6 by 9.5 inches (15 by 24 cm). Your notebook may be bigger or smaller though, so be sure to check if it isn’t printed on the front.
Tip: There are 2 types of prefabricated dividers for spiral notebooks. One of them has a single long tab that slides through your spiral binding at the top. The other has multiple tabs on the side that slide in between the spirals. They’re both good options.
-
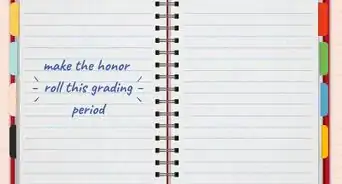
2Split the notebook into sections. Prefabricated notebook dividers can be taken out and put somewhere else whenever you need to move them, so you don’t need to be precise if you don’t want to be. It’s completely up to you if you want to count pages off to divide your sections, though. For a school class, consider leaving 20-40 pages in each section depending on how often you take notes.
- There’s nothing wrong with doing this by eye. Counting the pages can take a lot of time, so don’t worry if you aren’t super specific with your sections. It’s entirely up to you, though!
-
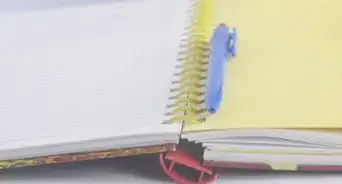
3Slide single-tab dividers through the top of the spiral binding. Open your notebook where you want to put your divider. If your divider has a single vertical tab that runs parallel along the side, lower the tab through the top of the spiral binding so that the binding sits in between the tab and the divider. Slide the divider down as far as it will go.[4]
- For an added layer of security, you can twist the binding a little and wrap the top of the binding over the top of the divider to keep it in place. You can only do this if the binding runs all the way to the top of the notebook, though.
-
4Push the tabs on multi-tabbed dividers in between the spirals. If you have 4-10 T-shaped tabs sticking out the long side of the divider, you need to push them through the binding. Lay the divider flat on the paper where you want to insert it. Then, slide the divider against the binding. Each T-shaped tab will roll over on top of the spiral binding. Use a pencil or your finger to push them through the openings between the spirals. The top of the T-shaped tabs will catch on the binding and hold the divider in place.[5]
- Make sure the top and bottom of the divider are flush with the page before inserting the tabs!
- Some dividers have hooks for every spiral. These are installed the same way.


Creating DIY Dividers
-
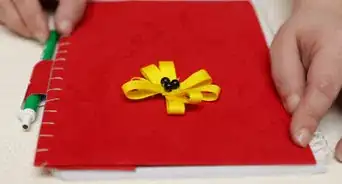
1Get some cardstock or construction paper for a thicker divider. You can make dividers out of regular printer paper if you really want to, but cardstock or construction paper is thicker. These papers are more likely to hold up over time and they’re much easier to find in a notebook. Get colored cardstock or construction paper to make them even easier to see in your notebook.[6]
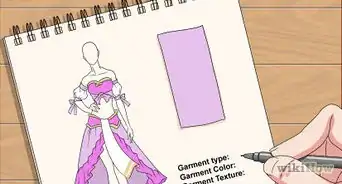
- You can add designs or labels to your divider after you’re done installing them. Don’t bother adding designs before you cut the dividers to size.
-
2Measure the size of your notebook using a ruler and cut the dividers to size. Either find the dimensions of your paper on the front of the notebook or measure a sheet with a ruler. Use a pencil to mark the length and width of the paper on your cardstock or cardboard. Then, use a paper cutter to make a perfect cut along each mark that you made.[7]
- You can use scissors if you’d like, but the divider won’t perfectly match the paper in your notebook.
- If you want tabs in your dividers so that they stick out past the notebook, add 0.5–1 in (1.3–2.5 cm) to the side that you want the divider on and cut a portion of the side out to leave a small tab.[8]
- Laminate the dividers if you want to protect them from tearing.[9]
-
3Pull out a sheet of paper and clip it to your divider to hold it in place. Pull out a sheet from your notebook. Lay the notebook paper flat on top of the divider so that the sides and corners line up with one another. Then, use binder clips or paper clips to attach the paper to the divider. This will hold it in place while you punch your holes.[10]
-
4Use a hole puncher to put matching holes into the divider. Grab a handheld hole puncher. Open the jaws and slide them around the paper and the divider. Hold it over the first hole in the paper. Close the handles on the hole puncher to drive a hole through the divider at the exact location where the paper’s hole is located. Continue using the paper as a guide to punch holes in the divider wherever the paper’s holes are located.[11]
- If your spiral notebook has dozens of holes in with thin binding, this can be kind of tricky. Do you best to place each hole you punch at least 0.25 inches (0.64 cm) away from the edge of the paper to avoid tearing the divider.
Tip: You have to use a handheld hole puncher that makes holes one at a time. You cannot use one of those long hole punchers that adds multiple holes at once since the 3 holes from the longer hole punch don’t line up with the holes in standard notebooks.
-
5Take your binder or paper clips off and remove the sheet of paper. Once you’re done punching your holes, take your paper or binder clips off. Discard the sheet of paper that you used as a guide. You now have a divider with holes that match the binding in your notebook.[12]
-
6Slide the divider into the binding if you have a gap in the spirals. If the spirals that bind your notebook run parallel to one another, there is probably a small gap in the sequence of rings. Twist the spirals by hand until you find this opening. Then, slide your homemade divider in between the spirals. Feed the holes you punched through the spirals so that the divider sits in your notebook like a regular sheet of paper.[13]
-
7Cut slits leading into each hole and slide them over the spirals if they’re closed. If the spiral binding in your notebook loops from one hole to another, there isn’t a gap for you to slide the divider into the notebook. Grab a pair of scissors and cut slits running from the edge of the divider into each hole next to it. Then, set your divider flat on the page where you want your section to start and slide the divider over the spirals using the slits you’ve just cut.[14]
- When you make your cuts, you’re basically creating tracks for the divider to slide around the binding.
- Since the spirals are thicker than the cuts you make, you may need to pinch them around the spiral binding by hand or with a pencil.

Things You’ll Need
Using Simple Dividers
- Post-it notes
- Sticky divider tabs
- Construction paper
- Scissors
- Tape
Installing Store-Bought Dividers
- Dividers
Creating DIY Dividers
- Cardstock or construction paper
- Hole punch
- Ruler
- Paper cutter
- Scissors (optional)


References
- ↑ https://youtu.be/68ZOszu7OAM?t=33
- ↑ https://youtu.be/xRKP_VJRiv4?t=49
- ↑ https://youtu.be/dnUJijBK7Fg?t=459
- ↑ https://youtu.be/e5PL5ymhzys?t=6
- ↑ https://youtu.be/9a2l4ZyDDHc?t=1869
- ↑ https://youtu.be/r2MsKe43xdE?t=265
- ↑ https://youtu.be/_Zbq_deMS9s?t=282
- ↑ https://youtu.be/r2MsKe43xdE?t=261
- ↑ https://youtu.be/_Zbq_deMS9s?t=1373
About This Article