This article was co-authored by Patrick Coye. Patrick Coye is the owner and operator of Patrick’s Painting & Home Improvement in Alexandria, Virginia. With over 15 years of experience in residential construction, Patrick specializes in painting, wallpaper removal/installation, drywall, staining decks and fences, and kitchen cabinetry painting. To date, Patrick and his team have painted over 2,000 houses and stained over 800 decks. Patrick's Company won a "Top Job" award from the American Painting contractor magazine in 2020.
This article has been viewed 17,478 times.
If you're planning on staining your wooden deck or patio, there are a few steps you'll need to take to ensure that your new finish shows up boldly and holds its color for years to come. Start by making any necessary repairs to the deck and sweeping the entire surface to remove loose debris like dirt and leaves. Then, apply a generous amount of deck cleaner and use a push broom or stiff-bristled brush to work it deep into the wood.[1] After a thorough rinse and a minimum of 48 hours of drying time, your deck will be ready to accept its first coat of stain.
Steps
Clearing and Repairing Your Deck
-
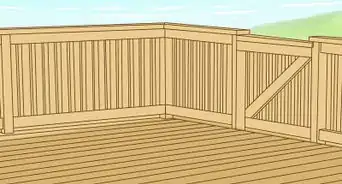
1Remove all furniture and accessories from your deck. Relocate things like tables, chairs, planters, and grills to the garage or a nearby part of the yard. You want the floor of your deck to be completely free of obstructions before you get started.
- You'll need to keep your deck clear for at least 2 days after cleaning it. If possible, store your deck furniture somewhere indoors in case the weather takes a turn for the worse.
- A basement, tool shed, and carport could also make a good place to temporarily stash your furnishings.
-
2Sweep the deck to clear away leaves and other loose debris. Start in the center of the deck and work your way outward, brushing the debris over the edges. In addition to larger like rocks, leaves, and acorns, try to remove as much dust and dry, packed dirt as possible.[2]
- Use a putty knife to dislodge any gunk you find trapped between the boards of your deck or inside other hard-to-reach places.
Advertisement -
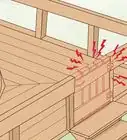
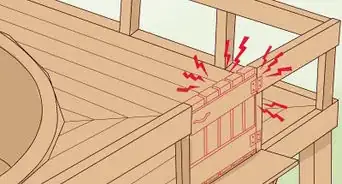
3Replace loose, rotten, or damaged boards.[3] If you're staining a deck that's seen many seasons, you may need to make a few repairs before you can refinish it safely. Pry up old, rickety boards and cut new ones to go in their place. Attach the replacement boards with the same type of fastener that was used the first time around.[4]
- To ensure that your deck ends up with a uniform appearance after staining, pick out a type of lumber with a similar color, texture, and grain pattern.
- If your deck is need of more extensive repairs, it may be a good idea to hire a contractor to come out and fix it up.[5]
Tip: Pull up loose nails and sink deck screws in their place. The slightly larger screws will fit snugly in holes that have expanded over the years.
-
4Sand down rough spots to smooth them out.[6] Use an orbital sander or a sanding block wrapped in medium-grit sandpaper (around 80-100 grit will work best). Work your sanding tool over any worn or splintered sections you come across in wide, easy circles circles to blend the edges with the surrounding wood.
- Watch out for uneven edges around corners, nail holes, and the lines where 2 boards meet.
- Be careful not to sand down the surface too much. Doing so could create shallow depressions, causing rainwater to pool on your deck.


Washing the Deck
-
1Cover any plants in the surrounding area with a tarp or plastic sheet. Shielding flowers, shrubs, and other vegetation will keep them from being exposed to the chemicals in the deck cleaner you'll be using.[7] Make sure the upper portion of each plant is fully concealed. The draping tarp or sheeting material should keep the rest off-limits.[8]
- It's not necessary to go to the trouble of covering your plants if you're working with an organic or plant-friendly wood cleaner. In this case, it will be enough to gently mist them down with a hose once you're finished.
- If there are any tree limbs or shrubs overhanging the edges of your deck, consider trimming them back to create more airflow and help the wood dry faster later on.[9]
-
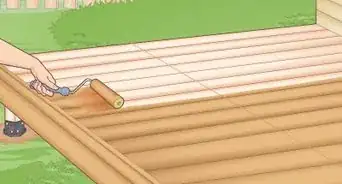
2Apply a liberal amount of deck cleaner to your deck. Load the cleaner into a garden sprayer, or pour it into a large bucket and slather it on manually with a long-handled roller or push broom. Aim to distribute the fluid evenly over the entire surface of the deck.
- Before you begin dispersing your deck cleaner, pull on a pair of gloves and some safety glasses to protect your skin and eyes from harsh chemicals.[10]
- Some cleaners are designed to be applied to a dry deck, while others require a damp surface. Be sure to follow the manufacturer's directions to ensure that your deck cleaner does its job effectively.
Warning: Apply additional fluid to problem areas if needed, but avoid using so much that pools or puddles form.
-
3Allow the cleaner to sit for at least 10-15 minutes. You'll find more specific time guidelines on the label of the product you're using. As the cleaner soaks into the deck, it will begin to break down dirt, grime, oil, rust, and other substances that often accumulate in wood.
- You can go ahead and scrub your deck while it's still wet to make the best use of your time.
-
4Scrub the deck vigorously with a push broom or stiff-bristled brush. Move your brush or broom along the boards of your deck lengthwise from end to end to work the cleaner deep into the grain. Pay special attention to moss, heavily soiled patches, and other spots that may need more attention.[11]
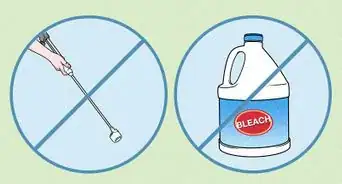
- Stay away from wire brushes or scouring pads. These can leave behind scratches or cause metal fibers to become embedded in the wood and rust over.
-
5Rinse your deck clean with a garden hose. Once the cleaner has set in for the recommended amount of time, spray off the entire surface to flush away any remaining traces of deck cleaner. Sweep the stream of water back and forth across the deck a few times to make sure it contacts every part. You can also attach a spray nozzle for greater precision, if you like.[12]
- Continue rinsing your deck until you no longer see bubbles foaming on the wood.
- Use a regular garden hose for this task. The force of a pressure washer could be enough to cause small cracks or similar surface wear.[13]
-
6Allow your deck to dry for at least 2 days before applying your stain. It's important to give the wood enough time to dry completely. In the meantime, limit foot traffic on your deck and avoid getting it wet for any reason. Once it's dry, you'll be ready to start staining!
- To determine whether your deck is dry enough for staining, pour some water onto a small section of the wood. If it takes less than 30 seconds for the water to soak in, you're good to go. Otherwise, let the wood continue drying overnight.[14]
- For best results, schedule your project for a stretch of days where clear conditions are expected.


Expert Q&A
-
QuestionHow can I tell if my deck wood is too damaged to stain?
 Patrick CoyePatrick Coye is the owner and operator of Patrick’s Painting & Home Improvement in Alexandria, Virginia. With over 15 years of experience in residential construction, Patrick specializes in painting, wallpaper removal/installation, drywall, staining decks and fences, and kitchen cabinetry painting. To date, Patrick and his team have painted over 2,000 houses and stained over 800 decks. Patrick's Company won a "Top Job" award from the American Painting contractor magazine in 2020.
Painting Specialist
Things You'll Need
Clearing and Repairing Your Deck
- Broom
- Putty knife
- Saw
- Replacement lumber
- Hammer or drill
- Nails or wood screws
- Orbital sander or sanding block
- 80-100-grit sandpaper
Washing the Deck
- Tarp or plastic sheeting
- Deck cleaner
- Garden sprayer or bucket
- Push broom or long-handled roller
- Garden hose
- Gloves and eye protection
- Stiff-bristled brush (optional)


References
- ↑ Patrick Coye. Painting Specialist. Expert Interview. 22 July 2020.
- ↑ https://www.sherwin-williams.com/homeowners/how-to/decks/preparing-decks
- ↑ Patrick Coye. Painting Specialist. Expert Interview. 22 July 2020.
- ↑ https://www.familyhandyman.com/decks/repairing-decks-and-railings/view-all/
- ↑ Patrick Coye. Painting Specialist. Expert Interview. 22 July 2020.
- ↑ Patrick Coye. Painting Specialist. Expert Interview. 22 July 2020.
- ↑ Patrick Coye. Painting Specialist. Expert Interview. 22 July 2020.
- ↑ https://www.thisoldhouse.com/how-to/go-old-deck-to-new-4-steps
- ↑ https://hoosierhomemade.com/how-to-clean-prepare-and-stain-your-deck/
- ↑ https://www.thisoldhouse.com/how-to/go-old-deck-to-new-4-steps
- ↑ https://hoosierhomemade.com/how-to-clean-prepare-and-stain-your-deck/
- ↑ https://www.sherwin-williams.com/homeowners/how-to/decks/preparing-decks
- ↑ https://hoosierhomemade.com/how-to-clean-prepare-and-stain-your-deck/
- ↑ https://www.todayshomeowner.com/video/how-to-prepare-a-wood-deck-for-staining/
- ↑ https://www.thisoldhouse.com/how-to/go-old-deck-to-new-4-steps
About This Article

To prepare a deck for staining, start by sweeping it so it's free of dust and debris. Then, sand the deck with 80-100 grit sandpaper (preferably with an orbital sander so it takes less time) until it's smooth. When you're finished, clean your deck with deck cleaner and let it dry for at least 2 days. You want it to be as clean and dry as possible before you stain it. Once it's dry, you're ready to start staining! For more expert staining tips, check out the full article below!