This article was co-authored by wikiHow Staff. Our trained team of editors and researchers validate articles for accuracy and comprehensiveness. wikiHow's Content Management Team carefully monitors the work from our editorial staff to ensure that each article is backed by trusted research and meets our high quality standards.
This article has been viewed 50,076 times.
Learn more...
A cedar fence is a beautiful addition to any home. Whether you have a recently installed new fence and want to know how to make it last, or would like to extend the life of a fence you already have, you can do so with some supplies found at a hardware store and a few hours of your time.
Steps
Choosing and Buying Your Stain
-
1Take a surface area measurement of your fence. Use a tape measure to measure the length and height of your fence, then multiply these numbers together to get the surface of your fence. Measure the length of your fence and the height, and multiply these numbers together to get the surface area.[1]
- Multiply the surface area by 2 if you're treating both sides of the fence.
-
2Buy an oil-based, semitransparent wood stain for a basic treatment. Oil-based stains penetrate the cell walls of wood and stabilize their surfaces much better than water-based acrylics. A stain that's semitransparent will have enough pigment to protect wood from UV rays, but not enough to conceal the wood's natural beauty.[2]
- Semitransparent oil stains are the most commonly used stains for cedar and can be found at your local hardware store.
- The can or container of stain will list how much surface area the product covers.
Advertisement -
3Choose a solid stain if you'd prefer a paint-like finish. Solid stains hold up the longest out of the three main types of stains. They also hide the wood grain much like paint does.[3]
- Solid finishes may also build up a film after several coats, which can peel, crack, and chip like paint.
-
4Use clear sealer instead to show off all the fine details of wood grain. Another option you have is to use clear sealer on your entire fence. Clear sealers show off all the natural grain of wood.[4]
- If you use a clear sealer, your fence may turn gray over time.
- You may also have to treat a clear sealed cedar fence more frequently.


Applying Your Stain
-
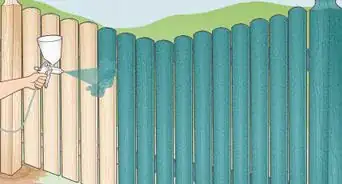
1Apply the stain to a small area of your fence with a pump sprayer if you have one. Some wood stains for outdoor decks and fences come in a pump sprayer container for your convenience. Hold the nozzle of the pump sprayer about 1 foot (0.30 m) from the fence surface and spray an even coating on an area of about 2 square feet (0.19 m2).[5]
- Follow any other instructions or safety precautions listed on the pump sprayer container.
- If you don't have a pump sprayer, you can brush the stain on instead.
-
2Brush or roll your sprayed surface immediately if you pump sprayed it. First, roll your brush or roll with the grain. Then, "buckbrush" to make sure you're getting the stain into all of the corners, gaps, and crevices with your brush or roller.[6]
- Stain starts to soak into the wood pretty quickly, so do this step immediately after you spray the stain.
- Use a clean or new brush or roller that is between 2–4 inches (5.1–10.2 cm) for the best results.
-
3Brush your stain on if you don't have a pump sprayer. If your stain doesn't come in a pump sprayer or you don't have access to one, you can use a 2–4 in (5.1–10.2 cm) brush or roller to apply your stain. Dip your brush in the can, shake off any excess drips, then apply your stain using brush strokes with the grain before "back brushing" against the grain.[7]
- "Back-brushing" helps get the stain into any gaps and crevices.
- If you're using a roller you will need a paint tray to pour the stain into so you can soak the roller in stain. Lightly shake any excess drips of stain on the roller before applying it to your fence.
-
4Continue staining your entire fence. Working in these small 2 square feet (0.19 m2) sections, repeat the stain application steps for your entire fence. Most semitransparent oil stains last 2-5 years. You should plan on recoating your fence with stain in about 3 years.[8]
-
5Allow 24 hours for your stain to dry. Try to stain your fence on a clear day without rain in the forecast. Do not allow anything to touch your wet fence for at least 24 hours.[9]


Sealing Your Posts
-
1Buy sealer for the end grain of your posts. The cut end grains of your fence posts can soak up water more readily than the sides and lead to the posts rotting. Most oil stains contain a protective sealant, but for your ends, you will want some extra water protection.[10]
- Look for a sealing product such as Anchorseal at your local hardware store for sealing your posts.
-
2Apply your sealer to ends of your fence posts with a brush. Using a 2 in (5.1 cm) brush, apply a light coat of sealer to the tops of your fence posts where you can see the end grain design.[11]
-
3Allow your sealer to dry for 24 hours. It's best to apply sealer on a clear day when there is no rain in the forecast. Don't touch the fence posts where you applied sealer for at least 24 hours to be sure that it's completely dry.[12]


Cleaning and Repairing Old Fences
-
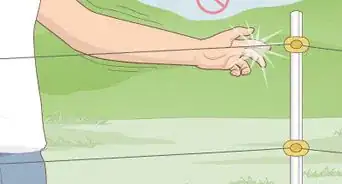
1Test your fence to see if it's ready for retreatment. A fence that was stained in the past will need to be retreated every 3-5 years. Use the “sprinkle test” to determine if your fence is ready to be restained. Sprinkle some water onto your fence and watch to see if the water beads up and runs down the sides, or if it soaks into the wood.[13]
- If the water beads up and runs down the sides, you're safe to wait a while before retreating. Test your fence again in a couple of months, or sooner if the fence is exposed to a lot of precipitation.
- If the water soaks into your fence, it's time to restain it.
-
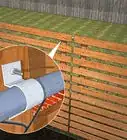
2Power wash your fence. Connect your garden hose to a power washer and pull the trigger of the high-pressure hose tip until water comes out. Then start up the power washer engine and hold the tip of the power washer wand about 18 inches (46 cm) away from your fence. Move it along the length of the boards, constantly moving it to avoid gouging the wood of your fence.[14]
- Spray your entire fence, using different angles to get into inside corners.
- Allow your fence to dry for 24 hours after power washing, before moving on to the next step.
-
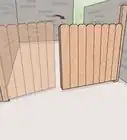
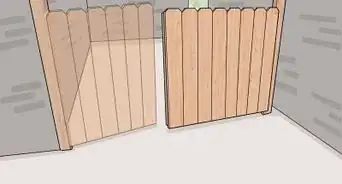
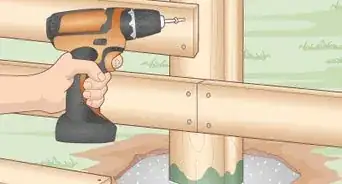
3Glue damaged pieces and tighten any loose boards on your fence. If you find any broken pieces on your fence, replace the pieces and apply wood glue and clamp or tape them into place until completely dry.[15]
- If you use wood glue, allow the glue to dry for 24 hours before staining your fence.
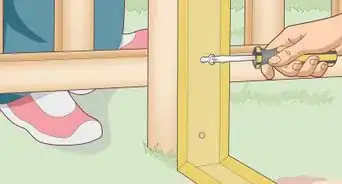
- Use weather-resistant screws to tighten or replace any loose or sagging boards in your fence.
- When tightening boards or screwing new boards into place, recess the screw head 1⁄4 inch (0.64 cm) into the wood and fill it in with a light colored caulk.
-
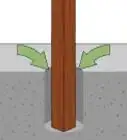
4Apply wood preservative to your base posts. The areas that rot first in a fence are always the posts near where they enter the ground. Brush a small amount of wood preservative, such as Cuprinol, along the wood of your base posts near where they enter the ground.[16]
- A product like Cuprinol was most likely used on the wood below the ground when your fence was installed, if it was installed properly. You're just reinforcing the extra protection above ground.


Things You'll Need
- Semitransparent oil based wood stain
- Pump sprayer for the stain
- Clean, dry 2-4 inch paint brushes or rollers
- End sealer such as Anchorseal
- Power washer
- Wood glue, weather resistant screws, and a drill
- Wood preservative such as Cuprinol


References
- ↑ https://www.thisoldhouse.com/ask-toh/how-do-i-finish-fence
- ↑ https://www.thisoldhouse.com/ask-toh/how-do-i-finish-fence
- ↑ https://www.consumerreports.org/cro/wood-stains/buying-guide/index.htm
- ↑ https://www.consumerreports.org/cro/wood-stains/buying-guide/index.htm
- ↑ https://www.thisoldhouse.com/ask-toh/how-do-i-finish-fence
- ↑ https://www.familyhandyman.com/garden-structures/fences/how-to-renew-wooden-fences/view-all/
- ↑ https://www.familyhandyman.com/garden-structures/fences/how-to-renew-wooden-fences/view-all/
- ↑ https://www.familyhandyman.com/garden-structures/fences/how-to-renew-wooden-fences/view-all/
- ↑ https://www.familyhandyman.com/garden-structures/fences/how-to-renew-wooden-fences/view-all/
- ↑ http://www.finehomebuilding.com/2016/05/16/preventing-cedar-post-rot
- ↑ http://www.finehomebuilding.com/2016/05/16/preventing-cedar-post-rot
- ↑ http://www.finehomebuilding.com/2016/05/16/preventing-cedar-post-rot
- ↑ https://www.familyhandyman.com/garden-structures/fences/how-to-renew-wooden-fences/view-all/
- ↑ https://www.familyhandyman.com/garden-structures/fences/how-to-renew-wooden-fences/view-all/
- ↑ https://www.familyhandyman.com/garden-structures/fences/how-to-renew-wooden-fences/view-all/
- ↑ https://www.familyhandyman.com/garden-structures/fences/how-to-renew-wooden-fences/view-all/
About This Article

To preserve your cedar fence, apply an oil-based, semi-transparent wood stain to it, which will stabilize the wood and protect it from UV rays. A semi-transparent stain will show off the natural beauty of the wood, but if you want a paint-like finish, opt for a solid stain. Before staining the wood, make sure to check the forecast and choose a rain-free day, since you’ll need to give it 24 hours to dry. Once you’re ready, use a 2 to 4-inch brush to apply the stain, making sure to “back brush” against the grain so you fill in any gaps or crevices. After your fence has completely dried, apply a coat of anchorseal to the exposed ends of the fence post to keep water from soaking into the grain. For more tips, including how to clean are repair your cedar fence, read on!