This article was co-authored by Mark Spelman. Mark Spelman is a General Contractor based in Austin, Texas. With over 30 years of construction experience, Mark specializes in constructing interiors, project management, and project estimation. He has been a construction professional since 1987.
This article has been viewed 98,081 times.
Reamers are wood and metalworking tools that come in a large variety of sizes, types, and metals. In general, reamers are meant to refine holes that have been drilled in the material of choice. Reamers will smooth a hole's interior sides, straighten a bored hole, size a hole to very fine tolerances, and shape conical holes. Powered lathes and table drill press setups make larger tasks easier, but you can also ream smaller holes by hand. Woodworkers and metalworkers, hobbyists, and artisans can learn how to ream a hole accurately and simply.
Steps
Using a Hand Reamer
-
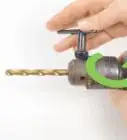
1Choose your reamer. Hand reamers work best in soft materials such as wood or plastic. Begin by choosing the size reamer to which you need your hole bored out. A hand reamer will have a square shank and depending on the size of the reamer, you’ll fit the shank into either a tap wrench or crescent wrench to turn it.[1]
- A hand reamer allows for great accuracy after considerable practice.
-
2Place the material you need to bore in a vise or steady it with clamps. Since a reamer is a precision tool, you don’t want your material moving around as you ream the hole.Advertisement
-
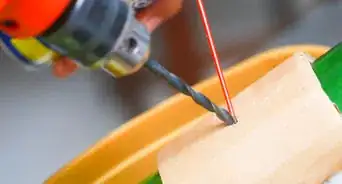
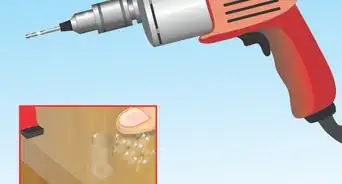
3Drill the hole. Because a reamer is an enlarging tool and not a cutting tool, you must drill out the hole with a standard drill bit before reaming it.[2] You want to use a drill bit approximately 0.016” smaller than your reamer to ensure that you don’t oversize the hole.
- For instance, if you know that you need to ream your hole to 1/2”, then you’d want to drill the hole first with a 31/64” drill bit.[3]
- Drilling a hole too small and leaving too much material left for the reamer to clear can lead to the reamer deflecting off the material, which is called chatter. Chatter leads to poor finishes and can also damage your reamer.
-
4Apply lubricant to the material. Based on the material into which you’re boring, you may need to apply cutting fluid to lubricate the reamer. Though less common with hand reaming, it’s not unheard of.
-
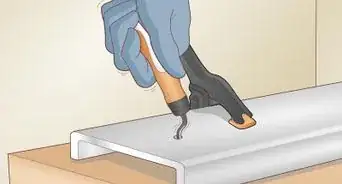
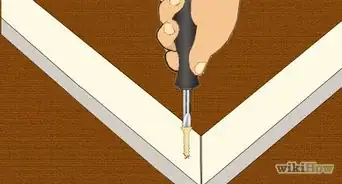
5Ream the hole. Now that the hole is prepped, you can use your tap wrench or crescent wrench to ream the hole. You will likely have either a straight flute reamer or a left-hand spiral flute reamer, which refers to the direction of the blades that actually enlarge the hole. In the case of a spiral reamer, you will need to turn counterclockwise.


Using a Drill Press
-
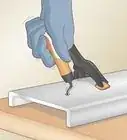
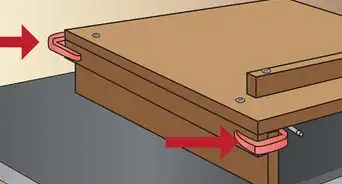
1Affix the material firmly to a flat surface with clamps or a vise. If you’re boring completely through the material, use a set of vise parallels to help support it while keeping it raised enough to drill through.[4]
- If you do use parallels, tap the material down with a rubber mallet to ensure that it’s tight against the parallels and won’t move once you begin drilling.[5]
-
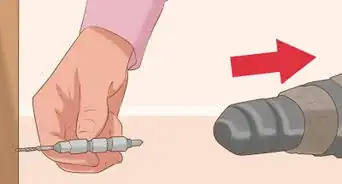
2Use a center drill bit in the press to mark your hole accurately. A center drill is a much smaller, pointed bit that allows you more precision in starting a hole at an exact mark before drilling it out with a larger bit.[6] A dab of cutting fluid should be applied when boring tougher materials such as metals to lubricate the bore and extend the life of all bits.[7]
-
3Drill with a bit 0.016” narrower in diameter than the hole desired. As with hand reaming, you still want to use a 1/64” smaller drill bit to bore your hole before reaming.[8]
- A drill press will allow more control and accuracy than a hand-held drill, especially on harder materials and denser metals, which is why a drill press is recommended.
-
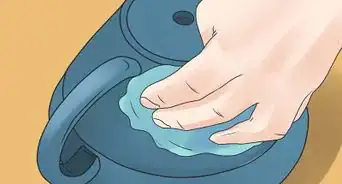
4Clear the hole. Especially when reaming a metal piece, you want to clear any filings from drilling the hole before reaming. Use a small round file to work away any filings.[9]
-
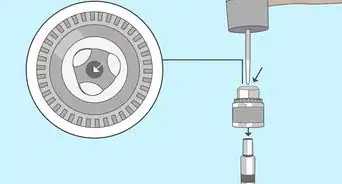
5Affix your reamer into the drill chuck. You’re now ready to place the reamer into the drill chuck and tighten it down. For high precision jobs, you may also consider using a floating reamer holder. A floating reamer holder allows the reamer to float, meaning it gives the reamer just enough movement to guide it into the hole in case of a slight misalignment.[10]
-
6Ream the hole. You can now lower the press and ream the hole. However, you want to set your press to roughly 1/3 of its usual speed because reaming with a press should be done at a much lower RPM.[11]
- Once again, make sure that you use cutting fluid to lubricate the reamer.
-
7Stop the spindle before removing. Once you have reamed your hole, you want to turn off the press and allow the spindle to come to a complete stop before you raise the press.[12] This will help ensure a smooth, clean ream.


Using a Lathe
-
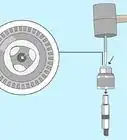
1Set your material firmly in the lathe spindle. Since the lathe will spin your material instead of the drill bits, you want to make sure that the point you want to bore is at the center of the axis.
-
2Bore an initial hole with a center drill bit. As with a drill press, you still want to begin by using a center drill bit to begin your bore with more precision.[13] If your lathe doesn’t have a coolant delivery system, ensure that you apply lathe coolant for every bore for cleaner finished products and to extend the life of your tools.
-
3Drill a pilot hole. Using a reamer on a lathe is still intended only to enlarge an existing hole, so you’ll need to first use a slightly smaller drill bit to create the hole. Similar to reaming with by other methods, you want to use a drill bit approximately 1/64” smaller than the reamer you’ll need to use.[14]
- Once more, ensure that you’re applying plenty of cutting oil as you bore the hole.
-
4Ream the hole. Once you have drilled the pilot hole and cleared any filings, you’re ready to ream the hole. Insert the reamer into the chuck of the tailstock (the portion that you move forward toward the lathe spindle), power on the lathe, and ream the hole.[15]
- For high precision jobs, you can use a floating reamer holder here like you can for reaming in a drill press to correct for any minor misalignment.
-
5Retract the reamer while the lathe is still running. To ensure the smoothest ream possible, retract the tailstock while the lathe is still running by steadily pulling it straight out. Do not ever reverse direction of the spindle like you would to back out a drill bit.[16]


Warnings
- Never reverse direction to back a reamer out of the reamed hole as you risk damage to both the reamer and material.⧼thumbs_response⧽
- Never wear gloves when operating a drill press, mill, or lathe. The glove can get caught and drag your hand into the cutter or drill.⧼thumbs_response⧽
- Wear protective eye wear in all applications.⧼thumbs_response⧽
Things You'll Need
- Safety glasses
- Good lighting
- Table vise
- Vise parallels
- Fine-toothed round file
- Cutting oil
- Clean rags
- Variable-speed drill press
- Drill bit
- Reamer
- Lathe


References
- ↑ https://www.youtube.com/watch?v=XEltyxuYUeU
- ↑ https://www.youtube.com/watch?v=XEltyxuYUeU
- ↑ https://www.youtube.com/watch?v=XEltyxuYUeU
- ↑ https://www.youtube.com/watch?v=DuewffX4eDo
- ↑ https://www.youtube.com/watch?v=DuewffX4eDo
- ↑ https://www.youtube.com/watch?v=DuewffX4eDo
- ↑ https://www.youtube.com/watch?v=DuewffX4eDo
- ↑ https://www.youtube.com/watch?v=DuewffX4eDo
- ↑ https://www.youtube.com/watch?v=DuewffX4eDo
- ↑ https://www.youtube.com/watch?v=CrOejwFpHCw
- ↑ https://www.youtube.com/watch?v=DuewffX4eDo
- ↑ https://www.youtube.com/watch?v=DuewffX4eDo
- ↑ https://www.youtube.com/watch?v=YfnUJ0dbG2g
- ↑ https://www.youtube.com/watch?v=YfnUJ0dbG2g
- ↑ https://www.youtube.com/watch?v=YfnUJ0dbG2g
- ↑ https://www.youtube.com/watch?v=YfnUJ0dbG2g
About This Article

To ream a hole by hand, choose a hand reamer in the same size as the hole you need. Fit the shank of the reamer into a tap wrench or a crescent wrench, and use a vise or clamps to secure the material you need to bore. Drill out the hole with a standard drill bit that’s about 0.016 smaller than your reamer, then place the reamer into the hole. Turn the wrench counter-clockwise to bore the hole until it’s the same size as the reamer. Keep reading to learn tips from our contracting reviewer on how to ream a hole with a drill press!