X
wikiHow is a “wiki,” similar to Wikipedia, which means that many of our articles are co-written by multiple authors. To create this article, volunteer authors worked to edit and improve it over time.
This article has been viewed 51,228 times.
Learn more...
Sharpening a drill bit by hand can be challenging. It is important to grind the drill bit at the right angle and doing it free hand makes this almost impossible. To ensure that you grind your drill bit to the proper angle, you can use a jig. If you don’t have a jig, then you can make your own!
Steps
Part 1
Part 1 of 2:
Using a Drill Sharpening Jig
-
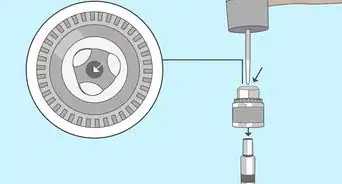
1Insert the drill bit into the jig. When you are ready to sharpen a drill bit, slide it into your drill bit jig so that the end of the drill bit hangs over the edge slightly. Make sure that the drill bit fits snugly in the slot. It should fit right into the central groove in your jig.[1]
- Then, place the tip of the drill bit near the grinding wheel. However, do not press the drill bit tip against the grinding wheel until after you turn it on.
-
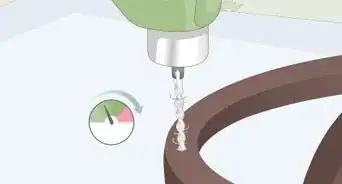
2Begin grinding. When you are ready, turn on the grinding wheel and push the drill bit towards the grinder. Slide the sharpening jig back and forth with one hand as you hold the drill bit against the grinder with the other hand.[2]
- You will also need to turn the drill bit slightly as you grind it down. Turn it clockwise slowly.
- It is important to make the edges as symmetrical as possible.[3] Using a jig will make this much easier than grinding a drill bit free hand.
Advertisement -
3Use water to cool the drill tip if necessary. If you have a lot of grinding to do, then you may need to dunk the tip of the drill bit in water once every minute or so to make sure that it stays cool. Keep grinding your drill bit until all of the edges are even.[4]
-
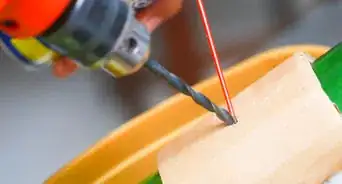
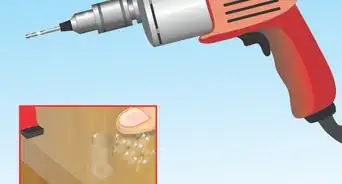
4Test the drill bit when you are finished. After you finish grinding down your drill it, it should be much more effective than it was. You can try out your newly sharpened drill bit on a scrap piece of wood, or even metal, to ensure that it is sharp.[5]
- Keep in mind that if you are going to be drilling through metal, it is best to use a drill press. It takes a lot of pressure to drill through metal, even with a sharp drill bit, so a handheld drill may not be enough.[6]


Advertisement
Part 2
Part 2 of 2:
Making a Drill Sharpening Jig
-
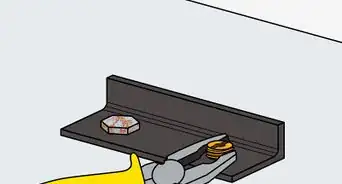
1Get a piece of scrap wood. A small piece of plywood is a good choice for making a jig, but you can use any type of durable scrap wood that you have laying around. The piece should be about a foot long and about four inches wide.[7]
-
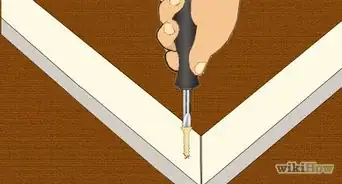
2Measure and mark it with a 59 degree angle. A 118 degree angle is ideal for drill bits, but you will need to create a 59 degree angle on your jig to get achieve this angle. Measure and mark your wood before you cut it.[8]
- If you have a protractor attachment for your table saw, then you can just set it to a 59 degree angle and use this to cut a notch in the wood.
-
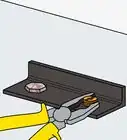
3Cut a slot along the mark. Turn on your table saw and slide your piece of wood towards the blade so that it passes over it completely. You can use a guide piece to keep the wood straight and push it across the blade.[9]
- Cut a V shape into the wood. This will keep your drill bit in place while you sharpen it.
- Wear safety goggles and keep your hands away from the saw blade.
-
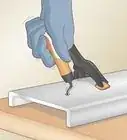
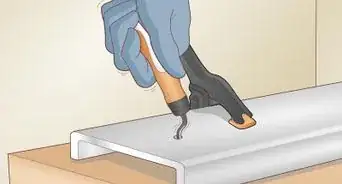
4Check the slot. After you have created the slot in your wood, check it to make sure that it is large enough to fit your drill bit into. If it is not large enough, then you can cut it a little wider.[10]
- Be careful not to make the slot too wide or it will not keep the drill bit in place.


Advertisement

References
- ↑ https://www.youtube.com/watch?v=72syhJoOsHM
- ↑ https://www.youtube.com/watch?v=72syhJoOsHM
- ↑ https://woodgears.ca/drill/sharpen.html
- ↑ https://www.youtube.com/watch?v=72syhJoOsHM
- ↑ https://www.youtube.com/watch?v=72syhJoOsHM
- ↑ https://woodgears.ca/drill/sharpen.html
- ↑ https://www.youtube.com/watch?v=PYJabbbx4Yg
- ↑ https://www.youtube.com/watch?v=PYJabbbx4Yg
- ↑ https://www.youtube.com/watch?v=PYJabbbx4Yg
About This Article
Advertisement