This article was co-authored by wikiHow Staff. Our trained team of editors and researchers validate articles for accuracy and comprehensiveness. wikiHow's Content Management Team carefully monitors the work from our editorial staff to ensure that each article is backed by trusted research and meets our high quality standards.
There are 8 references cited in this article, which can be found at the bottom of the page.
This article has been viewed 16,945 times.
Learn more...
Plaster of Paris is strong and durable, so it’s very popular for making molds or filling holes. However, this also means it breaks down very slowly, which is causing pollution problems and over-filling at landfills.[1] Luckily, there’s a reliable process to recycle and reuse the plaster and reduce pollution. This is not only good for the environment, but you’ll also save money by buying less plaster for your projects!
Steps
Dehydrating the Plaster
-
1Put the plaster mold into your oven or toaster oven. Either one will work, as long as it gets hot enough. Place the mold on a baking sheet or tray, then put it in the oven.[2]
- The baking process removes all the water from the plaster so you can reuse it later on.
-
2Set your oven to 180 °C (356 °F). At this temperature, the plaster will get hot enough for all the water to evaporate. This preps the plaster for recycling.[3]Advertisement
-
3Bake the plaster for 2 hours. Leave the plaster in the oven and let it bake. After 2 hours, the plaster should be completely dried out.[4]
- Check back on the oven periodically to make sure it’s still on and at the right temperature.
-
4Remove the plaster and let it cool. Use oven mitts or a towel and pull the tray out of the oven. Let the plaster rest on your stovetop until it’s cool enough to handle.[5]
- If you keep thick work gloves on, you could probably handle the plaster while it’s still hot and start breaking it up right away. Just be careful not to let any touch your skin.


Breaking Up the Mold
-
1Put on goggles to protect your eyes. Pieces of plaster could fly around while you’re breaking up the mold, so always be safe and put goggles on first. Ideally, use goggles that wrap around your eyes so you have protection all around.
- If you have asthma, then wearing a dust mask is a good idea too. There might be some powder particles that could make you cough.
-
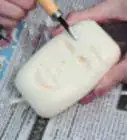
2Break up the plaster mold into small pieces with a hammer. Put the mold in a durable metal or plastic tray, and rest it on a solid surface like a workbench. Hit the mold with a hammer to break it up into pieces. Continue hammering until the pieces are as small as possible.[6]
- If the plaster is tough to break up, you could also use a chisel to help. This is also good for breaking up smaller pieces.
-
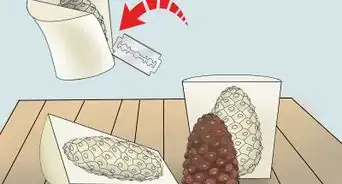
3Pulverize the pieces into powder. The plaster needs to be in powder form to reuse. Continue pounding the mold until the pieces are small. Then hit or grind the pieces with the flat top of a sledgehammer to reduce it into a powder.[7]
- You could also wrap the plaster in a towel or bag and crush it up with your hammer. This pulverizes it without getting powder everywhere.
-
4Pick out any dirt or debris from the plaster. Check the powder for any debris like this. Pick it out so it doesn’t interfere with the plaster curing process.[8]
- If you don’t use the plaster again right away, keep it stored in a plastic bag or bucket so it doesn’t get dirty.
-
5Bake the powder in the oven again for another 2 hours. All of the water has to be evaporated or the plaster won't re-form correctly. Pour all of the powder into an oven-safe tray or pan and set your oven back to 180 °C (356 °F). Put the pan into the oven and bake the plaster for another 2 hours to get rid of any remaining water.[9]
-
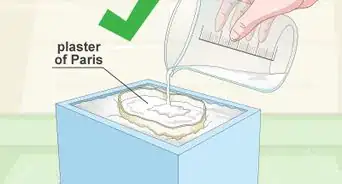
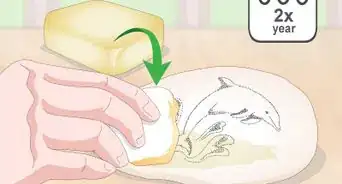
6Re-form the plaster when you’re ready to make another mold. The process is the same as using the plaster for the first time. Mix together 1 part of cold water with 2 parts of plaster in a clean container. Stir the mixture until it reaches a jelly-like consistency and pour it into the mold. Remove the plaster after 1 hour and give the mold 3 days to fully cure.[10]
- Don’t mix more plaster than you can use in 7-12 minutes because it’ll start hardening.
-
7Repeat this process any time you want to recycle the mold. Studies show that you can dry, crush, and reuse plaster of Paris many times without any problems. Use this same method as often as you want to, as long as the plaster is curing and hardening properly.[11]
- If the mold isn’t curing properly or seems too soft, then you probably need some new plaster.


Things You’ll Need
- Oven
- Plaster mold
- Goggles
- Oven Mitts
- Hammer
- Chisel
- Tray
Warnings
- Don't pour the water from plaster down a drain, or it could get clogged. Pour any water or excess plaster into a garbage bag.[13]⧼thumbs_response⧽


References
- ↑ https://www.ncbi.nlm.nih.gov/pmc/articles/PMC7276351/
- ↑ https://youtu.be/W0mrbF7Www8?t=9
- ↑ https://www.ncbi.nlm.nih.gov/pmc/articles/PMC7276351/
- ↑ https://www.ncbi.nlm.nih.gov/pmc/articles/PMC7276351/
- ↑ https://youtu.be/W0mrbF7Www8?t=20
- ↑ https://youtu.be/W0mrbF7Www8?t=51
- ↑ https://youtu.be/W0mrbF7Www8?t=56
- ↑ https://www.ncbi.nlm.nih.gov/pmc/articles/PMC7276351/
- ↑ https://www.ncbi.nlm.nih.gov/pmc/articles/PMC7276351/
About This Article