This article was co-authored by wikiHow Staff. Our trained team of editors and researchers validate articles for accuracy and comprehensiveness. wikiHow's Content Management Team carefully monitors the work from our editorial staff to ensure that each article is backed by trusted research and meets our high quality standards.
wikiHow marks an article as reader-approved once it receives enough positive feedback. In this case, 89% of readers who voted found the article helpful, earning it our reader-approved status.
This article has been viewed 196,006 times.
Learn more...
If you have an interesting object that you’d like to duplicate, you can create a latex mold. Latex is an extremely versatile and simple to use material. Just clean the object of choice, coat it with several layers of latex, and finish out the mold with a support stand. Once you are finished, you can easily cast dozens of copies of the original item.
Steps
Preparing the Object
-
1Choose an item from which to make your mold. You can cast a latex mold over almost anything. Some people mold rocks, plants, and masks. The one caveat here is that you cannot apply the latex over someone’s skin. The latex will seal the skin from the air and cause damage to the skin.[1]
-
2Clean and dry the item you wish to duplicate. Dirt, dust, and other contaminants can interfere with your mold. Clean the item with an appropriate cleaner such as soap and water (this may vary from item to item). Before creating the mold, make sure that you dry the object or allow it time to air dry.[2]Advertisement
-
3Set the item on a surface to act as a flange. Choose a flat, wide work surface. This will allow you to apply your mold beyond the edge of the object you wish to capture and form an outer flange. This flange will be useful when you are filling your mold in the future.[3]


Coating with latex
-
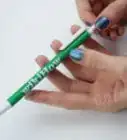
1Brush on a thin layer of liquid latex. Go a couple centimeters past the items edge to create a flange. This first layer will be the mold surface so ensure that there are no air bubbles. Allow this layer to dry for about 30 minutes.[4]
-
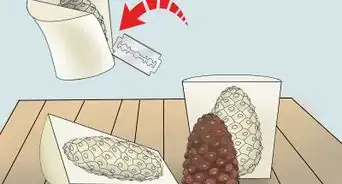
2Brush on more layers of latex. Allow each layer to dry before applying the next. More layers of latex will yield a stronger mold. For very small items, four or five layers may be sufficient. Larger items may need ten or more layers.[5]
- Do not allow the latex to dry overnight between layers. This will cure the mold and cause subsequent layers not to bond properly.
-
3Add reinforcing material. If you are molding a larger item, you may need some extra materials to produce a sturdy mold. Loosely woven fabric such as gauze works well. Wet it with latex and apply to areas that are likely to stretch out of shape when the mold is filled with casting medium. Avoid reinforcing areas that will need to stretch to facilitate the item's release from the mold.[6]
- The mold is likely to stretch and deform near the bottom of the mold (which is likely the top of the object). This is because it has to support most of the weight of your casting material.


Finishing Your Mold
-
1Allow the mold to dry overnight or longer once complete. This process is called curing. Only cure the mold once you have added all of the layers necessary. When cured, the latex will be unable to bond with subsequent layers. It will also be more resilient to environmental things (water, air, etc.).[7]
-
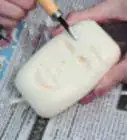
2Peel off the mold. The latex should be very durable and can be peeled right back inside-out. Then just pop it back to it's original shape. If you have an intricate object, you may have to pull and stretch some parts of the mold to release it. Be careful not to tear the mold or break your original object when separating the two.[8]
-
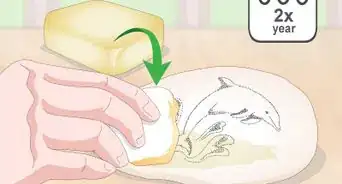
3Build a support stand for the mold. For most items, it is best to support the mold just under the flange so that it is suspended. Larger items may require extra support such as a wooden box to keep it in the proper shape when filled. You can also use a medium like sand to reinforce the mold all over.[9]
- By placing your mold in sand, the weight of the casting material is supported evenly by the sand. This holds the mold in place and prevents stretching and deforming. Be careful not to get sand into your resin or plaster.
-
4Cast your item using any casting medium. Plaster of Paris is probably the easiest. It can be painted later. That said, polyester resin or similar polymers will reproduce very fine details in your item. Choose your casting medium to fit your needs.[10]


References
- ↑ https://www.sculpturehouse.com/t-faq_moldmaking.aspx
- ↑ http://modeltrain.com/rubbermold/rubbermold.html
- ↑ https://www.sculpturehouse.com/t-faq_moldmaking.aspx
- ↑ http://modeltrain.com/rubbermold/rubbermold.html
- ↑ http://modeltrain.com/rubbermold/rubbermold.html
- ↑ http://modeltrain.com/rubbermold/rubbermold.html
- ↑ https://www.sculpturehouse.com/t-faq_moldmaking.aspx
- ↑ https://www.sculpturehouse.com/t-faq_moldmaking.aspx
- ↑ http://modeltrain.com/rubbermold/rubbermold.html
Community Q&A
-
QuestionWhere can I buy latex?
 Community AnswerMost craft supply stores, as well as online specialty retailers of casting or model making supplies, will have it.
 -
QuestionWhat is the purpose of the hardener sold by many suppliers?Community AnswerHardener or thickener is to make the latex mold stiffer. Latex is very flexible without it. In some cases it can negate the need for a support frame for the mold. In most molds, it's not always necessary, although in some applications it can be helpful.
-
QuestionHow do I make a mold of a toy truck wheel so that I can make more wheels? What would be a good media to cast the wheels?Community AnswerYou can use clay, and be sure to let it dry for a few days before using it.
Things You’ll Need
- An object to mold
- Flat surface
- Liquid Latex
- Brushes
- Cloth Strips
- Sand or other reinforcement


About This Article

To make a latex mold, start by applying a layer of latex to your chosen object and letting it dry for 30 minutes. Repeat this process to add 4-5 layers for small objects and 10 or more layers for larger items. If your object is very large, cover some gauze with latex and apply the gauze to your mold to strengthen it. When you've added all of the layers, allow the mold to dry overnight to cure it. Finally, peel the mold off your object and place it in a supporting material like sand. For tips on how to prepare an object for molding and how to cast an item, read on!