This article was co-authored by Luba Lee, FNP-BC, MS. Luba Lee, FNP-BC is a Board-Certified Family Nurse Practitioner (FNP) and educator in Tennessee with over a decade of clinical experience. Luba has certifications in Pediatric Advanced Life Support (PALS), Emergency Medicine, Advanced Cardiac Life Support (ACLS), Team Building, and Critical Care Nursing. She received her Master of Science in Nursing (MSN) from the University of Tennessee in 2006.
There are 8 references cited in this article, which can be found at the bottom of the page.
This article has been viewed 337,114 times.
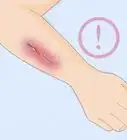
Ouch! Removing a band-aid can hurt. Each person experiences pain differently and there is no one-size-fits-all approach. How much hair is in the area, type of band-aid, how long it’s been on your skin, and how healed your wound is can all affect how it feels to pull it off. All of these methods can be achieved with common household items and a little bit of patience.
Steps
Peeling It Off Slowly
-
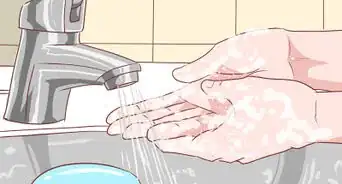
1Wash your hands with soap and clean water. You should have clean hands whenever you are touching the area around your band-aid to prevent the spread of bacteria and possible infection.[1]
- Use clean water from a tap to wet your hands. Warm or cold is fine.
- Turn off the tap and apply soap to your hands.
- Rub your hands together to create a lather with the soap making sure to coat the back of your hands, between your fingers, and underneath your fingernails.
- Continue scrubbing your hands for 20 seconds. This is about as long as it takes to sing the “Happy Birthday” song twice in a row from beginning to end.
- Rinse the soap off of your hands with clean water from the tap.
- Dry your hands with a clean cloth towel, paper towel, or you can air dry them.
- As an alternative to washing your hands, you can use a hand sanitizer that is at least 60% alcohol.
-
2Clean the area around the band-aid. Like washing your hands, cleaning the area around your band-aid can help prevent infection or the spread of bacteria during removal.
- Fill a clean bowl with clean tap water and mild liquid soap. Warm or cold water is fine, although warm (not hot) water may feel more comforting.
- Soak a clean washcloth in the soapy water and wring it out to remove excess moisture.
- Gently wash the skin around and on top of the band-aid with the washcloth. Avoid putting direct pressure on top of the band-aid as you do this. Instead, give it a quick wipe with the cloth.
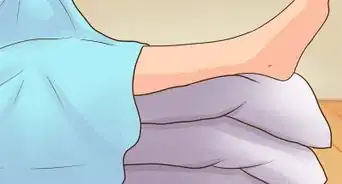
- Gently pat the area dry with a clean, dry washcloth.
Advertisement -
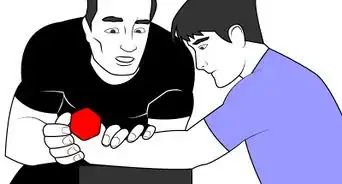
3Work at one corner of the bandage little by little. It’s important to move slowly here and are not too ambitious about how much you peel up. The less you peel, the less it will hurt.[2]
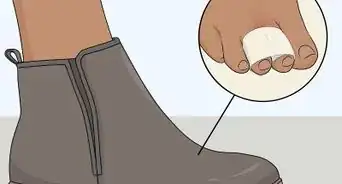
- If the band-aid is in a hairy part of your body, ripping it off slowly may be more comfortable.
- It can help to get a fingernail up under the edge of the band-aid to tease the adhesive away from the skin.
-
4Lift it a little, tug at it a little more, then rest and repeat until the bandage comes off completely. This part can feel like it’s taking forever, but in order to reduce discomfort, you need to work slowly.
- Take breaks for as long as you need to in between tugs. This gives your pain reflex a chance to calm down.
- This process takes extra patience, but you are getting there, slowly but surely.
- How many times you repeat these steps depends on how big the band-aid is, and how much you are able to peel back each time.
- Take your time, breathe, and stay relaxed as you work the band-aid off.
- Remember, if you get bored, though, you can always switch to the quick rip method.


Peeling It Off Parallel to Your Skin
-
1Wash your hands with soap and clean water. You should have clean hands whenever you are touching the area around your band-aid to prevent the spread of bacteria and possible infection.
- Use clean water from a tap to wet your hands. Warm or cold is fine.
- Turn off the tap and apply soap to your hands.
- Rub your hands together to create a lather with the soap making sure to coat the back of your hands, between your fingers, and underneath your fingernails.
- Continue scrubbing your hands for 20 seconds. This is about as long as it takes to sing the “Happy Birthday” song twice in a row from beginning to end.
- Rinse the soap off of your hands with clean water from the tap.
- Dry your hands with a clean cloth towel, paper towel, or you can air dry them.
- As an alternative to washing your hands, you can use a hand sanitizer that is at least 60% alcohol.
-
2Clean the area around the band-aid. Like washing your hands, cleaning the area around your band-aid can help prevent infection or the spread of bacteria during removal.
- Fill a clean bowl with clean tap water and mild liquid soap. Warm or cold water is fine, although warm (not hot) water may feel more comforting.
- Soak a clean washcloth in the soapy water and wring it out to remove excess moisture.
- Gently wash the skin around and on top of the band-aid with the washcloth. Avoid putting direct pressure on top of the band-aid as you do this. Instead, give it a quick wipe with the cloth.
- Gently pat the area dry with a clean, dry washcloth.
-
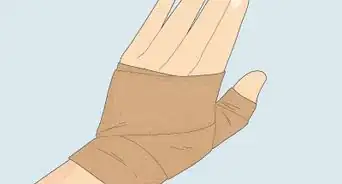
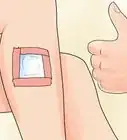
3Grasp an edge of the band-aid and grip it firmly between your pointer finger and thumb. You’ll need a firm grip to keep consistent tension and angle for this method.
- This method may work especially well for waterproof band-aids.
-
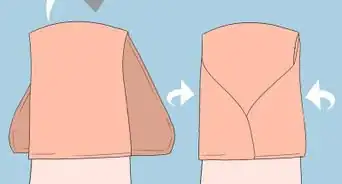
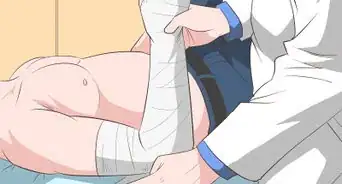
4Pull on the band-aid gently keeping it parallel to your skin. Pulling parallel to your skin encourages the adhesive to release rather than stick to your skin.[3]
- It is normal for the band-aid to stretch slightly with this method.
- This can be an awkward movement, but when you get the hang of it, you’ll feel the adhesive release from your skin.
-
5Keep tension on the band-aid as you pull it all the way off. Consistent tension keeps the band-aid from sagging and re-sticking to your skin.
- For the final bit, you may have to pull up more vigorously and finish with a quick jerk up and away from your skin.
- It will help if you have “follow-through” with your movement so you don’t get stuck at the very end.
- Keep this movement as steady and smooth as you can so you don’t prolong any discomfort.
- Alternatively, you can peel the band-aid off diagonally across the wound. Some people find they are better at controlling the band-aid with this method.
- The tingling feeling you have on your skin where the band-aid was should subside shortly.


Dissolving the Adhesive
-
1Wash your hands with soap and clean water. You should have clean hands whenever you are touching the area around your band-aid to prevent the spread of bacteria and possible infection.[4]
- Use clean water from a tap to wet your hands. Warm or cold is fine.
- Turn off the tap and apply soap to your hands.
- Rub your hands together to create a lather with the soap making sure to coat the back of your hands, between your fingers, and underneath your fingernails.
- Continue scrubbing your hands for 20 seconds. This is about as long as it takes to sing the “Happy Birthday” song twice in a row from beginning to end.
- Rinse the soap off of your hands with clean water from the tap.
- Dry your hands with a clean cloth towel, paper towel, or you can air dry them.
- As an alternative to washing your hands, you can use a hand sanitizer that is at least 60% alcohol.
-
2Clean the area around the band-aid. Like washing your hands, cleaning the area around your band-aid can help prevent infection or the spread of bacteria during removal.
- Fill a clean bowl with clean tap water and mild liquid soap. Warm or cold water is fine, although warm (not hot) water may feel more comforting.
- Soak a clean washcloth in the soapy water and wring it out to remove excess moisture.
- Gently wash the skin around and on top of the band-aid with the washcloth. Avoid putting direct pressure on top of the band-aid as you do this. Instead, give it a quick wipe with the cloth.
- Gently pat the area dry with a clean, dry washcloth.
-
3Soak a cotton ball in olive oil to saturate it. This is the most efficient way to get the most oil onto the adhesive part of the band-aid.
- This will take 1-2 minutes depending on how big your cotton ball is.
- Be sure to protect your clothing and other items around you from accidental drips.
- Alternatively, you can also use baby oil instead of olive oil.
- Another option is to use a mixture of lotion and baby oil applied with a cotton swab to achieve similar results
- If you don’t have either of these oils on hand, you can also soak the band-aid and surrounding area in a bowl of clean, warm water until the adhesive dissolves. This option may work better for fabric types of band-aids.
-
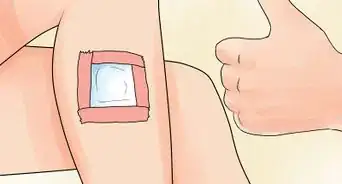
4Rub the cotton all over the top of the adhesive parts of the band-aid and let it soak in. The oil will help to dissolve the part of the band-aid that sticks to your skin so it can slip off with minimal effort.[5]
- How long this takes depends on the size, location, and strength of the adhesive on the band-aid.
- Keep the oil from getting on the cotton underside of the band-aid so it doesn’t irritate your wound.
-
5Peel the band-aid off slowly. This should require little effort and no pain. If it's still sticking, try leaving the oil on for a little longer.


Melting the Adhesive
-
1Wash your hands with soap and clean water. You should have clean hands whenever you are touching the area around your band-aid to prevent the spread of bacteria and possible infection.[6]
- Use clean water from a tap to wet your hands. Warm or cold is fine.
- Turn off the tap and apply soap to your hands.
- Rub your hands together to create a lather with the soap making sure to coat the back of your hands, between your fingers, and underneath your fingernails.
- Continue scrubbing your hands for 20 seconds. This is about as long as it takes to sing the “Happy Birthday” song twice in a row from beginning to end.
- Rinse the soap off of your hands with clean water from the tap.
- Dry your hands with a clean cloth towel, paper towel, or you can air dry them.
- As an alternative to washing your hands, you can use a hand sanitizer that is at least 60% alcohol.
-
2Clean the area around the band-aid. Like washing your hands, cleaning the area around your band-aid can help prevent infection or the spread of bacteria during removal.
- Fill a clean bowl with clean tap water and mild liquid soap. Warm or cold water is fine, although warm (not hot) water may feel more comforting.
- Soak a clean washcloth in the soapy water and wring it out to remove excess moisture.
- Gently wash the skin around and on top of the band-aid with the washcloth. Avoid putting direct pressure on top of the band-aid as you do this. Instead, give it a quick wipe with the cloth.
- Gently pat the area dry with a clean, dry washcloth.
-
3Set your blow dryer to the lowest setting. Warm air softens the sticky part of the band-aid and makes it easier to remove.
- Using the warm setting will lower the risk of you burning yourself.
-
4Blow warm air in a back and forth motion onto the band-aid. This helps you achieve an even release of the adhesive and minimizes discomfort from the heat on your skin.[7]
-
5Test to see if the band-aid is ready to peel off. How long this process takes depends on the size and strength of the adhesive area.
- It’s easiest to slide a fingernail underneath an edge and gently pry it up.
- If it's not ready to peel off, apply more warm heat with the blow-dryer.
- Areas with more hair may take less time than band-aids stuck to smooth skin.
-
6Repeat these steps until the band-aid is loose enough to come off easily. You should feel minimal resistance from the band-aid. If it’s not ready yet, be patient and keep working at it with the heat.


Freezing the Adhesive
-
1Wash your hands with soap and clean water. You should have clean hands whenever you are touching the area around your band-aid to prevent the spread of bacteria and possible infection.
- Use clean water from a tap to wet your hands. Warm or cold is fine.
- Turn off the tap and apply soap to your hands.
- Rub your hands together to create a lather with the soap making sure to coat the back of your hands, between your fingers, and underneath your fingernails.
- Continue scrubbing your hands for 20 seconds. This is about as long as it takes to sing the “Happy Birthday” song twice in a row from beginning to end.
- Rinse the soap off of your hands with clean water from the tap.
- Dry your hands with a clean cloth towel, paper towel, or you can air dry them.
- As an alternative to washing your hands, you can use a hand sanitizer that is at least 60% alcohol.
-
2Clean the area around the band-aid. Like washing your hands, cleaning the area around your band-aid can help prevent infection or the spread of bacteria during removal.
- Fill a clean bowl with clean tap water and mild liquid soap. Warm or cold water is fine, although warm (not hot) water may feel more comforting.
- Soak a clean washcloth in the soapy water and wring it out to remove excess moisture.
- Gently wash the skin around and on top of the band-aid with the washcloth. Avoid putting direct pressure on top of the band-aid as you do this. Instead, give it a quick wipe with the cloth.
- Gently pat the area dry with a clean, dry washcloth.
-
3Make an ice pack by wrapping several ice cubes in a paper towel or thin cloth. Choose something not too thick that it blocks the cold of the ice.
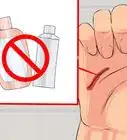
- Don’t use a gel pack because it won’t get the adhesive cold enough.
-
4Hold the ice pack against the parts of the band-aid with adhesive. Ice can make the adhesive brittle so it pulls off your skin easily.
- The time it takes here depends on how strong the adhesive is, and the overall size of your band-aid.
-
5Test to see if the band-aid is released by lifting a corner. If the band-aid doesn’t release easily, continue icing it. Repeat this until the band-aid is able to come off entirely.
- It’s easiest to slide a fingernail underneath an edge and gently prying it up.


Ripping It Off Quickly
-
1Wash your hands with soap and clean water. You should have clean hands whenever you are touching the area around your band-aid to prevent the spread of bacteria and possible infection.
- Use clean water from a tap to wet your hands. Warm or cold is fine.
- Turn off the tap and apply soap to your hands.
- Rub your hands together to create a lather with the soap making sure to coat the back of your hands, between your fingers, and underneath your fingernails.
- Continue scrubbing your hands for 20 seconds. This is about as long as it takes to sing the “Happy Birthday” song twice in a row from beginning to end.
- Rinse the soap off of your hands with clean water from the tap.
- Dry your hands with a clean cloth towel, paper towel, or you can air dry them.
- As an alternative to washing your hands, you can use a hand sanitizer that is at least 60% alcohol.
-
2Clean the area around the band-aid. Like washing your hands, cleaning the area around your band-aid can help prevent infection or the spread of bacteria during removal.
- Fill a clean bowl with clean tap water and mild liquid soap. Warm or cold water is fine, although warm (not hot) water may feel more comforting.
- Soak a clean washcloth in the soapy water and wring it out to remove excess moisture.
- Gently wash the skin around and on top of the band-aid with the washcloth. Avoid putting direct pressure on top of the band-aid as you do this. Instead, give it a quick wipe with the cloth.
- Gently pat the area dry with a clean, dry washcloth.
-
3Peel back one end of the bandage to create a tab. Making this tab will help you keep control over the band-aid as you pull it off.
-
4Close your eyes, take a deep breath and hold it in for a count of three. Paying attention to your breath will signal your body to let go of stress and helps you get ready to pull off the band-aid.[8]
-
5Exhale on three and pull the bandage off as fast as you can. Contrary to what many think, ripping the band-aid off quickly can be less painful for some. However, it could damage your skin, so use caution if you choose to rip off the bandage.[9]
- Exhaling while you pull the band-aid off can trigger your body to relax rather than tense up. Likewise, the faster you pull, the faster your discomfort will be over.
- If the skin is really irritated, apply a chunk of ice or a cold compress to the area to help soothe the skin.


Warnings
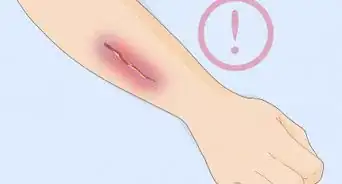
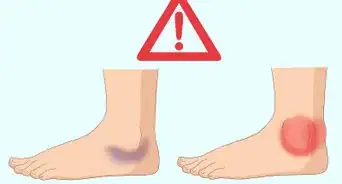
- Be extra careful if the adhesive is touching your wound. You don't want to re-open it or cause yourself more injury.⧼thumbs_response⧽
- For any of the heat methods, make sure to use warm temperatures rather than hot.⧼thumbs_response⧽
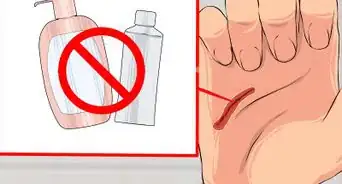
- When using oils and lotions, be sure to protect your clothing and any furniture you are near.⧼thumbs_response⧽


References
- ↑ http://www.cdc.gov/handwashing/when-how-handwashing.html
- ↑ https://www.mja.com.au/journal/2009/191/11/fast-versus-slow-bandaid-removal-randomised-trial
- ↑ https://www.independentnurse.co.uk/clinical-article/managing-pain-during-the-removal-of-wound-dressings/63599/
- ↑ http://www.cdc.gov/handwashing/when-how-handwashing.html
- ↑ https://www.myamericannurse.com/adhesive-removal/
- ↑ https://kidshealth.org/en/parents/hand-washing.html
- ↑ https://www.latimes.com/archives/la-xpm-1997-nov-09-re-51847-story.html
- ↑ https://news.umich.edu/mindful-breathing-for-pain-control-like-yin-and-yang/
- ↑ https://www.mja.com.au/journal/2009/191/11/fast-versus-slow-bandaid-removal-randomised-trial#4
About This Article
To quickly remove a band-aid, grip one end, take a deep breath, count to three, and pull it off in one motion. If that seems too painful, try peeling the band-aid off slowly by gently lifting one end, then working your finger under the sticky part little-by-little until it comes off. However, if pulling off the band-aid still hurts, you can try dissolving the adhesive first by blotting the band-aid with a cotton ball soaked in olive oil or blowing it with a hair dryer, keeping the hair dryer on warm so you don’t burn yourself. For more tips, such as how to freeze band-aid adhesive, read on!


Medical Disclaimer
The content of this article is not intended to be a substitute for professional medical advice, examination, diagnosis, or treatment. You should always contact your doctor or other qualified healthcare professional before starting, changing, or stopping any kind of health treatment.
Read More...