This article was co-authored by wikiHow staff writer, Nicole Levine, MFA. Nicole Levine is a Technology Writer and Editor for wikiHow. She has more than 20 years of experience creating technical documentation and leading support teams at major web hosting and software companies. Nicole also holds an MFA in Creative Writing from Portland State University and teaches composition, fiction-writing, and zine-making at various institutions.
The wikiHow Tech Team also followed the article's instructions and verified that they work.
This article has been viewed 219,857 times.
Learn more...
This wikiHow teaches you how to make a white background transparent using Microsoft Paint. If you're using Windows 10, your computer comes with an updated version of MS Paint (called Paint 3D) that allows you to remove backgrounds with just a few clicks. If you're using an earlier version of Windows, you can't save an image with a transparent image in Paint. You can, however, cut out the image's subject and paste it onto a different background.
Steps
Using Paint 3D
-
1Open Paint 3D. Windows 10 comes with an updated version of MS Paint called MS Paint 3D. You'll find it in the Start menu, or by typing "Paint 3D" into the Windows search bar.
- You can use this method with any solid-color background.
-
2Click Open. It's the second box on the left side of the Welcome screen.Advertisement
-
3Click Browse files. It's at the top of the right panel.
-
4Select your file and click Open. This opens your image for editing.
-
5Click the Canvas tab. It's the hash/pound icon in the toolbar that runs along the top of the app.
-
6
-
7Remove the check mark from "Resize image with canvas." It's near the middle of the right panel.
-
8Drag the canvas edges so the image fits inside. You can do this by dragging the small boxes at each corner inward until it's close to the part of the image you want to keep.
-
9Click Magic select. It's on the lighter gray part of the toolbar at the top of the screen, toward the left. Its icon looks like an outline of a person looking into its reflection. The "Magic select" panel will expand on the right.
-
10Click Next. It's in the right panel.
-
11Remove the check mark from "Autofill background." It's in the right panel.
-
12Click Done. This removes just the selected part of the image from what remains of the background and places it onto a new placeholder background (which is also white).
-
13Click the Canvas tab again. It's the hash/pound symbol in bar that runs along the top of the app.
-
14
-
15Click the Menu button. It's the folder at the top-left corner of Paint 3D.
-
16Click Save As. It's near the middle of the menu.
-
17Click Image. It's the box that has an icon that resembles a photo of mountains.
-
18Check the box next to "Transparency." It's in the right panel. The background will appear checkered, which means it's transparent. The checker pattern will not be saved along with your subject.
-
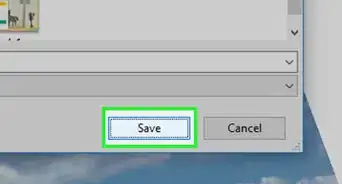
19Click Save. It's at the bottom-right corner.
-
20Enter a file name and click Save. This saves your image with a completely transparent background.


Using MS Paint
-
1Open Paint. You can do this quickly by typing "paint" into the Windows search bar and clicking Paint in the search results.
- If you have Windows 10, use the "Using Paint 3D" method instead.
- It's not possible to make the white background transparent in MS Paint. This method will teach you how to cut out the part of the image you want to keep and paste it onto a different background.
-
2Click the File menu. It’s at the top-left corner of Paint.
-
3Click Open.
-
4Select an image and click Open. Be sure to select the image with a white background.
-
5Click Color 2. It's in the toolbar at the top of the screen, to the right of the color palette.
-
6Click the eyedropper icon. It's in the toolbar at the top of the screen (in the "Tools" panel).
-
7Click a blank area of the white background. The background color will now appear in the "Color 2" box.
- Even if the color of the box was already white, this is just an extra precaution to take in case image's background has any gray or other tints to it.
-
8
-
9Click Transparent selection. It’s at the bottom of the menu. A check mark will appear next to the option to show that it's selected.
- The Transparent Select tool ignores the white background when you copy images in Paint and paste them into another image.
-
10
-
11Click Rectangular selection. It's at the top of the menu. This tool lets you draw a box around the subject to select it.
-
12Select the part of the image you want to keep. Click and drag the mouse until you've surrounded the entire subject, then lift your finger from the button. A dotted rectangular selection box will appear around the selected area.
- Everything within your selection that doesn't match the color in "Color 2" will be preserved. If the background isn't completely white (such as if there are shadows or objects in the background you don't want to keep), choose Freeform selection instead so you can trace around just the part of the image you want to keep.
-
13Click Copy. It's near the top-left corner of Paint in the "Clipboard" panel. This copies your selection.
-
14Create or open a new file. Now that your selection is copied, you can open the image you want to paste it on. You'll be prompted to save or discard the changes to the image you're working on before the new one will open.
- Click File in the upper-right corner.
- Click New to create a new file, or click Open to open a different image.
-
15Click Paste. It’s near the top-left corner of Paint. This pastes the selected part of the previous image onto the new image.
- Click and drag the pasted selection to move it.
- There may still be some white around the edges of the image you pasted. Keep reading to learn how to fix this.
-
16Click Color 1. It's next to the palette at the top of the screen.
-
17Click the eyedropper tool in the toolbar.
-
18Click the background next to the white edges. If there is any white around the edges of the image you pasted, click the background right next to the white edge to select the color directly behind the white edge. This will allow you to paint the white areas to match the selected color.
-
19Click the paintbrush tool. It's the paintbrush icon to the right of the "Tools" panel at the top of Paint.
- You can click the arrow pointing down below the brush to select different brush types.
-
20Paint over the white edges. Use the brush tool to color over any white edges that may remain around the object you pasted.
- Zoom in and try not to color within the image.
- If the background is not a solid color, you may need to use the eyedropper tool more than once.
- Click the drop-down menu below Size to change brush sizes. Use a larger brush size to color over the bulk of the remaining white edge, then zoom in and switch to a smaller brush for precision.
- Look for any white parts of the image that the Transparent Select tool didn't copy. Use the brush tool to color them back in.
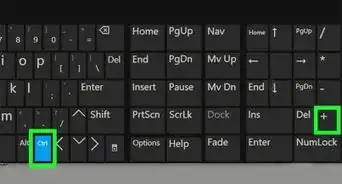
- If you accidentally color over a part of the image you don't want to, press Ctrl+Z to undo the mark.


-Step-29.webp)


About This Article

1. Open Paint 3D.
2. Open the image you want to edit.
3. Click Canvas.
4. Slide the Transparent Canvas switch to the On position.
5. Uncheck Resize image with canvas and adjust the edges so that the image fits inside the canvas.
6. Click Magic Select and uncheck Autofill background.
7. Slide the Show Canvas switch to the Off position and save your file.