This article was co-authored by wikiHow staff writer, Jack Lloyd. Jack Lloyd is a Technology Writer and Editor for wikiHow. He has over two years of experience writing and editing technology-related articles. He is technology enthusiast and an English teacher.
The wikiHow Tech Team also followed the article's instructions and verified that they work.
This article has been viewed 1,721,999 times.
Learn more...
This wikiHow teaches you how to change the background for an image using one of your Windows computer's Paint programs. While the traditional MS Paint program won't allow you to create a transparent image, you can create a green screen background by filling in your image with a solid color that can be replaced with a different image later. You can also use Paint 3D to crop out the section of the image you want to use and then paste the resulting image onto a background.
Steps
Using Paint
-
1Find the image for which you want to change the background. Go to the image that you want to use for this project. You can use any image, but keep in mind that a higher-resolution image will be easier to work with.
-
2Right-click the image. Doing so prompts a drop-down menu.Advertisement
-
3Select Open with. It's near the middle of the drop-down menu. A pop-out window will appear.
-
4Click Paint. This option is in the pop-out menu. Doing this will open your photo in Paint.
-
5Select the drawing tool. Click the pencil-shaped icon in the "Tools" section of the Paint toolbar to do so.
-
6Change the drawing tool's width. Click the Size drop-down box, then click the thickest line in the resulting drop-down menu.
-
7Double-click the light green box. It's in the upper-right side of the Paint window.
-
8Draw carefully around the part of the image you want to save. This will help create a boundary between the image for which you want to change the background and the section of the photo that you'll replace with a green screen.
- You can zoom in by clicking the + icon in the lower-right corner of the window.
-
9Use the light green color to fill in the surrounding space. The best manner for doing this will vary depending on your image; for example, if the left side of your image is mostly background that you want to delete later, you can select the rectangle drawing icon, click Fill, click Solid color, and then click the Color 2 box and double-click the light-green option. You can then click and drag across the section you want to remove to block it out with a large green box.
- When you're done, you should have a green background surrounding your subject.
-
10Save the image. Once you've added the green screen background to your image, save the image as a new file by doing the following:
- Click File.
- Select Save as.
- Click JPEG picture.
- Enter a file name, then click a save location (e.g., Desktop).
- Click Save.
-
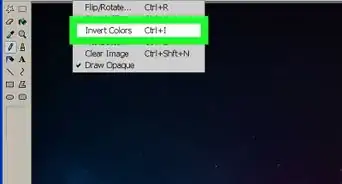
11Use a different program to replace the green screen. Unfortunately, MS Paint can't replace your green screen with a different image; you'll have to use your preferred photo manipulation option (e.g., Photoshop) or video editor to do this.
- Since the whole background is the same color, any green screen editing should leave you with only your initial subject on whatever background you select.
-Step-1-Version-8.jpg)
-Step-2-Version-8.jpg)
-Step-3-Version-8.jpg)
-Step-4-Version-8.jpg)
-Step-5-Version-8.jpg)
-Step-6-Version-8.jpg)
-Step-7-Version-8.jpg)
-Step-8-Version-8.jpg)
-Step-9-Version-9.jpg)
-Step-10-Version-8.jpg)
-Step-11-Version-8.jpg)
Using Paint 3D
-
1
-
2Open Paint 3D. Type paint 3d into Start, then click the Paint 3D option at the top of the Start window.
-
3Click Open. It's in the middle of the Paint 3D window.
-
4Click Browse files. This option is near the middle of the window. Doing so opens a new window.
-
5Select a photo. Go to the location of the photo for which you want to replace the background, then click the photo once to select it.
-
6Click Open. It's in the bottom-right corner of the window. Your image will be opened in Paint 3D.
-
7Click the Canvas tab. This three-by-three grid icon is in the upper-right side of the Paint 3D window. Doing so opens a new column on the right side of the window.
-
8
-
9Click Magic Select. You'll find this tab near the left-hand side of the Paint 3D window.
-
10Drag the edges of the canvas in to surround your subject. This will ensure that your final image requires as little editing as possible.
- Try to get the edges as close to the part of the image that you want to keep as possible without being inside of it.
-
11Click Next. It's on the right side of the page.
-
12Add or remove any sections you want to keep or delete. Anything that is both outlined in blue and fully colored (e.g., not greyed out) will be saved when you crop the photo. If parts of the section you want to save aren't included, or if parts that you don't want to save are included, you can add or remove sections by doing the following:
- Add — Click the Add icon at the top of the right-hand column, then draw an outline around the section of the image that you want to include.
- Remove — Click the Remove icon at the top of the right-hand column, then draw an outline around the section of the image that you want to remove.
-
13Click Done. It's on the right side of the page.
-
14Copy the selection to your clipboard. Press Ctrl+X to do so. You should see the selected portion of your image disappear from the Paint 3D window.
-
15Click Menu. It's a folder-shaped icon in the top-left corner of the window.
-
16Open your background image. Do the following:
- Click Open.
- Click Browse files.
- Click Don't save when prompted.
- Select the image you want to use as a background.
- Click Open.
-
17Add the original image to the background. Once the background image opens, press Ctrl+V to paste the copied section of your original image onto the background.
- If necessary, you can resize the original image by clicking and dragging one of its corners inward or outward.
-
18Save your image. To save your project as one image, do the following:
- Click the folder-shaped Menu icon in the top-left corner of the window.
- Click Save as.
- Click Image.
- Enter a name for your image, then click a save location (e.g., Desktop).
- Click Save.
-Step-12-Version-5.jpg)

-Step-13.jpg)
-Step-14.jpg)
-Step-15.jpg)
-Step-16.jpg)
-Step-17.jpg)
-Step-18.jpg)
-Step-19.jpg)


-Step-20.jpg)
-Step-21.jpg)
-Step-22.jpg)
-Step-23.jpg)
-Step-24.jpg)
-Step-25.jpg)
-Step-26.jpg)
-Step-27.jpg)
-Step-28.jpg)
-Step-29.jpg)
Community Q&A
-
QuestionIs it possible for me to save the image as just an image without any background?
 Community AnswerYes. Portable Interchange Graphics (PNG) allows you to save the image without a background, but you need an image viewer program to view it. There are various type of programs available on the internet.
 -
QuestionHow do I remove the background?
 Community AnswerFollow the same steps as above, but when pasting, paste into a blank section of canvas (If there isn't any, just expand the sides to make room), then delete the background. If you don't care for having some background, use the tool to select the object wanted, right-click it, then press crop.
 -
QuestionCan I get Paint 3D on Windows 7?
 Pep PurkCommunity AnswerPaint 3D is only for Windows 10. On Windows 7 you have normal Paint. So you need a VM or PC with Windows 10 to use Paint 3D.
Warnings
- Avoid using your mouse's scroll wheel (or scroll wheel function) in Paint, as doing so can ruin your image if you're zoomed in.⧼thumbs_response⧽


About This Article
1. Open the image in Paint.
2. Click the pencil.
3. Double-click the light-green box.
4. Draw around the area you want to save.
5. Fill the surrounding area with light green.
6. Open the image in app like Photoshop or GIMP.
7. Replace the green with a different background.