wikiHow is a “wiki,” similar to Wikipedia, which means that many of our articles are co-written by multiple authors. To create this article, 18 people, some anonymous, worked to edit and improve it over time.
This article has been viewed 42,573 times.
Learn more...
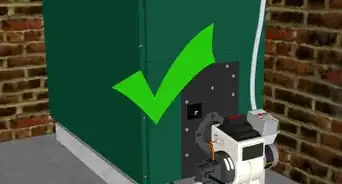
The combustion chamber of an oil fired furnace will eventually collapse and require replacement. An improperly maintained oil burner, that repeatedly becomes locked out and manually reset, can flood the chamber with heating oil. This would also necessitate chamber replacement. This job can cost you $300 or more, when performed by your oil service company. You can do this yourself for just the cost of a few hours of your time and a chamber replacement kit. While these instructions are specific to a Weil Mclain Gold furnace, the procedure is very similar for most other residential furnaces. Always follow instructions provided with your chamber kit.
Steps
-
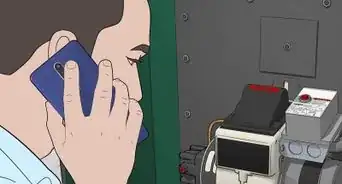
1Shut off the power. Most oil burners have a service switch on or near the boiler (or furnace) itself, designed specifically for service personnel to ensure the power remains off while they are working on the equipment. The switch is unique in that most times, it has a wall plate that is bright red with the words "OIL BURNER EMERGENCY SWITCH" written on it. If unable to locate the service switch, shut off power one way or another (circuit breaker, fire safety valve, etc.) to prevent furnace from starting. Place a note on the electrical panel explaining the the circuit is off because the furnace is being serviced. Professionals typically employ "Lock Out / Tag Out" by affixing a handle lock and tag on the breaker or panel cover while they are working on the equipment.
- Test to verify power is off before continuing.
- Shut off fuel supply (often found between the outlet of the tank and the filter).
-
2Allow the furnace to cool. There is a risk injury from burns if you do not allow enough time for the furnace cool down before attempting this work.Advertisement
-
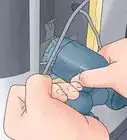
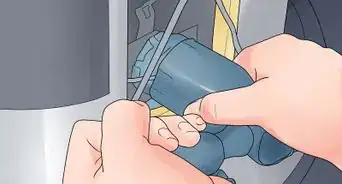
3Clear cables and power lines that will interfere with the opening of the furnace door. Most modern furnaces have the oil burner supported through an opening in a hinged door. Take a photo with your cell phone or camera before beginning the job. This will help you to remember how to reconnect the lines and cables later. If the fuel line must be removed, also be sure to shut off the oil supply valve at or just before the point of disconnect.
- Many times, the easiest point and method to disconnect is by unbolting the fuel pump cover from the furnace motor itself. Gently move it out of the way, while trying not to disturb the fuel lines any more than necessary. This minimizes the chances of kinking lines or disrupting the mating surfaces between flared ends of the lines and compression fittings. Remove and (clean or) have a replacement filter ready to install when reassembling later.
-
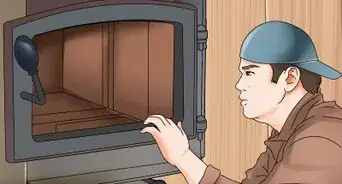
4Unbolt or otherwise release the door to allow it to open. The door has an important gas-tight seal that is usually maintained by a hex nut or bolt that squeezes the door seal against the furnace opening. If it is undamaged and you are not interested in replacing it, try not to disturb it.
-
5Control airborne fibers. Wear personal protective equipment consisting of safety glasses, long sleeve shirt, protective gloves and mask to prevent inhaling fibers and getting them in your skin. Wetting the inside of the chamber with water will help prevent fibers from becoming airborne. This will also make it easier for a vacuum to pick up the debris in the next step.
-
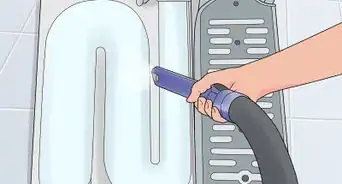
6Vacuum loose particles in the chamber. Remove the soot, rust and other debris that has collected or formed on the floor and walls of the chamber. A soot vacuum or HEPA vacuum is recommended, if the inside hasn't been wet down in the previous step. These types of vacuums employ extra-fine filter media that prevents tiny soot particles and fine fibers from passing through the filter and becoming airborne again (a standard household vacuum is not suitable for this work due to these very small dry particles being able to pass through the filter media or bag). If it has been wet down, a common shop vacuum will do.
-
7Arrange a heavy-duty trash bag with the open end under the opening to the furnace. Reach in and pull the preformed refractory lining from rear wall and blanket material on the floor out of the chamber. Use a screw driver to gently break and scrape off the old lining material completely and then use a whisk broom to sweep all pieces into the garbage bag. Gently clean the steel surfaces with a wire brush. Do not wedge screwdrivers and similar objects between boiler sections. Whisk broom or vacuum all surfaces once again.
-
8Remove the preformed refractory lining from the door. There may be a small liner blanket behind the preformed refractory liner that should be removed as well. Clean the area the same way as the inside of the chamber and vacuum.
-
9Remove the rope seal from the channel around the inside edge of the door. If the seal is undamaged and you do not want to replace it, - you may skip this step, as well as those appearing later that detail replacement. Otherwise, run a screwdriver around the channel to scrape it clean and then wire brush and whisk broom this area clean.
- Clean up any addition debris and put in the trash bag. Close up the bag tightly and remove it from the work area.
-
10Locate and install the new preformed rear wall refractory liner as per instructions provided. You may need to tip it to get it into the proper position. Make sure that it is all the way back against the rear wall by pressing with palms firmly all the way around.
-
11Test fit the blanket on the chamber floor. Orient the the blanket as per instructions and lay it inside the chamber. Butt the blanket up against the bottom edge of the rear wall refractory liner and extend it out of the chamber. Mark the blanket to indicate where it meets the outside edge of the opening to the chamber. Arrange the blanket so the sides extend equally up the sides of the chamber wall. Make a mark on the blanket and chamber wall so you can place it in the same position later.
-
12Cut the blanket. Use a straight edge and razor knife so it fits the chamber according to your measurements and in accordance with the instructions.
-
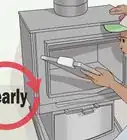
13Apply water glass. The water glass is wet and sticky and will harden like glue when heated. Pour about 3/4 of the water glass onto the chamber floor, then spread it with gloved fingers. Save the rest of the water glass to help secure the rope seal into the recess of the door in a later step. If you are not replacing the rope seal, using more water glass than needed by the blanket will only drip and leak out the front of the chamber.
-
14Ready the blanket for installation on the floor. Hold the blanket inside and above the chamber floor (above the water glass covered surfaces). Align the marks on the blanket and the chamber floor. When satisfied with the position, lower and press it into place .
-
15Install the door blanket around the burner opening as per instructions.
-
16Install the preformed door refractory liner fully into the recesses of the door by slowly working it into place with hands. Some liners come with paper strips to help it slide over rough edges of the cast iron door. Use them as needed to prevent cracking or breaking of the liner while pressing to fit. The liner is considered in position when the burner opening is flush with the liner to as much as 1/4" recessed behind the liner, or as indicated in the instructions that accompany your liner kit.
-
17Apply a few drops of water glass every few inches (or less) in the cleaned rope seal recess of the door. This step should be skipped if you did not remove the undamaged rope seal in a previous step. Remove the paper backing from the rope seal and press the adhesive side into the recess. Start with the middle of the rope seal at the mid point at the top of the door. Press the rope seal into the recess all the way around both sides of the door from top to bottom. Cut the rope seal to allow them to overlap slightly in the middle of the bottom of the door.
-
18Close the door fully and secure with the bolt or hex nut to re-establish the gas-tight seal.
-
19Reconnect fuel lines, pump and filter lines, and power lines. Try not to move the fuel lines any more than necessary to help minimize the chances of disturbing the mating surfaces between flared ends of the lines and compression fittings. Wipe away any excess oil from lines, fittings and floor.
-
20Open all fuel shut off valves. Visually check for oil leaks at all fittings and correct as needed.
-
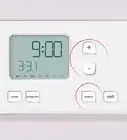
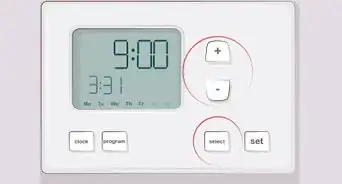
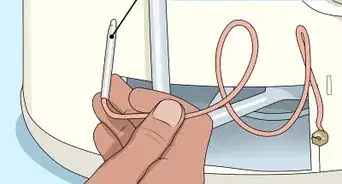
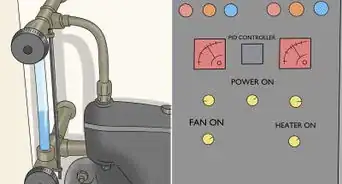
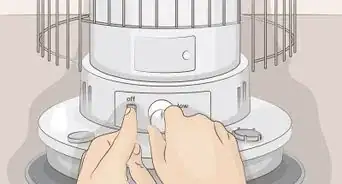
21Turn on power (and increase the thermostat temperature if required) to cause the burner start. Allow to run for at least 15 minutes to cure water glass. If the burner fails to start and locks out, the oil pump may need to primed. The priming procedure can be found here: Restart-a-Furnace-After-Running-out-of-Oil
-
22Inspect floor and fuel lines for evidence of leaking fuel oil. Tighten fittings or make the necessary repairs to stop any and all leaks.


Community Q&A
-
QuestionOther than the filter, what other parts should I replace on an oil boiler?
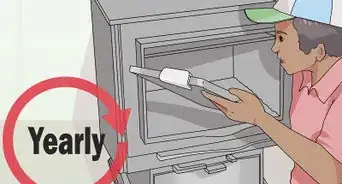
 SteveTop AnswererAnnual furnace tuneups often include replacement of oil filter(s), oil strainer (inside pump), associated gasket(s) and the fuel nozzle. Nearly all the other parts remain in place unless they have failed or look like they are about to due to being worn, dirty, damaged, split, leaking or unable to be adjusted to operate as the manufacturer intended or code requires. That covers quite a bit of ground, and it is best left to a trained professional.
 -
QuestionWould a bad chamber make my furnace operate ineffectively?
 Community AnswerYes. Get a new one installed, it will be much more efficient.
 -
QuestionMy furnace door is not totally sealed, what should I do?SteveTop AnswererDeadly carbon monoxide gasses will escape through a poorly sealed furnace door when firing. If there are missing sections of the rope seal, or the door and opening of the furnace are not warped or cracked, replacing the rope seal should solve the problem. If you are unable get a seal between the door and the furnace you should have it serviced professionally AT ONCE. Under NO circumstances should this furnace be permitted to operate until the seal has been fixed!
Things You'll Need
- PPE: Proper fitting Personal Protective Equipment is required. Glasses, vinyl gloves, respirator mask and long sleeve shirt.
- Chamber Replacement Kit for your particular model furnace. Locate the model information on a label or tag affixed to the furnace itself.
- Whisk broom, straight blade screw driver, adjustable wrench or socket set, old rags or speedy-dry, trash bag.
- Replacement oil filters are relatively inexpensive and are recommended over cleaning and reinstalling the current filter.
- Vacuum cleaner. A vacuum cleaner designed for soot is required for picking up dry soot, dusts, etc., however a shop vacuum may be acceptable if the debris is dampened first.
Warnings
- Refractory dust can be very dangerous. Do not inhale and keep off skin. Clothing worn while performing this work should be laundered separately from other clothing.⧼thumbs_response⧽
- Do not minimize the need for PPE.⧼thumbs_response⧽
- Make sure power and fuel supplies are shut off before starting this work.⧼thumbs_response⧽

-Step-34.webp)