This article was co-authored by wikiHow staff writer, Travis Boylls. Travis Boylls is a Technology Writer and Editor for wikiHow. Travis has experience writing technology-related articles, providing software customer service, and in graphic design. He specializes in Windows, macOS, Android, iOS, and Linux platforms. He studied graphic design at Pikes Peak Community College.
This article has been viewed 15,623 times.
Learn more...
The Samsung Galaxy S5 was a flagship phone model that broke many sales records for Samsung. However, 2 GB of RAM and lots of bloatware can make it hard to use today. Rooting your device gives you superuser access. This allows to you to uninstall the bloatware and even install your own light-weight operating system. This wikiHow teaches you how to root your Galaxy S5.
Steps
Preparing to Root Your Phone
-
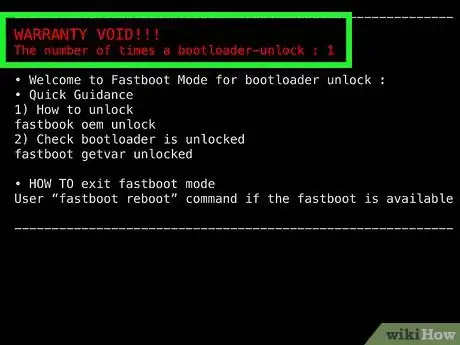
1Understand the risks of rooting your Samsung Galaxy S5. Rooting your device will remove all security features put in place by Google. Many apps and service may not work once your phone has been rooted. Unlocking the bootloader will trigger Knox security. Any Samsung services, such as Samsung Pay, and the Galaxy Store will no longer work. There is also a possibility that your phone may stop working if the root process doesn't go as planned. Lastly, if your phone is still under warranty, it will be voided.
- This method requires you to unlock your bootloader. Neither AT&T or Verizon allow you to unlock your Bootloader.
-
2Back up everything you want to keep on your phone. The process for rooting your Android phone requires you to flash a new recovery system onto your phone. This may wipe all data on your phone. Before you begin, be sure to transfer any photos and videos you want to keep to your computer. You can back up your account settings, app data, and other information to your Google Cloud account using the following steps:
- Open the Settings app.
- Tap the magnifying glass icon in the upper-right corner.
- Use the search bar to search for "Backup".
- Tap the Backup & Restore option.
- Tap Backup data.
- Tap Back up.
Advertisement -
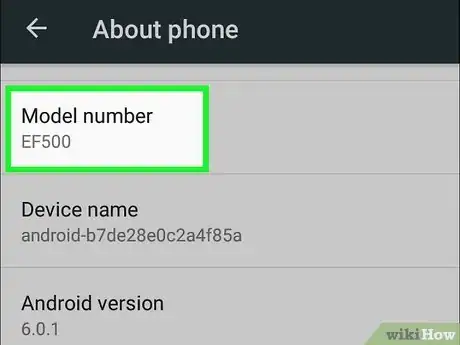
3Check the model number for your phone. You'll need to know this to download the correct version of TWRP custom recovery system for your phone model. Use the following steps to check the model number of your phone:
- Open the Settings app.
- Tap About phone.
- Note the model number.
-
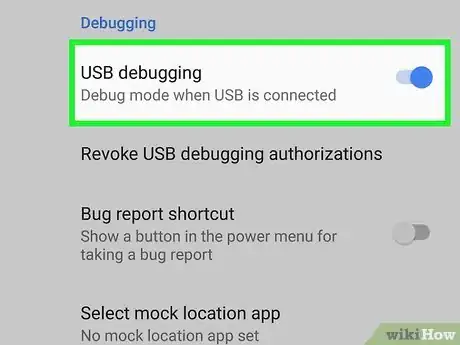
4Enable USB debugging on your phone. In order to interface with your phone on your computer, you'll need to enable USB debugging. Use the following steps to enable USB debugging mode.
- Open the Settings app in your Apps menu.
- Tap About phone.
- Tap Build number 7 times to unlock Developer Options.
- Tap the back button in the upper-right corner to return to the root Settings menu.
- Tap Developer Options.
- Tap the checkbox next to "USB Debugging".
-
5Download and install the Samsung USB drivers. You need to install the Samsung USB drivers for your Windows computer in order to interface your Samsung Galaxy S5 with your computer. Use the following steps to download and install the Samsung USB drivers:
- Go to https://developer.samsung.com/mobile/android-usb-driver.html in a web browser on your Windows computer.
- Click the button that says Samsung_USB_Drivers_for_mobile_Phones.exe to download the installation file.
- Open the installation file in your web browser or Downloads folder.
- Follow the steps to complete the installation.
-
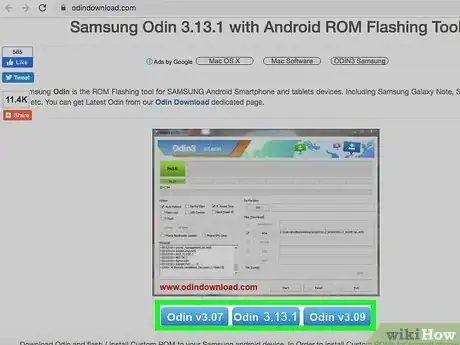
6Download and install Odin. Odin is the software needed to flash a custom recovery system to your phone. Odin is only available for Windows computers. Use the following steps to download and install Odin:
- Go to https://samsungodin.com/ in a web browser on your Windows computer.
- Scroll down and click Odin 3.13.1 or the latest version.
- Extract the "Odin3 v3.13.13.zip" file.
-
7Download TWRP. TWRP is the custom recovery system you will need to flash to your phone using Odin. The version you download will depend on the exact phone model you are using. Use the following steps to download TWRP:
-
8Download the Magisk zip file to your phone. Magisk is the actual file you will use root your Samsung Galaxy S5. You can either download this file directly to your phone, or you can download it to your computer and transfer it to your phone via the USB cable. Make sure you note the exact location you save it to on your phone. Use the following steps to download and install Magisk.
- Go to https://github.com/topjohnwu/Magisk/releases/tag/v20.4 in a web browser on your phone or computer.
- Scroll down and click or tap Magisk-v20.4.zip
- Connect your phone to your computer.
- Transfer the "Magisk-v20.4.zip" file to a folder on your phone or SD card that you can locate.
Rooting Your Phone
-
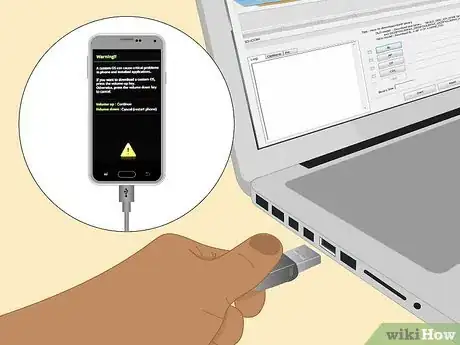
1Boot your phone into Download mode. Your phone needs to be in Download mode in order for Odin to be able to flash TWRP to your phone. The Volume buttons are on the left side of your phone. The Power button is on the right side, and the Home button is in the center below the screen. Use the following steps to boot your phone into Download mode.
- Power your phone off.
- Press and hold Volume Down + Power + Home all at the same time.
- Press the Volume Up button when you see the warning message.
-
2Connect your phone to your computer and launch Odin. Use the charging cable that came with your phone and connect it to your computer. Then launch the Odin3.exe file in the Oden folder you downloaded and extracted. Odin should detect your phone when it opens.
-
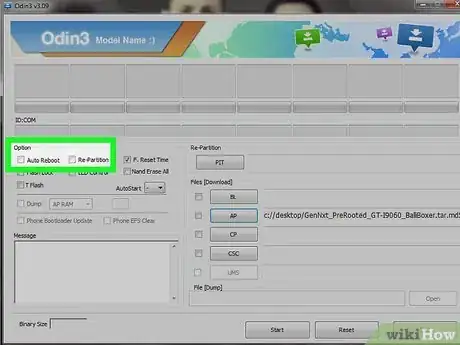
3Ensure "Auto-reboot" and "Re-partition" are disabled. Use the USB following steps to ensure that "Auto Reboot" and "Re-partion" are disabled in Odin:
- Click the Options tab above the panel to the left.
- Ensure that both the "Auto Reboot" and "Re-partition" options are unchecked.
-
4Flash TWRP to your phone. Use the following steps to flash TWRP to your phone using Odin.
- Click the AP (PDA in older versions of Odin) on the right.
- Browse to and select the TWRP ".img.tar" file and click it to select it.
- Click Open.
- Click Start at the bottom of Odin.
-
5Reboot your phone into recovery mode. This will boot your phone into TWRP. You can use TWRP to install Magisk and root your phone. Wait until Odin is done flashing your phone and then use the following steps to reboot your phone into recovery mode:
- Power off your phone.
- Press and hold Volume Up + Power + Home at the same time to boot into Recover mode.
-
6Wipe your data cache. Most of the time, you only need to wipe the data cache. If it doesn't work, you may need to wipe the entire memory:
- Tap Wipe
- Tap Advanced wipe.
- Tap Data cache
- Swipe the bar at the bottom right to wipe your data cache.
-
7Return to the Home screen and tap Install. Once you wipe your cache data, press the back button to return to the main menu of TWRP. Then tap Install.
-
8Navigate to the Magisk zip file. Use the file browser to navigate to the location you saved the Magisk zip file on your phone. Tap it to select it.
-
9Swipe right to flash Magisk to your phone. Once you locate the file and tap it, swipe right on your phone to flash it.
-
10Reboot your phone. Once TWRP finishes flashing Magisk to your phone, press the back button to return to the main menu. Tap Reboot followed by System to reboot your phone. It may need to reboot several times during the initial reboot. Once it reboots, your phone will be rooted.[1]
- If your phone gets caught in a boot loop and is unable to start up, copy No Verity Opt Encrypt to your phone and use TWRP to flash it to your phone.
- It's also recommended you [Magisk Manager to your phone once you reboot it. You can install it using an APK file.
- You can verify the root using a root checker app that is available from the Google Play Store.










-on-Samsung-Galaxy-Step-17.webp)


