This article was co-authored by Ryaan Tuttle. Ryaan Tuttle is a Home Improvement Specialist and the CEO of Best Handyman, Inc. in Boston, Massachusetts. With over 17 years of experience, he specializes in building home service businesses, focusing on creating scalable and efficient brands. With the help of his global team, the companies have achieved over 10+ million in sales and received recognition through magazine features, and enjoy partnerships with wikiHow and Jobber field service software. Boston Magazine and LocalBest.com have named Best Handyman Boston the Best Handyman in Boston. Ryaan holds Construction Supervisor and Home Improvement Contractor Licenses.
There are 9 references cited in this article, which can be found at the bottom of the page.
This article has been viewed 80,958 times.
Changing a lightbulb can be difficult if you don’t know what you’re doing. Learning how to read the labels on lightbulbs and being familiar with the terminology goes a long way when replacing a lightbulb. With a little bit of planning and some elbow grease you can be a lightbulb-changing pro in no time!
Steps
Replacing a Screw-In Lightbulb
-
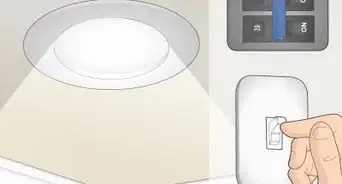
1Turn off the power source. If there’s a switch that controls the light, turn the switch off. Similarly, if the light is battery operated, remove the batteries. If the light fixture is plugged into the wall, unplug it.
-
2Unscrew the old bulb. Grasp the bulb, keeping your hand as close to the base as you can. Gently twist the lightbulb counterclockwise. If you feel too much resistance you may need to put on heavy duty work gloves before unscrewing. If the bulb breaks your hand will be protected from the sharp glass shards. Then you can try to remove the base of the bulb by hand.[1]
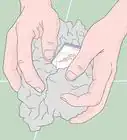
- If the bulb breaks and you can’t get the base out with the gloves, dispose of the shards properly and clean the area. Next, use needle nose pliers to grasp the base of the light and turn it.
Advertisement -
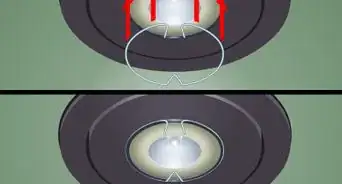
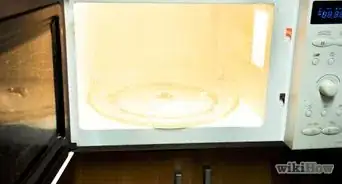
3Inspect the old bulb. Be sure that the lightbulb has really gone out. Usually a bulb goes out because it’s old. However, sometimes there may be problems with the light fixture. To test this, put the bulb in another light fixture and see if it turns on. When in doubt, get a new light bulb.
- If the bulb has a black spot, you’re using a bulb with higher wattage than recommended for the light fixture. Buy a lower wattage bulb.
- If the lightbulb was flickering or burns out too quickly, the old bulb was screwed in too tightly.[2]
-
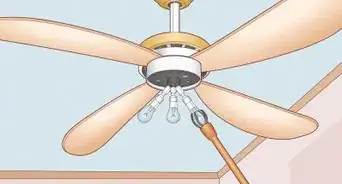
4Screw in a replacement bulb. Gently screw the new lightbulb into the socket using a clockwise motion. Don’t stop turning until you encounter resistance. If you encounter a lot of resistance and the bulb isn’t completely screwed in yet, double check that you have the right bulb size. The base of the bulb should perfectly match the base of the old bulb.[3]
- If you bought the wrong size bulb, don’t try to make it work. Go back to the store and get the right bulb.
- Once the bulb is in place, test the bulb by turning the light back on. If it doesn’t work, unscrew the bulb, blow on the socket to remove debris, and try again.
-
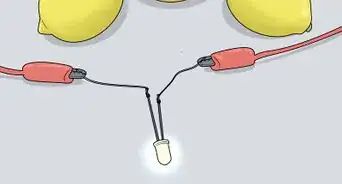
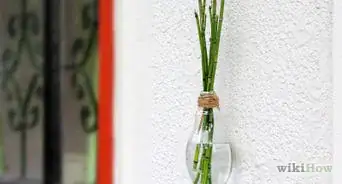
5Consider an energy-saving alternative bulb. Most standard lightbulbs are incandescent. However, if you’d like to use energy efficient bulbs, you can usually find a Light Emitting Diode (LED) or Compact Fluorescent (CFL) option in your bulb size. These kinds of lightbulbs use less energy and save you money in the long run.[4]
- A CFL bulb can use up to 75% less energy than an incandescent bulb and can last up to nine years.
- An LED bulb can use up to 80% less energy than an incandescent bulb and can last up to twenty years.

Replacing a Specialty Lightbulb
-
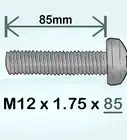
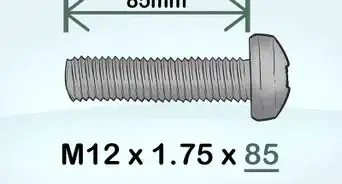
1Buy the correct size of lightbulb. There are varying socket sizes for light fixtures. To choose the correct size of bulb, look on the bottom or top of the burnt out lightbulb or around the fixture’s socket. You will see some letters that are occasionally followed by a series of numbers. This is the code for the lightbulb you will need to find at the store. Bring the dead lightbulb with you to the hardware store to find a replacement more easily.
- Some lightbulbs only have the letter code. If this is the case, you will have to measure the bulb yourself to find the circumference. Multiply this number by 8 to find the code. For example, a 2 1/2” PAR-type lightbulb is a PAR-20. [5]
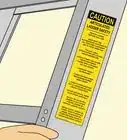
- Remember, make sure to buy a bulb with the correct wattage. Otherwise, you risk starting a fire. This information can be found on the dead bulb.
-
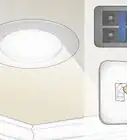
2Replace a linear light bulb. A linear light bulb is shaped like a tube with metal pins on each end. Most linear light bulbs are fluorescent. However, some bulb supply stores will sell halogen, LED, and CFL linear bulbs as well. First, turn off the light and wait ten minutes for the bulb to cool.[6] Remove any covering over the light fixture and set it aside.
- Be careful when removing the light fixture covering. There may be dead bugs or glass debris inside that could fall in your eyes.
-
3Remove the dead bulb. Gently twist the bulb ninety degrees in the direction with the least resistance. The pins on the end will line up with the socket groove. Now you will be able to lower the lightbulb away from the fixture. If you encounter any resistance while lowering the bulb, rotate the bulb more and try again.[7]
- Be careful when removing a fluorescent light bulb. This kind of bulb is prone to breaking.
- Wear safety goggles when removing fluorescent bulbs from a ceiling fixture. Otherwise, it may break get glass in your eye.
-
4Put in the new bulb. Find the socket grooves on the light fixture. Turn the bulb so that both of the pins can slide easily into the socket opening. Once the pins are in the socket grooves, turn the bulb about ninety degrees in the direction with the least resistance. If you have resistance in both directions, gently push the bulb further into the socket.[8]
- After replacing the bulb, turn on the light to test the bulb before replacing the fixture covering.
- Some handymen prefer to replace all of the bulbs in a fixture at once to save money and time. [9]


Warnings
- Work with a buddy. If you electrocute yourself while working alone, no one will know.⧼thumbs_response⧽
- Never stand on a rolling chair to replace light bulbs. The chair will roll out from underneath you and you’ll hurt yourself.⧼thumbs_response⧽
- Always be careful when working with electronics. Electrocution can be deadly. If someone you know is electrocuted, call your local emergency services immediately. You also may need to assist the victim with CPR.⧼thumbs_response⧽


References
- ↑ http://www.home-ec101.com/how-to-remove-a-broken-light-bulb/
- ↑ http://www.askthebuilder.com/light-bulbs-burn-out-quickly/
- ↑ http://howto.yellow.co.nz/home-garden/home-repair-and-maintenance/how-to-change-a-light-bulb/
- ↑ http://www.lowes.com/projects/decorate-and-entertain/Lightbulb-Buying-Guide/project
- ↑ http://www.mapawatt.com/light-bulb-codes-shapes-sizes-and-bases
- ↑ https://www.youtube.com/watch?v=jtI_lBIoqAs&feature=youtu.be&t=24
- ↑ https://www.youtube.com/watch?v=jtI_lBIoqAs&feature=youtu.be&t=29
- ↑ https://www.youtube.com/watch?v=5rkUhU6lnIk&feature=youtu.be&t=59
- ↑ https://www.naturalhandyman.com/iip/infelectrical/inffluor.html
About This Article