This article was co-authored by wikiHow staff writer, Jack Lloyd. Jack Lloyd is a Technology Writer and Editor for wikiHow. He has over two years of experience writing and editing technology-related articles. He is technology enthusiast and an English teacher.
The wikiHow Tech Team also followed the article's instructions and verified that they work.
This article has been viewed 62,992 times.
Learn more...
Viewing your Apple Messages history is as simple as opening your Messages app and reviewing your conversations! You can also view the media (e.g., pictures and videos) from inside any given conversation. If you're missing messages you had before your last backup, you can also access these messages on iCloud and restore them, or use iTunes.
Steps
Viewing Your iMessages (iOS)
-
1Open the Messages app.
-
2Tap a conversation you wish to view. If you're already in a different conversation, tap < in the top left corner of your screen first.Advertisement
-
3Scroll up through the conversation's contents. This will allow you to see your Messages history from as far back as the conversation goes!
- You will not be able to see deleted messages here.
-
4Tap the Details button. This is the encircled "i" in the top right corner of your screen.
-
5Review your conversation's media. Media comes in two formats that you can switch between by tapping the pertinent button:
- Images - All images and videos from your conversation.
- Attachments - All attachments (e.g., audio clips) from your conversation.
-
6Tap Done. You have successfully seen your Messages history for a conversation!


Viewing Your iMessages (Mac)
-
1Open the Messages program. This is the blue speech bubble icon in your dock.
-
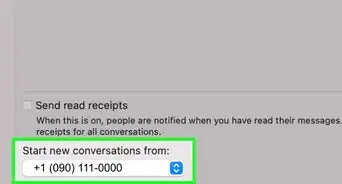
2Select a conversation. You can do so from the left side of your Messages program.[1]
-
3Scroll up through the conversation's contents. As long as your messages haven't been deleted, you can review the conversation's history!


Restoring an iTunes Backup
-
1Attach phone to your computer. Use your Apple charging cord to do this.
-
2Open the iTunes program. Depending on your computer's settings, it may open automatically.
-
3Wait for your iPhone to sync to iTunes.
-
4Click the device icon. This icon resembles an iPhone and is located beneath the "Account" tab.[2]
-
5Click Restore Backup. This is in the "Backups" box in the middle of your iTunes page.
- You may have to disable Find My iPhone on your phone before continuing.
-
6Select your restore point. You'll find this option in the "Restore from this backup" section; click the bar with your iPhone's name in it to select a restore point.
- You won't want to select the most recent one (e.g., the one your phone just performed) because it won't contain your deleted iMessages.
-
7Click Restore. Your iTunes will begin restoring your phone; you should see a "Time remaining" value on the bottom of the restoration pop-up window.
-
8Press the Home button.
-
9Enter your Apple ID password. Your iMessages should be restored along with the rest of your phone's data!


Restoring an iCloud Backup
-
1Open the Settings app.
-
2Make sure your software is up to date. You won't be able to restore from iCloud if you aren't running the latest version of iOS. To check for an update:
- Tap General.
- Tap Software Update.
- Tap Download and Install if there is an update available.
-
3Return to the "General" tab. If you had to update, you'll need to re-open Settings.[3]
-
4Tap Reset.
-
5Tap Erase all content and settings. If your iPhone has a passcode, you'll need to enter it to continue.
-
6Tap Erase iPhone.
-
7Wait for your iPhone to finish resetting. This may take several minute; once it's done, you can begin restoring your iPhone.
-
8Press the Home button.
-
9Set up your phone's preferences. These include:
- Preferred language
- Preferred region
- Preferred wifi network
-
10Enter your Apple ID and password.
-
11Tap Next.
-
12Choose to enable or disable location services.[4]
-
13Enter a passcode. You can also skip this step.
-
14Tap Restore from iCloud Backup. This should be on the "Apps and Data" screen.
-
15Enter your Apple ID and password again.
-
16Tap Agree.
-
17Tap your preferred iCloud backup date. Make sure you pick one that will hold the iMessages you wish to retrieve.
-
18Wait for your iPhone to finish restoring. This may take several minutes.
-
19Enter your Apple ID password. This will restore your phone and its data, including your lost iMessages!


Warnings
- Depending on your message settings, your messages might delete themselves after a certain amount of time. You can change this setting from within the "Messages" tab in the Settings app.⧼thumbs_response⧽