This article was co-authored by Mia Danilowicz. Mia Danilowicz is a Master Tailor who works onset and on the red carpet in Los Angeles, California. With over a decade of experience, Mia specializes in bridal and gown couturier fittings, garment reconstruction, and custom design. Mia has worked at the Oscars, Grammys, SAG Awards, and Golden Globes. Her clients include a long list of entertainment and fashion industry headliners, major fashion magazines, luxury consumer brands, and popular media. Mia was trained at the Fashion Institute of Design and Merchandising and received her AA in Fashion Design and BS in Business Management.
There are 13 references cited in this article, which can be found at the bottom of the page.
This article has been viewed 35,447 times.
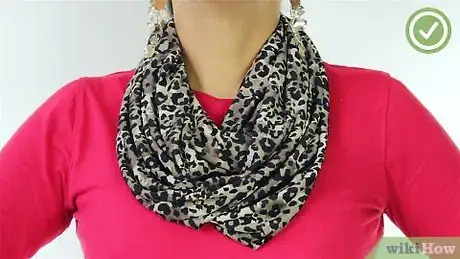
Sewing a scarf is an easy project that you can try even if you are a beginner to sewing. You can use any fabric you like to create a unique scarf. You can make an infinity scarf, which is a scarf that is in a circle, a straight scarf using a lightweight fabric, or a ruffle scarf using knit fabric or an old sweater. A sewing machine is required for all of these projects.
Steps
Sewing an Infinity Scarf
-
1Get 1.5 yards (1.4 m) of fabric. Having a bit of stretch to your infinity scarf can be nice if you decide to wrap it around your neck a few times, so you may want to go with a stretch jersey fabric. This will make it easier to get the scarf on and off. However, you can also go with a non-stretchy fabric if you choose, such as a cotton broadcloth or satin. Select a fabric that will allow you to create the type and color scarf that you want to wear.
-
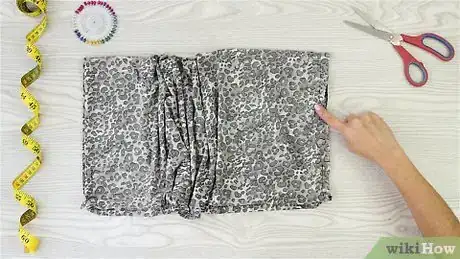
2Cut the fabric to the desired length and width. You can wrap the fabric around your neck to determine how long you want it to be, and doing this will also help you to decide how thick you would like you scarf.[1] [2]
- Mark the fabric where you want to cut it for the length, and then lay the fabric out flat and cut a straight line across the fabric to shorten the piece.
- If the fabric feels too bulky around your neck, then try cutting a few inches off of the long edge to thin it out. Then, try it on again.
- For a lightweight scarf, cut the fabric so that it is 24 inches (61 cm) wide and about 54 inches (140 cm) long.[3]
Advertisement -
3Set your sewing machine. If you are using a stretchy fabric, then use the zigzag stitch setting on your sewing machine. This will help to provide some give to the stitched areas. If your fabric is not stretchy, then use the straight stitch setting on your sewing machine.[4]
- Every sewing machine is a little different. Consult your sewing machine’s manual for instructions on how to apply different settings to your machine.
-
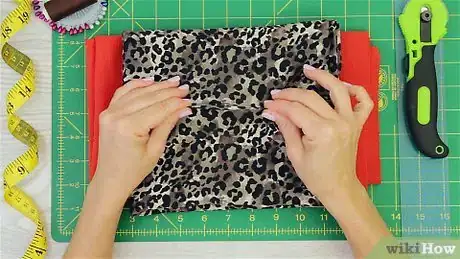
4Fold the fabric in half lengthwise with the printed sides facing each other. Lay your fabric out flat on your work surface so that the printed side is facing up towards you. Then, fold one of the long edges over so that it matches up with the other long edge.[5]
- After you fold your fabric in half, the print sides should be matching up and no longer visible.
- You may pin the edges together to keep the fabric’s edges even while you sew. Place a pin about every 4 inches (10 cm) to hold the fabric edges in place. This is especially helpful if you are working with a slippery fabric.[6]
-
5Sew a few inches in and then backstitch a few stitches. Place your fabric under the presser foot so that the end of the fabric is lined up under the needle. Then, lower the presser foot and start stitching at a slow speed by applying gentle pressure to your pedal. Sew about 0.5 inches (1.3 cm) from the raw (cut) edges of the folded fabric. After you get a few stitches into the fabric, backstitch a few stitches.[7]
- To backstitch, press the lever on the side of your machine. This will reverse the direction of your stitches. When the needle gets to the end of your fabric again, release the lever.
-
6Sew along the pinned edges. Continue to sew all the way down the length of the fabric along the pinned areas. Sew until you reach the end of the fabric, but do not sew over the edge.[8]
- Make sure not to sew over the pins and remove the pins as you go.
-
7Backstitch again when you are near the end of the fabric. To secure the end stitches, backstitch a few more stitches at the end.[9] Then, release the lever and sew to the end normally. Stop the machine when you are finished sewing, and raise the presser foot to release the fabric.
- Cut the thread near the last stitch to free the fabric from the machine.
-
8Pull one of the ends through the tube of fabric until the ends match up. Next, reach through the tube of fabric you have created and grasp the end of the tube. Pull this end through the tube until you have lined it up with the other end.[10]
- Do not pull the fabric through the tube completely!
-
9Pin the ends together. Line up the edges of the tube ends so that the ends are even and the seams are aligned. Then, pin the ends of the tube together to secure them.[11]
-
10Sew around the tube leaving a 3 inches (7.6 cm) gap. Take the tube to the sewing machine and sew a straight stitch (even if the fabric is stretchy) along the edges of the tube. Do not sew all the way around the tube! Leave about 3 inches (7.6 cm) unsecured. You will need this opening to turn the fabric right-side out.[12]
- Make sure to backstitch at the beginning and end of the tube stitches just as you did with the long seam.
- Raise the presser foot when you are finished sewing and cut the thread near the last stitch to free the fabric from the machine.
-
11Invert the fabric. Next, reach into the tube and begin pulling the fabric through the opening. This will reveal the printed side of your fabric and hide the non-printed side of your fabric. Keep pulling until the tube is completely inverted.[13]
-
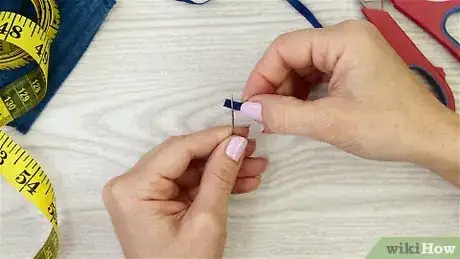
12Stitch the opening closed by hand. To finish up your infinity scarf, sew up the open area using a needle and thread. Thread a needle with about 30 inches (76 cm) of a color of thread that matches your fabric. Match up the ends of the thread so that they are even, and tie a knot to secure the ends of the thread. Insert the needle from the inside of your fabric so that the knot will be anchored inside of the scarf. Then, begin sewing the hole closed.[14]
- Tuck the fabric edges under as you sew across the hole to ensure that the cut edges are hidden.
- Make sure to sew the two sides together evenly so that the hole will have a neat closure.
- Secure the thread with a knot when you are finished and cut the excess thread.
Sewing a Lightweight Straight Scarf
-
1Choose a lightweight, gauzy fabric. To make a scarf that is nice and light for wearing during warmer weather, select a fabric that is lightweight and gauzy. For example, you could use a rayon challis, cotton voile, silk gauze, or cotton batiste fabric to make your scarf.
- Make sure that the fabric looks the same on both sides. Otherwise, you will have a scarf with one side printed and the other not printed, which may look a bit odd. Most gauzy, semi-transparent fabrics will look the same on both sides
-
2Cut the fabric to the desired length and width.[15] You can use 1.5 yards (1.4 m) for a moderate length scarf, or use 2 yards (1.8 m) for a long scarf. The width of the fabric will depend on how full you want it to be. Try wrapping the fabric around your neck a couple of times to see how it looks with the current width. If it seems too full, then you could cut off some of the excess to lighten it up.
-
3Finish the edges with a serger if you have one. A serger is ideal for finishing the edges on a gauzy fabric. If you have a serger, set your machine to the rolled hem setting and serge along the edges of the scarf using a matching color thread.
-
4Fold and sew the edges of your scarf if you don’t have a serger. If you do not have a serger, then you could fold over the edges of your scarf fabric by about 0.5 inches (1.3 cm) and then sew a zigzag stitch along the edges to secure them. Make sure to sew over the raw (cut) edges of the fabric to hide this area and prevent fraying.
Sewing a Ruffle Scarf
-
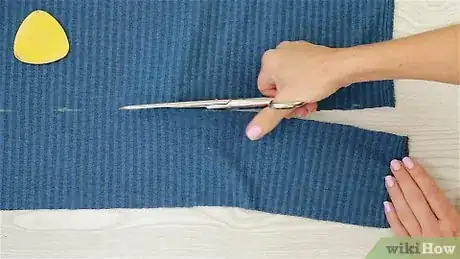
1Cut piece of knit fabric into 4 inches (10 cm) wide strips. You can use an old, lightweight sweater to do this, or you can purchase some knit fabric. Measure and cut several 4 in (10 cm) wide strips from your fabric. The more strips you use to create your long strip the better. You will be bunching it up, so it is best to have lots of material to ensure a long scarf.[16]
-
2Sew the ends of the strips together. Line up the edges of the strips so that they are overlapping and then use your sewing machine to sew a straight stitch across the strips. Sew across the area where the strips overlap each other 2 times to secure them together. Repeat this to attach all of your strips in one continuous strip.
- Cut the excess thread after sewing each segment.
-
3Hem the edges of the fabric strip. Your fabric strip may have some raw or even frayed edges that will require a hem to keep them from unraveling further. Use your sewing machine to sew a zigzag stitch along the edges of your fabric strip after you have connected all of the pieces.[17]
-
4Thread some ribbon through a yarn needle. Next, take the ribbon that you want to use to create the ruffled effect and thread it through the eye of a yarn needle. You will need a piece of ribbon that is about 3 yards (2.7 m) long and somewhat narrow (about 0.25 inches (0.64 cm) wide).
- Make sure to choose a color of ribbon that will blend in with the color of your knit fabric.
-
5Anchor the end of the ribbon to the end of the fabric with a safety pin. To ensure that the knit fabric does not slide off of the ribbon completely, you can anchor it to something using a safety pin. Insert the pin through the end of the ribbon and then pin the end of the ribbon to the end of the fabric strip.
-
6Weave the needle through the center of the fabric strip. Insert the needle a few inches from the end of the strip. Then, insert the needle from the opposite side of the strip a few inches in from the end. Keep inserting the needle through the strip a few inches apart to create ruffles.[18]
-
7Pull the fabric to create ruffles as you weave the ribbon through. After every few stitches, slide the fabric down on the ribbon to form the ruffles. Don’t do too many stitches without sliding the fabric down.[19]
-
8Sew the ends of the ribbon to secure them. To secure the ends of your scarf, sew through the ribbon to secure it to the fabric. Use your sewing machine to sew a straight stitch across the ribbon and fabric on each end of the scarf. This will keep the scarf ruffled on the ribbon.
- Another option is to tie the ends of the ribbon together to secure the scarf. This will turn the ruffle scarf into an infinity ruffle scarf.
Expert Q&A
-
QuestionHow should I finish off the edges?
 Mia DanilowiczMia Danilowicz is a Master Tailor who works onset and on the red carpet in Los Angeles, California. With over a decade of experience, Mia specializes in bridal and gown couturier fittings, garment reconstruction, and custom design. Mia has worked at the Oscars, Grammys, SAG Awards, and Golden Globes. Her clients include a long list of entertainment and fashion industry headliners, major fashion magazines, luxury consumer brands, and popular media. Mia was trained at the Fashion Institute of Design and Merchandising and received her AA in Fashion Design and BS in Business Management.
Master Tailor You can finish off the edges using a variety of methods. One is to finish the edges by doing a rolled hem. This would require a sewing machine to turn over the edge of the fabric and stitch at ¼ inch two times. Another method is to line the scarf with either the same material or a contrasting material. To do this you would need to cut both pieces to the same size and sew around the edges, leaving a small gap about 4 inches large. Then, flip the fabric right side out and finish off the small gap with a stitch. Alternatively, if you have a more delicate silk fabric, you can finish it with a marrow edge hem. Traditionally there is a special machine that does this, however, if you have an overlock or serger you may be able to program it to create a thin marrow edge.
Things You’ll Need
Sewing an Infinity Scarf
- Fabric in the type and color or print of your choice
- Measuring tape
- Scissors
- Pins
- Sewing machine
- Matching color of thread
Sewing a Lightweight Straight Scarf
- Lightweight, gauzy fabric
- Measuring tape
- Scissors
- Serger or sewing machine
- Matching thread
Sewing a Ruffle Scarf
- Knit fabric or an old sweater to cut up
- Scissors
- Ruler
- Ribbon
- Safety pin
- Yarn needle
- Sewing machine
- Matching thread
References
- ↑ https://www.youtube.com/watch?v=zRyCWbe0Xfc&feature=youtu.be&t=1m18s
- ↑ Mia Danilowicz. Master Tailor. Expert Interview. 8 January 2021.
- ↑ https://www.youtube.com/watch?v=6WSiwjgXLKQ&feature=youtu.be&t=2m39s
- ↑ https://www.youtube.com/watch?v=zRyCWbe0Xfc&feature=youtu.be&t=1m37s
- ↑ https://www.youtube.com/watch?v=6WSiwjgXLKQ&feature=youtu.be&t=2m50s
- ↑ https://www.youtube.com/watch?v=zRyCWbe0Xfc&feature=youtu.be&t=1m21s
- ↑ https://www.youtube.com/watch?v=zRyCWbe0Xfc&feature=youtu.be&t=1m33s
- ↑ https://www.youtube.com/watch?v=zRyCWbe0Xfc&feature=youtu.be&t=1m37s
- ↑ https://www.youtube.com/watch?v=zRyCWbe0Xfc&feature=youtu.be&t=1m33s
- ↑ https://www.youtube.com/watch?v=zRyCWbe0Xfc&feature=youtu.be&t=1m42s
- ↑ https://www.youtube.com/watch?v=zRyCWbe0Xfc&feature=youtu.be&t=1m59s
- ↑ https://www.youtube.com/watch?v=zRyCWbe0Xfc&feature=youtu.be&t=2m14s
- ↑ https://www.youtube.com/watch?v=zRyCWbe0Xfc&feature=youtu.be&t=2m23s
- ↑ https://www.youtube.com/watch?v=zRyCWbe0Xfc&feature=youtu.be&t=2m40s
- ↑ Mia Danilowicz. Master Tailor. Expert Interview. 8 January 2021.
- ↑ https://makezine.com/2009/10/13/how-to_sew_a_ruffled_scarf/
- ↑ https://makezine.com/2009/10/13/how-to_sew_a_ruffled_scarf/
- ↑ https://makezine.com/2009/10/13/how-to_sew_a_ruffled_scarf/
- ↑ https://makezine.com/2009/10/13/how-to_sew_a_ruffled_scarf/
