This article was co-authored by Quynh La. Quynh La is a Professional Baker and the Owner of Sugar Bakery & Cafe in Seattle, Washington. With over seven years of experience, she specializes in baking cakes, cookies, croissants, and bread. Quynh holds an AAS in Culinary Arts from South Seattle College and a second AAS in Specialty Desserts & Bread from Seattle Central College.
This article has been viewed 30,451 times.
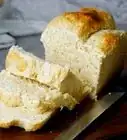
Shaping a loaf of bread is a fun and creative part of the bread making process. A loaf of bread is ready to be shaped when the dough has been punched down, kneaded, and allowed to rise. Although most types of dough can be treated similarly, certain doughs may require two rounds of rising and punching before shaping. No matter what type of dough you’re using, handle it carefully so that it won’t be overworked. There are many potential shapes for bread, like a rectangular, bloomer, or round loaf.
Steps
Shaping a Rectangular Loaf
-
1
-
2Let the dough rest for a few minutes.[3] After it has been formed into a round shape, allow it to sit for a few minutes. Allowing it to sit will let the gluten relax, which will make the dough easier to shape.[4]Advertisement
-
3Flatten the dough into a rectangle.[5] Take the heels of your hands and begin to flatten the circular shape into a rectangle. Use your hands to form four corners. The shape does not have to be perfect—it just needs to be recognizably rectangular.[6]
- Sprinkle some flour under the dough if it sticks. Do not, however, use a lot of flour or the dough will not stick to itself when it comes time to fold it.
-
4Fold the top and bottom thirds of the dough.[7] Now that the dough is in the shape of a rectangle, fold a third of the dough on top of itself. Then, fold the bottom third down so that it overlaps the other layers. Pinch the dough where the layers meet to close up the gaps.[8]
- Fold it in half again if the dough still seems loose. The dough needs to be taut to turn out well.
-
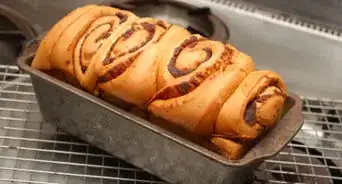
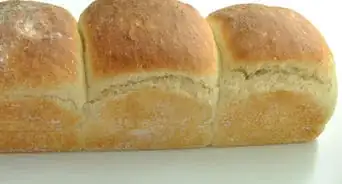
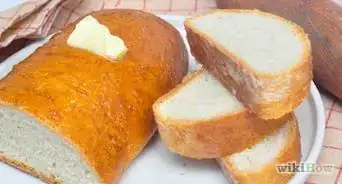
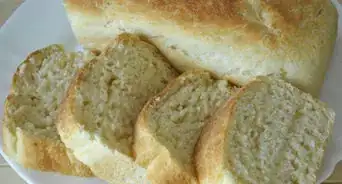
5Put the dough face down into a pan. Grease the pan with cooking oil or butter. If you are making white or wheat bread, use coarse cornmeal to prevent the dough from sticking. Gently roll the dough into the pan. The part with the seams should face down in the pan. The smooth, taut surface should be facing up.[9]
-
6Slash the dough with a knife when it begins to rise. You are ready to bake the dough when it starts to rise slightly above the top of the pan. When that happens, slash a vertical line through the middle of the dough. This will allow the dough to rise evenly as it bakes.[10]
- You can also use a razor blade if you don’t have a serrated knife.


Making a Rounded Loaf
-
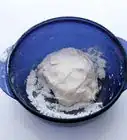
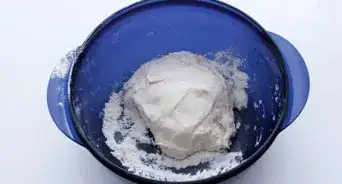
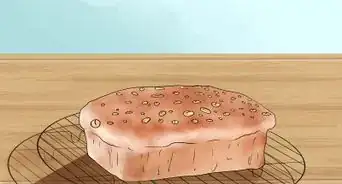
1Shape the dough into a sphere. Take the risen dough and begin to form it into a spherical shape. When it has rounded out, smooth out the dough. The top of the dough should be plump and slightly rounded as well. It does not need to be perfectly shaped just yet.[11]
-
2Push and flip the dough. Once the dough has been rounded, push your fist into the center of the dough. Leave the indentation from your fist in the dough. Then, flip it over to the other side.[12]
-
3Continue to shape and smooth the dough. Rotate the dough as you continue to shape it. Smooth it out as you continue to shape. Once you are satisfied with the shape, allow it a few minutes to rise before putting it in the pan to bake.[13]
- Make sure that you grease the pan with cooking oil or butter before baking. If you are baking white or wheat bread, use coarse cornmeal instead of oil or butter.
-
4Create a Coburg loaf. To create a Coburg loaf, begin with the rounded shape. Use a knife to make a deep cut down the center of the loaf. Make another cut in perpendicular to the first cut, forming a cross. Then, bake as usual.[14]
-
5Make a ring loaf for a variation on a rounded loaf. First, insert 2 to 3 fingers into the center of the loaf. Then, use your hands to push the hole outward on all sides. Once you’re satisfied with the size of the hole, smooth out the edges of the center hole. Put a towel over the loaf and allow it to rise for a few minutes before putting it into a pan to bake.[15]
-
6Make a Cottage loaf with two spheres. To make a Cottage loaf, start with the rounded dough you’ve just created. Make another, slightly smaller, rounded dough ball. Put the smaller sphere on top of the larger rounded dough. Next, put 2 fingers through the center of a dough. Use a wooden spoon or dowel to extend the hole into the second dough. Put a towel over the loaf, and allow it to rise for a few minutes before putting it into a pan to bake.[16]
- The holes will allow the 2 dough balls to weld together during baking.


Forming a Bloomer
-
1Use a rolling pin on the dough to create a rectangular shape. A “bloomer” means that the dough is in a cylindrical shape with slightly tapered ends. To achieve this shape, begin by rolling the dough out into the shape of a rectangle. The corners of the dough, however, should still be rounded. When you are done, the dough should be no longer than 14 inches (35.5 cm) and about 1 to 1 ½ inches (2.5 to 3.8 cm) thick.[17]
-
2Roll up the dough. Choose 1 side of the dough and begin to roll it vertically. Roll it on top of itself so that it becomes gradually thicker. It should be about 4 (10 cm) or 5 inches (12.7 cm) thick when you are done rolling. Tuck the ends to close up any space, and smooth out the dough when you are done rolling.[18]
-
3Allow the dough to rise. Put the rolled-up dough onto a baking sheet that has been lightly greased. Put a kitchen towel on top of the dough. Allow it to rise for a few minutes.[19]
-
4Cut diagonal slashes into the dough. After it has risen a bit more, use a knife to cut slashes into the top of the dough. Cut diagonal marks that are about 1 ½ inches apart. Typically, you will be able to fit in 6 slashes.[20]


Community Q&A
Did you know you can get answers researched by wikiHow Staff?
Unlock staff-researched answers by supporting wikiHow
-
QuestionWhy did my bread fall after baking?
 wikiHow Staff EditorThis answer was written by one of our trained team of researchers who validated it for accuracy and comprehensiveness.
Staff AnswerwikiHow Staff EditorStaff AnswerThis may indicate that the bread dough was allowed to overrise before baking. Or, it may indicate that the oven temperature was too low; you may need to check your oven's temperature with a thermometer to be sure it's working properly. Another possible reason might be what you've added to the loaf, such as pureed vegetables or dried fruits that might have weighed down the loaf if the proportions were not accurate.
Support wikiHow by unlocking this staff-researched answer.
-
QuestionI need to make two loaves but only have one pan, what can I do?wikiHow Staff EditorThis answer was written by one of our trained team of researchers who validated it for accuracy and comprehensiveness.
Staff AnswerwikiHow Staff EditorStaff AnswerYou can improvise a loaf pan by using the existing pan and a baking dish. The baking dish needs to be the same width as the loaf pan. Place the loaf pan across the center of the baking dish, its edges resting over the dish edges. This will create a loaf size hole on either side of the baking dish, where you can deposit the second or even third pieces of dough to make additional loaves. Place the whole dish into the oven and you'll be baking 2 to 3 loaves at once.Support wikiHow by unlocking this staff-researched answer.
Warnings
- The dough will not retain its shape while cooking if it has not been kneaded and allowed to rise before shaping.⧼thumbs_response⧽
Things You’ll Need
- Rolling pin
- Serrated knife
- Kitchen towel
- Greased baking sheet
- Flour
References
- ↑ Quynh La. Professional Baker. Expert Interview. 11 March 2022.
- ↑ https://www.thekitchn.com/basic-techniques-how-to-shape-97063
- ↑ Quynh La. Professional Baker. Expert Interview. 11 March 2022.
- ↑ https://www.thekitchn.com/basic-techniques-how-to-shape-97063
- ↑ Quynh La. Professional Baker. Expert Interview. 11 March 2022.
- ↑ https://www.thekitchn.com/basic-techniques-how-to-shape-97063
- ↑ Quynh La. Professional Baker. Expert Interview. 11 March 2022.
- ↑ https://www.thekitchn.com/basic-techniques-how-to-shape-97063
- ↑ https://www.thekitchn.com/basic-techniques-how-to-shape-97063
- ↑ https://www.thekitchn.com/basic-techniques-how-to-shape-97063
- ↑ http://www.recipetips.com/kitchen-tips/t--1120/creating-bread-shapes.asp
- ↑ http://www.recipetips.com/kitchen-tips/t--1120/creating-bread-shapes.asp
- ↑ http://www.recipetips.com/kitchen-tips/t--1120/creating-bread-shapes.asp
- ↑ http://www.recipetips.com/kitchen-tips/t--1120/creating-bread-shapes.asp
- ↑ http://www.recipetips.com/kitchen-tips/t--1120/creating-bread-shapes.asp</
- ↑ http://www.recipetips.com/kitchen-tips/t--1120/creating-bread-shapes.asp
- ↑ http://www.recipetips.com/kitchen-tips/t--1120/creating-bread-shapes.asp
- ↑ http://www.recipetips.com/kitchen-tips/t--1120/creating-bread-shapes.asp
- ↑ http://www.recipetips.com/kitchen-tips/t--1120/creating-bread-shapes.asp
- ↑ http://www.recipetips.com/kitchen-tips/t--1120/creating-bread-shapes.asp
About This Article