This article was co-authored by wikiHow Staff. Our trained team of editors and researchers validate articles for accuracy and comprehensiveness. wikiHow's Content Management Team carefully monitors the work from our editorial staff to ensure that each article is backed by trusted research and meets our high quality standards.
wikiHow marks an article as reader-approved once it receives enough positive feedback. In this case, 89% of readers who voted found the article helpful, earning it our reader-approved status.
This article has been viewed 52,259 times.
Learn more...
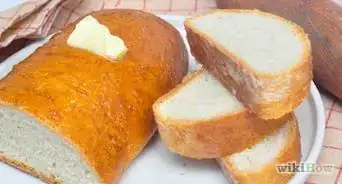
If you want the lightest, fluffiest bread possible, follow a basic recipe and assemble the bread in three individual pieces. This aerates the bread, making it come out of the oven extra light. While baking your bread, you should also follow some basic baking tips to make sure your bread comes out fluffy. When you're done, you can impress others with a light, fluffy treat.
Ingredients
- 1 large egg
- 2⁄3 cup (160 mL) whole milk
- 3 tablespoons (45 mL) of warmed water
- 2 1⁄3 cups plus (555 mL) 1 tablespoon (15 mL) of bread flour
- 1⁄4 cup (60 mL) plus 1 teaspoon (5 mL) of sugar
- 1 1⁄4 (6.25 mL) teaspoon of instant dry yeast
- 2 teaspoons (10 mL) of kosher salt
- 1⁄4 cup (60 mL) of unsalted butter
- Nonstick baking spray
Steps
Mixing Your Dough
-
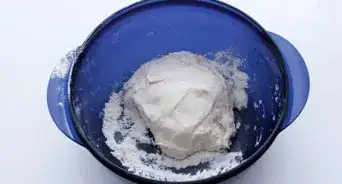
1Add the egg, milk, water, flour, sugar, and yeast to a mixer or mixing bowl. Ideally, you should use a stand mixer to mix your ingredients. If you don't have one, however, use an electronic mixer instead. Transfer the egg, milk, water, flour, sugar, and yeast to a stand mixer or large mixing bowl.[1]
-
2Mix the egg, milk, water, flour, sugar, and yeast for three minutes. Beat your ingredients on the lowest speed for about three minutes. The dough should just be beginning to form.[2]Advertisement
-
3Increase the speed and beat your ingredients for 4 minutes. Switch to the second highest speed on your mixer. Beat the dough at this speed for 4 minutes.[3]
-
4Beat in the butter at a lower speed for 12 minutes. Switch back to the lower speed. Add the butter. Beat the dough for an additional 12 minutes. When you're done, all the ingredients should be evenly mixed.[4]
- Make sure to use room temperature butter so it blends easily into your dough.
- The ingredients should make a firm, uniform dough when you're done.
-
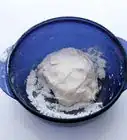
5Cover the bowl for 90 minutes and allow the dough to rise. Place plastic wrap over the mixing bowl that contains the dough. Place the bowl in a room temperature space and let the dough rise for 90 minutes. When it's done rising, it should have roughly doubled in size.[5]


Forming and Baking Your Bread
-
1Break the bread into three pieces. After the bread has been sitting for 90 minutes, place the dough on a lightly floured surface. Break the dough into three even portions.[6]
-
2Let the pieces rise for 10 to 15 minutes. Cover the portions of bread with a clean paper towel. Keep them in an area where they will not be disturbed while they spend an additional 10 to 15 minutes rising.[7]
-
3Roll the pieces into cylinders. Roll each piece on a lightly floured surface using your hands. Roll the pieces into cylinder shapes one at a time. The shapes should be about 11 by 6 inches (28 by 15 centimeters).[8]
-
4Shape each cylinder. Take one of the cylinder pieces you made. Roll the short ends of the cylinder inward until they touch. This will form a small, rectangular shape that has a seam in the middle where the end pieces of your dough meet. With the seam side facing upward, roll this small rectangle into another, tighter cylinder. Repeat this process with the other two cylinders.[9]
-
5Arrange your dough in a baking pan. Grease a 9-inch (23 centimeter) loaf pan with non-stick spray. Set each piece of dough in the tray. Keep them evenly spaced. They should be close together but not touching. There should be just enough space in your pan for them all to fit neatly. The dough will blend together during the baking process, creating a fluffy, aerated bread.[10]
-
6Let the dough rise more. Cover the pan in plastic wrap. Set the dough in a room temperature space and let it rise for an additional 60 to 75 minutes. The dough should just be rising over the baking pan when it's done.[11]
-
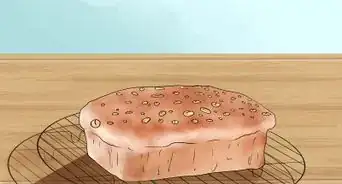
7Bake your bread at 375 °F (191 °C) for 35 to 40 minutes. Place your bread in a preheated oven and bake it for 35 to 40 minutes. When done, the bread should be golden brown.[12]
- Start by baking the bread for 35 minutes and, if it's not done, bake it for two or three more minutes. Continue increasing the baking time in two or three minute intervals until your bread is done.
-
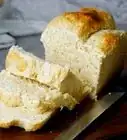
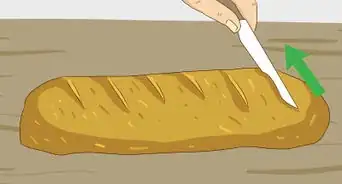
8Let your bread cool. Remove the bread from the oven and set it on a cooling rack. Cool the bread for 15 minutes before removing it from the pan. Then, set it on a wire rack and let it cool for an additional hour before cutting.[13]


Ensuring a Light Final Product
-
1Make sure your yeast is fresh. Even if you follow instructions carefully, bread may not come out as fluffy if your ingredients aren't fresh. Yeast plays a huge role in helping bread rise and aerate, so check the expiration date on your yeast to make sure it's not expired.[14]
-
2Make sure your dough passes the finger density test. Test your dough by sprinkling a small amount of flour over the dough and press your finger about 1 inch (2.5 cm) into the dough. If the dough is ready to go in the oven, the dough will spring back up slowly. It will not completely spring back up, however, and will leave a small dent on the surface of the bread.[15]
-
3Splurge on your bread flour. You get what you pay for when it comes to fluffy bread. Spend a little extra on the pricier varieties of bread flour in your supermarket. It's worth the extra price to get a lighter, fluffier final product.[16]
- Make sure to use flour specifically made for baking bread. Conventional all purpose flour will not yield the best results.


Community Q&A
-
QuestionCan I use a food processor to mix?
 Community AnswerSure, but once you have mixed the ingredients, you'll have to knead by hand on a clean, floured surface. To check whether you have kneaded the dough enough, gently press the dough with one finger. If it bounces back immediately, then it's ready to bake.
 -
QuestionWhat's the difference in ingredients between "all purpose flour" and "baking flour"?
 Community AnswerIn this recipe, the bread flour has a higher gluten content, making the bread have a more chewy and elastic texture.
Things You'll Need
- Stand mixer
- Electronic mixer
- Baking pan
- Paper towel


References
- ↑ http://www.saveur.com/fluffy-white-bread-recipe
- ↑ http://www.saveur.com/fluffy-white-bread-recipe
- ↑ http://www.saveur.com/fluffy-white-bread-recipe
- ↑ http://www.saveur.com/fluffy-white-bread-recipe
- ↑ http://www.saveur.com/fluffy-white-bread-recipe
- ↑ http://www.saveur.com/fluffy-white-bread-recipe
- ↑ http://www.saveur.com/fluffy-white-bread-recipe
- ↑ http://www.saveur.com/fluffy-white-bread-recipe
- ↑ http://www.saveur.com/fluffy-white-bread-recipe
- ↑ http://www.saveur.com/fluffy-white-bread-recipe
- ↑ http://www.saveur.com/fluffy-white-bread-recipe
- ↑ http://www.saveur.com/fluffy-white-bread-recipe
- ↑ http://www.saveur.com/fluffy-white-bread-recipe
- ↑ http://www.thekitchn.com/how-can-i-make-my-bread-less-dense-good-questions-206158
- ↑ https://www.youtube.com/watch?v=6oAfl1u0fIw
- ↑ https://www.preparedpantry.com/blog/make-light-airy-bread/
About This Article